(Descrição e \* Invocando */) |
(Pequenas traduções nas estatísticas) |
||
| Linha 11: | Linha 11: | ||
| duration = While the player is within 1800 feet (900 Blocks) from the boss. |
| duration = While the player is within 1800 feet (900 Blocks) from the boss. |
||
| debufftip = You have seen something nasty, there is no escape. |
| debufftip = You have seen something nasty, there is no escape. |
||
| − | | debuff2 = |
+ | | debuff2 = A língua | debufflink2 = no |
| − | | duration2 = |
+ | | duration2 = Quando o jogador estiver a 1800 pés (900 Blocos) atrás do chefe. |
| − | | debufftip2 = |
+ | | debufftip2 = A boca está sugando você. |
| idbuff = 37, 38 |
| idbuff = 37, 38 |
||
| immune1 = Confused |
| immune1 = Confused |
||
Revisão das 16h46min de 11 de julho de 2018
| Página marcada para tradução. | |
| Se você conhece um pouco de inglês, ajude traduzindo a página aqui. | |
| Última edição por AiltonCow em 2018-07-11 16:46:59. |

| Tipo | |
|---|---|
| Ambiente | |
| Tipo de IA | Wall of Flesh Body AI |
| Dano | 50 / 150 (melee) |
| Vida máx. | 8000 / 11200 |
| Defesa | 12 |
| Res. ao RC | 100% |
| Imune a |
| Efeito negativo | |
|---|---|
| Dica | You have seen something nasty, there is no escape. |
| Efeito negativo | noA língua |
|---|---|
| Dica | A boca está sugando você. |
| Moedas | 8 |
|---|
- Item (Quantidade)Taxa
 Poção de Cura (5-15)100%
- Pwnhammer100%
- groupgroup (One of the following 7 items will always drop)700%
- 16.67%
- Fuzil de Assalto Relógio16.67%
- 16.67%
- Emblema do Guerreiro12.5%
- Emblema do Feiticeiro12.5%
- Emblema do Vigia12.5%
- Emblema do Invocador12.5%
- 14.29%
- 10%
- Bolsa do Tesouro(Parede de Carne)

- ID Interno do Efeito: 37
![]() "O mestre e o centro do mundo..."
"O mestre e o centro do mundo..." ![]()

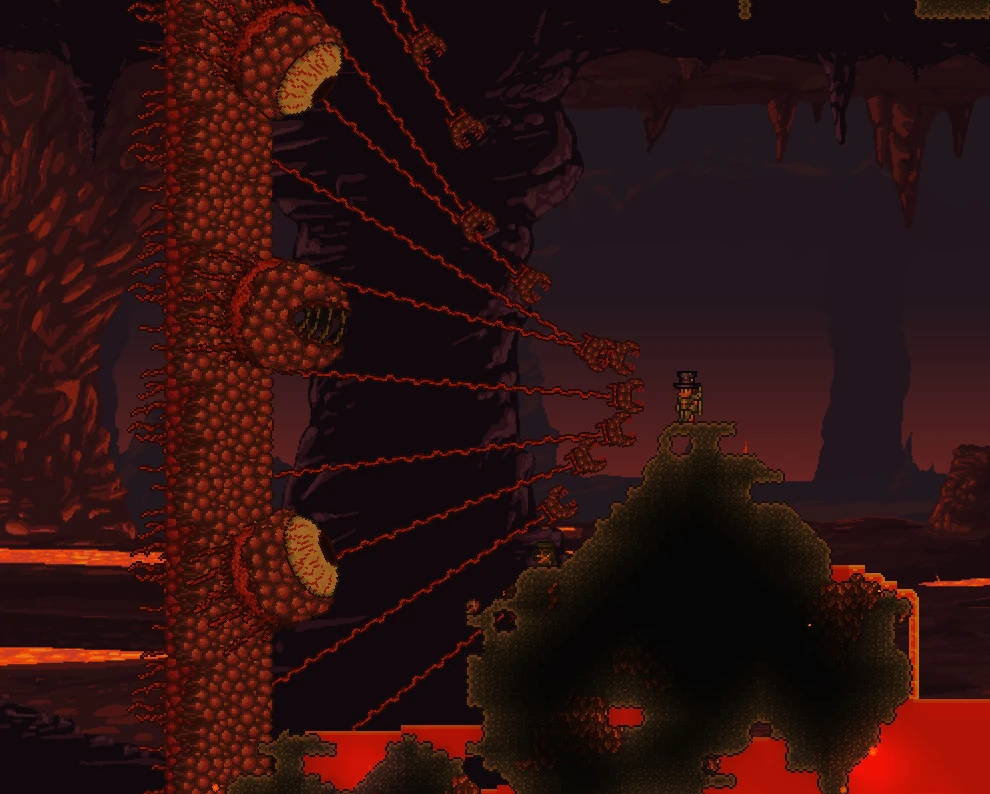
Um jogador enfrentando a Parede de Carne
A Parede de Carne é um Chefão do Pré-Modo Difícil, e nasce somente no Submundo. Ele é considerado o chefão mais difícil antes de entrar no Modo Difícil. Uma vez derrotado, o mundo será convertido permanentemente para o Modo Difícil. Desbloqueando então dois novos biomas, a Consagração e Consagração Subterrânea. O Modo Difícil também introduz novos chefões, tal como Esqueletron Alfa, Os Gêmeos, e O Destruidor, para não mencionar inimigos mais poderosos.
Para derrotar a Parede de Carne, o Jogador deve atacar os olhos e, ou a sua boca. Eles compartilham o mesmo contador de vida, então atacar qualquer um dos três, diminuirá a vida total do chefão. Atacar os olhos causa mais dano, já que é onde tem a menor defesa. Suas outras partes são intangíveis, então ataca-los não diminuirá a sua vida.
Veja abaixo mais informações sobre Horrified e The Tongue debuffs.
Invocando
A Parede de Carne é invocada quando um Boneco de Vodu Guia é jogado na Lava no Subterrâneo enquanto o Guia está vivo (isto deve ser feito no Subterrâneo; Lava em qualquer outra Camada somente ira matar o Guia e não invocara a Parede de Carne). Isto irá matar o Guia e invocar o Chefão imediatamente. Para conseguir um Boneco de Vodu Guia, você deve matar um Demônio Vodu que carrega o Vodu Guia enquanto ele voa sobre uma poça de lava, ou pegando um Vodu Guia que caiu e jogando ele na lava manualmente. Na ![]() Versão para Celular, você pode simplesmente consumir o Vodu Guia no Subterrâneo que invocara.
Versão para Celular, você pode simplesmente consumir o Vodu Guia no Subterrâneo que invocara.
Se o Guia não estiver vivo enquanto o Boneco de Vodu Guia é destruído, a Parede de Carne não será invocada e o item é gasto. If you have already summoned the Wall of Flesh recently or if the Guide was killed in some other instance, make sure the Guide has respawned before attempting to summon the Wall of Flesh again. On the ![]() Versão para Computador and the
Versão para Computador and the ![]() Versão para Console the housing menu can be used to see which NPCs are still alive. The minimap can also be used to see if the guide is present on all versions.
Versão para Console the housing menu can be used to see which NPCs are still alive. The minimap can also be used to see if the guide is present on all versions.
The Wall of Flesh's sweep direction is determined by its spawn location. Spawning it anywhere left of the center of the world will cause it to sweep from left to right, while spawning it right of center will cause it to sweep right to left. Maximum fight space can be achieved by spawning it at the extreme right or left of the world, though these areas have fewer natural structures and may require additional lava survival gear or construction.
Attacks
The Wall of Flesh is very large, occupying the entire screen vertically. Once spawned, it slowly sweeps across the map in a single direction, forcing the player to constantly move away for the duration of the fight, while also contending with the Underworld's usual hazards. It must be killed before it reaches the other end of the map, otherwise it will despawn, and all living players in The Underworld will die (with the unique death message "<PlayerName> was licked.").
Once the Wall of Flesh has spawned, all players within 1800 feet will be inflicted with the Horrified debuff. The debuff lasts until either the player or the Wall of Flesh dies. If a player dies, and then returns to the battle, they will again be inflicted with this debuff. While under this debuff, players cannot flee the battle. Attempting to leave the Underworld, or to get behind the Wall of Flesh will inflict The Tongue debuff. Attempting to escape the Underworld via Magic Mirror, Recall Potion, Teleporter, running far ahead of the Wall and leaving, or exiting and re-entering the world, will cause the player to die instantly with the unique death message, "<Playername> tried to escape."
When The Tongue debuff is activated, a tendril will snatch the player and draw them into the Wall of Flesh's mouth, ignoring blocks in the way, and dealing high damage to the player (50 damage per second). During this, the player will be unable to move or use items.
The Wall of Flesh moves faster as its health depletes. On Expert mode, it can reach up to 50 mph while below 500 HP (as compared to the Hermes Boots at only 30 mph, Lightning Boots at 34, and the Bunny Mount at 38).
Keep this behavior in mind when preparing an arena, as the fight will take the player many screens away (unless the player is equipped with Hardmode gear). Any platform built will need to be very long (500+ tiles, even more in Expert mode).
Additionally:
- The Wall of Flesh has small mouths called The Hungry, each attached by a long vein, which move towards and damage players. As the Wall of Flesh's main body takes damage, they deal more damage and become more resistant to attacks. When sufficiently damaged, they detach and fly towards players at high speed.
- In Expert mode, the Hungry respawn as long as the Wall of Flesh is alive.
- The Wall of Flesh's eyes fire lasers. As its health depletes, the lasers increase in damage and frequency.
- The Wall of Flesh "burps" Leeches from its mouth that chase players. These will always drop hearts when killed.
- In Expert mode, Leeches only have a 20% chance to drop hearts when killed.[[]]
Aftermath
When the Wall of Flesh is killed, it leaves its drops in a floating, fully-enclosed frame of Demonite Brick for Corruption worlds, or Crimtane Brick for Crimson worlds. The one definite drop is the Pwnhammer, which becomes an essential tool moving into Hardmode.
- In the Versão para Console old-gen e Versão para , the frame is always made of Demonite Bricks.
Hardmode
After defeating the Wall of Flesh for the first time, a status message displays: "The ancient spirits of light and dark have been released.", ![]() a dialogue box explaining Hardmode appears, and the world converts to Hardmode. Hardmode brings new biomes, new and tougher enemies, and new tiers of equipment.
a dialogue box explaining Hardmode appears, and the world converts to Hardmode. Hardmode brings new biomes, new and tougher enemies, and new tiers of equipment.
Two diagonal stripes of The Hallow and Corruption or Crimson form in a "V" pattern from the center of the Underworld, all the way to the Surface. The Crimson or Corruption and The Hallow will spread at a much faster rate, eventually covering the whole map if no action is taken.
Components
Wall of Flesh Eye 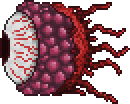  Estatísticas
Sons
|
Wall of Flesh Mouth 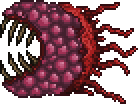  Estatísticas
Sons
| ||||||||||||||||||||
O Faminto Estatísticas
Sons
|
Notes
- Take care to avoid accidentally letting a Voodoo Demon drop its doll into lava when you're not prepared to fight, as this will also summon the Wall of Flesh. If it does get summoned while you're not prepared, you can save and quit and reopen the world to avoid the fight. This can be very helpful on Hardcore mode, although some players may consider it cheating.
- If you have problems getting the Guide to spawn, make sure there is no Event in progress. Traveling back to your world's original spawn point can reveal an ongoing event, like a Goblin Invasion, and allow you to complete it. It also must be Day for the Guide to respawn.
- If you kill the Wall of Flesh too fast, (you kill it while it hasn't entered your world yet (to the far left or far right)), the items will also drop outside the world and therefore be unable to be picked up. This is most easily achieved with high attack summons like the Stardust Dragon.
- If the Guide NPC is killed by lava in the Underworld, the Wall of Flesh will not be summoned.
- Attempting a summon too close to a world border may not spawn it, even if the Guide is alive.
- The Wall of Flesh is one of the few bosses that does not despawn based on player distance. Once summoned, it only despawns once it reaches the far edge of the world, which also kills the player.
- When the Wall of Flesh is alive, it is possible for the Guide NPC to respawn during the battle with the WoF. Dropping another Guide Voodoo Doll into lava will kill the Guide. However, this will not summon a second Wall of Flesh.
- The Wall of Flesh attempts to cover the entire Underworld cavern space by moving its eyes up and down; it orients by existence/absence of solid blocks and liquids 4-5 tiles above and beneath the eyes. That means making a bridge will make the eyes stay at constant height 4-7 blocks from the bridge.
- Although the Eyes and Mouth of the Wall of Flesh are immune to On Fire!, Poisoned, etc., the Hungries they are preceded by are only immune to Confused.
- The Wall will spawn in the direction of the map from the center (east of the player if they are east of the center/west of the player if they are west of the center) regardless of which direction from which Voodoo Doll falls into the lava or is thrown.
Tips
Para estratégias elaboradas em como derrotar Parede de Carne, incluindo recomendações de armas e arena, veja Guide:Wall of Flesh strategies.
- Mobility-enhancing items, such as Gravitation Potion, Rocket Boots/Spectre Boots, and various Hooks can make traversing the Underworld much easier. Similarly, items like Obsidian Skin Potions, Lava Waders, or an Obsidian Rose can mitigate the underworld's many lava pools and other ambient hazards.
- The player can build a long wooden Platform going along the underworld quite high up so the structures, lava and mounds of ash do not get in the way.
- A Flamethrower is an extremely effective way to defeat The Hungry in Hardmode.
- Making a platform with explosion-immune blocks (such as Dungeon Bricks) and proceeding to use Dynamite can be extremely effective if the player times their throws well.
- Try not to use melee weapons if you are fighting the Wall of Flesh for the first time, because you take a sizable amount of damage from touching the Wall of Flesh or its many Hungries. If you find one however, a Dark Lance works very well with a long walkway.
- Beenades are a highly effective weapon against the Wall of Flesh, especially in Expert mode.
- The Bee's Knees is a useful weapon for extra damage, as well as the Molten Fury or Phoenix Blaster.
- A Water Bolt is an excellent weapon, because even if the player dies, the projectile will bounce, giving the possibility to kill the WoF after the player's death.
- A good pre-Hardmode weapon is the Minishark with the Hurtful Modifier. Obtaining around 270 Meteor Shots as ammunition is an effective way to kill it quickly, preferably with the Imp Staff as well.
- In the Versão para Console old-gen e Versão para , using a Sharanga is great against the Wall of Flesh, as it turns any arrows into Spectral Arrows which inflict Cursed Inferno.
- The Hellwing Bow is extremely effective, as it turns normal arrows into flying bats that can pass through enemies.
- On the Versão para , utilizing Heart Arrows from the Valentine's Day event as ammunition can render the boss unable to move, so long as the arrows are aimed at its mouth. Note that this still allows the eyes to fire their lasers at the player.
- Before hardmode, it is advised to kill The Hungries before significantly damaging the Wall itself due to their increases in damage and defense.
- Using Molotov tails is another very effective way to kill the Wall of Flesh.
Trivia
- Despite being based around flesh, the Wall of Flesh was in the game long before the Crimson, and this flesh theme was a coincidence.
- Because killing the Wall of Flesh creates strips of Hallow and Corruption/Crimson, if you defeat the WoF near the middle of the map, it may drop a Soul of Light or Soul of Night on death, proving that the world is in fact converted to Hardmode before the status message displays.
- One of the Cyborg's quotes is "Have you defeated the Wall of <Guide's Name>?", which is a reference to the Wall of Flesh being spawned when the player sacrifices the Guide.
Achievements


History
- Desktop 1.3.5: Sprite updated.
- Desktop 1.3.0.1:
- Has new AI for Expert mode and will drop its own Treasure Bag.
- Can now drop the Summoner Emblem.
- Drops will now be encased in Crimtane Bricks if the world was generated with Crimson.
- Desktop 1.2.3: Now has a chance to drop the Wall of Flesh Mask.
- Desktop 1.2: Now has a chance to drop the Wall of Flesh Trophy.
- Desktop 1.1: Introduced.
- Console-Release: Introduced.
- Mobile-Release: Introduced.
- 3DS-Release: Introduced.
- Inimigos do pré-Hardmode
- Inimigos do Hardmode
- Inimigos de Evento
- Chefes
- Animais
- NPCs Amigáveis
- Familiares