
The PvP icon - View summary for details.
Player versus Player brings a unique type of play to the world of Terraria. This is a game mode where one player or a team of players can defeat another player or team of players. This is done by joining a multiplayer world, and enabling the PvP option by clicking on the swords in the upper right hand corner of the screen. The only way a player can damage another player is if both have the PvP option enabled. There is also the option of joining a team. Teams are represented by the colored shields in the upper right corner of the screen as well. Once you select a team there is an onscreen notification of how far away they are, as well as how much health they have. PvP is not an overly useful game mode as it does not help game progression in any particular way. However it allows a very fun and challenging form of gameplay. Teamwork is usually the key factor in PvP combat, as it is also the key factor in Terraria. Below is a general guide as well as some tips, tricks, and hints that can help the average player become knowledgeable about the PvP factors in Terraria.
Damage
When attacking a player your damage is no longer doubled. For instance, if you attack with a Muramasa, having a base damage of 18, and hit a player wearing a full set of Molten armor, giving 25 defense, the damage dealt will be 5, as the damage is not increased to 36 and the damage reduction is 13.
Additionally, the window of invincibility after taking damage is greatly reduced if it came from another player. Normally, you would receive 2/3 of a second of invincibility (0.66). In PvP, however, you only receive 2/15 of a second (0.13). Additionally, the accessory Cross Necklace has no effect in PvP.
Weapons
PvP combat is always fast and always fierce; bringing top tier weapons is a must, but how can one decide on what to bring? Should one bring a flail or a sword, a gun or a bow? Here are some brief breakdowns of weapons sets that are advantageous (take into mind that only top tier weapons are included and described for space).
Ranged weapons
Bow & arrow 1: Tsunami + Venom Arrows/Chlorophyte Arrows/Holy Arrows - Devastatingly powerful shots.
Bow & arrow 2: Pulse Bow + any arrows - Strong ricocheting shots, but less useful in the open.
Crossbow 1: Stake Launcher + Stake - Strong ~100 damage shots. Attack button can be held down. Best in stealth mode.
Crossbow 2: Chlorophyte Shotbow + high damage arrow - Shoots 3 arrows repeatedly, but high damage modifiers are recommended due to its relatively low base damage. Can also spam upward to "rain" arrows.
Gun & ammo 1: S.D.M.G.* + Chlorophyte Bullets/Crystal Bullets: Very high firing rate and damage per second.
Gun & ammo 2: Candy Corn Rifle + Candy Corn: A rather spammable and quite easy to maintain gun alternative that pierces enemies and bounces multiple
Gun & ammo 3: Chain Gun + Venom Bullet/Meteor Shot: One of the fastest firing weapons in the game, and ties with the S.D.M.G. in damage. Can be used with Venom Bullets to maximize damage, or with Meteor Shot for spammable damage.
Flamethrower: Flamethrower/Elf Melter + Gel - A powerful close-ranged piercing weapon that uses cheap ammo, much more so with the Elf Melter's superior stats.
Explosives 1: Rocket Launcher/Grenade Launcher/Snowman Cannon + Rocket III/Rocket IV (if allowed) - A powerful explosive weapon. Watch out for splash damage. The Snowman Cannon's fast speed and damage can easily do hundreds of damage per shot, resulting in kills within a few seconds.
Explosives 2: Proximity Mine Launcher + Rocket III - Excellent for setting traps.
Explosives 3: Jack 'O Lantern Launcher + Explosive Jack 'O Lantern - A powerful grenade-type weapon that doesn't hurt the user.
Explosives 4: Stynger + Stynger Bolts - An effective and cheap explosive weapon with shrapnel, allowing less precise aim.
- The S.D.M.G. cannot be legitimately obtained yet, so consider the Megashark, Chain Gun, Sniper Rifle, or Venus Magnum instead.
Melee weapons
Sword 1: Terra Blade - The best sword in the game! Plus it shoots a green sword forward in a line when used, which can hit up to three targets. No skill needed.
Sword 2: Christmas Tree Sword - A bit weaker than the Terra Blade, but can hit enemies behind cover if the launched ornament is aimed right.
Sword 3: Cutlass - The hardmode equivalent to Muramasa, but with better knockback (4 instead of 1). Its speed + knockback combo can crush enemies without shields.
Flail 1: Dao of Pow - Confusion disorients players, opening a window of opportunity to kill or wound the enemy player.
Flail 2: Flower Pow - More damage than the Dao of Pow, but no confusion. Shoots flower petals at enemies (but apparently not other players) while active.
Lance 1: Gungnir - A high power, high speed, high range spear that both generates light and is relatively easily obtainable. Excellent overall.
Lance 2: Mushroom Spear - Stronger than the Gungnir and can damage through walls, but much slower.
Lance 3: Chlorophyte Partisan - Has the lowest damage of the endgame spears, but fires a green cloud that pierces through walls, giving a surprising range.
Lance 4: North Pole - An incredibly effective long-range melee weapon capable of hitting enemy players behind cover.
Boomerang 1: Possessed Hatchet - Fast speed + Damage + Homing = The best boomerang. One of the best in-game weapons with proper equipment.
Boomerang 2: Paladin's Hammer - Same as the Possesed Hatchet, but without homing.
Boomerang 3: Light Disc x5 / Bananarang x10 - A spammable long-range boomerang. The Light Disc is deadly in narrow hallways, while the Bananarang is more effective in the open.
Boomerang 4: Thorn Chakram - High-fire-rate ricocheting boomerang + chance to poison + Godly modifier = good.
Misc. 1: Flairon - A relatively spammable weapon that creates a wall of bubbles.
Misc. 2: Vampire Knives - Although the weapon does not provide healing in PvP, the knives are still an effective long-range melee weapon.
Misc. 3: Scourge of the Corruptor - Even if the weapon does not home in on enemies, the projectiles are likely to hit multiple enemies.
Magic weapons
Magic 1: Shadowbeam Staff - High DPS, low mana cost, and massive range.
Magic 2: Inferno Fork - High damage and explodes into a large, damaging cloud of fire which lasts for several seconds.
Magic 3: Golden Shower - Reduce enemy defense and very fast speed, but offset by low power. Better used as a support weapon to weaken powerful targets for stronger weapons.
Magic 4: Cursed Flames - Bouncing, pierces up to 5. Great for heavy hits against groups of players. May also be used for ricochet hits similar to meteor shot to wipe out enemies safely. Can also quickly reveal any invisible target.
Magic 5: Heat Ray - A powerful hitscan ray that pierces through an unlimited number of enemies.
Magic 6: Razorpine - Very high DPS and speed; if combined with the Spectre Armor, becomes an effective weapon.
Magic 7: Razorblade Typhoon - Fast, large, bouncing, piercing and spammable projectiles offset by an extremely high mana cost for its speed.
Magic 8: Blizzard Staff - An extremely effective magic weapon that can hit almost anywhere exposed to the sky.
Magic 9: Bubble Gun - A short range weapon that creates a wall of bubbles, high damage for its firing speed.
Magic 10: Staff of the Frost Hydra - Though the frost hydra does not attack other players during PvP, any player that runs into it receives a lot of damage. Clicking on enemy players when they are on the ground repeatedly deals a lot of damage, and can be done behind walls or from a safe distance.
Armor
Armor is one of the major aspects of PvP combat as it will be the first thing that alerts a player to what build they are going up against (This advantage is removed if the opponent wears Familiar Clothes). Below are the basic unique armor sets found in PvP combat, their special set bonuses and abilities and some details on usage. Please note that this is not a general armor discussion, and only contains armor of second tier or better.
Tip: wear Copper Armor, any basic ore armor or Familiar clothing in your social slots and always use a copper pickaxe. Underneath, have Turtle, Spectre, or Shroomite armor and a powerful weapon. Imagine the surprise when a lowly assassin tries to attack you!
Normal Mode
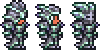
![]() Molten armor: The highest pre-hardmode defense set with a base defense of 25. This set should be used for roles that are likely to take large quantities of damage. Usually this can be mixed with other defense accessories items such as the Cobalt Shield, the Obsidian Skull and the Shackle, which all add +1 defense, as well as the Ironskin Potion for another +8, granting a total of 36 defense. Molten armor also gives a +17% bonus to melee damage. Combined with a Feral Claws this makes for an almost unstoppable tank.
Molten armor: The highest pre-hardmode defense set with a base defense of 25. This set should be used for roles that are likely to take large quantities of damage. Usually this can be mixed with other defense accessories items such as the Cobalt Shield, the Obsidian Skull and the Shackle, which all add +1 defense, as well as the Ironskin Potion for another +8, granting a total of 36 defense. Molten armor also gives a +17% bonus to melee damage. Combined with a Feral Claws this makes for an almost unstoppable tank.
![]() Jungle armor: This set grants the player base 13 defense, an additional max 60 Mana, and 9% magic critical chance boost. The set bonus reduces spell costs by 16%. It is useful for players that want to cast spells. This set of armor can be used with a Band of Starpower to further increase the amount of available Mana.
Jungle armor: This set grants the player base 13 defense, an additional max 60 Mana, and 9% magic critical chance boost. The set bonus reduces spell costs by 16%. It is useful for players that want to cast spells. This set of armor can be used with a Band of Starpower to further increase the amount of available Mana.
![]() Necro armor: This set grants 16 defense. The set bonus gives a +20% chance not to use ranged ammo (stacks with the Minishark's bonus and works for the Sandgun) making this the go to set for ranging.
Necro armor: This set grants 16 defense. The set bonus gives a +20% chance not to use ranged ammo (stacks with the Minishark's bonus and works for the Sandgun) making this the go to set for ranging.
![]() Shadow armor: This set grants the player +21% increased melee speed and 19 base defense. The set bonus increases movement speed by +15%. It is best for those that want to maximize their melee DPS, often referred to as a glass cannon. This is done by equipping a Feral Claws to reach the maximum melee attack speed. This makes the player a veritable bladestorm in combat; this is suggested to be used with the Muramasa, a weapon lauded for its strong attack power and very fast attack speed.
Shadow armor: This set grants the player +21% increased melee speed and 19 base defense. The set bonus increases movement speed by +15%. It is best for those that want to maximize their melee DPS, often referred to as a glass cannon. This is done by equipping a Feral Claws to reach the maximum melee attack speed. This makes the player a veritable bladestorm in combat; this is suggested to be used with the Muramasa, a weapon lauded for its strong attack power and very fast attack speed.
![]() Crimson armor: This set grants a total of 19 base defense, +6% increased damage, and greatly increased health regeneration. The Crimson armor sacrifices melee DPS for survivability with the increased health regeneration for wearing the full set. Note that the health regen effect is increased when standing still, and stacks with the Campfire and Honey.
Crimson armor: This set grants a total of 19 base defense, +6% increased damage, and greatly increased health regeneration. The Crimson armor sacrifices melee DPS for survivability with the increased health regeneration for wearing the full set. Note that the health regen effect is increased when standing still, and stacks with the Campfire and Honey.
![]() Meteor armor: A good set for mages, this set grants the player a base 16 defense, and it increases magic damage by +21%. The set bonus reduces the cost of using the Space Gun to 0, allowing unlimited shots with this weapon. It can be useful for ranged combat by players using Rocket Boots and Ivy Whips to stay out of reach while spamming opponents with rapid fire.
Meteor armor: A good set for mages, this set grants the player a base 16 defense, and it increases magic damage by +21%. The set bonus reduces the cost of using the Space Gun to 0, allowing unlimited shots with this weapon. It can be useful for ranged combat by players using Rocket Boots and Ivy Whips to stay out of reach while spamming opponents with rapid fire.
![]() Bee armor
Bee armor: The only pre-Hardmode Summoner armor, the bee armor gives more minions and more minion power, but very weak defense, so it almost isn't worth it seeing as how minions don't target players. However, a this set can be very useful for a skilled summoner.
Hardmode
![]()
![]()
![]() Cobalt armor: One of the more basic hardmode armors, and comes in three varieties based on which helmet choice. The Cobalt Hat boosts magic power, the Cobalt Helmet boosts melee power, and the Cobalt Mask is best for ranged characters.
Cobalt armor: One of the more basic hardmode armors, and comes in three varieties based on which helmet choice. The Cobalt Hat boosts magic power, the Cobalt Helmet boosts melee power, and the Cobalt Mask is best for ranged characters.
 Palladium armor: Introduced in 1.2, Palladium armor provides overall more survivability than the Cobalt Armor, as it has higher defense. The Palladium armor's set bonus provides a burst of health regeneration after hitting an enemy with any attack. The health regeneration effect is refreshed if you hit another enemy while it's active. A prime choice when stronger armors aren't available.
![]()
![]()
![]() Mythril armor: Mythril armor has the same class system as Cobalt, but each hat's effects are stronger, and the total set's defense is higher. A very good choice when available.
Mythril armor: Mythril armor has the same class system as Cobalt, but each hat's effects are stronger, and the total set's defense is higher. A very good choice when available.
 Orichalcum armor: Introduced in 1.2, Orichalcum armor has more defense than its counterpart mythril armor. It lacks the class-based set bonuses of the Mythril armor, but the Orichalcum armor's set bonus allows for extra damage to be dealt when striking an enemy.
![]()
![]()
![]() Adamantite armor: Adamantite is a good armor set, with good defense. It is just like Mythril Armor but with a lot more defense.
Adamantite armor: Adamantite is a good armor set, with good defense. It is just like Mythril Armor but with a lot more defense.
 Titanium armor: Introduced in 1.2, Titanium armor has almost as much defense as Hallowed armor, and is better suited for tanking players better than the adamantite armor. Titanium armor's set bonus allows for temporary invincibility after hitting an enemy. The invincibility buff, named Shadow Dodge, lasts for 20 seconds, but can only be activated 20 seconds after the previous Shadow Dodge has worn off. An excellent choice when available.
![]()
![]() Tiki armor: 1.2 introduced the new "summoner"-type class, with respective armor, accessories, and weapons, such as the Pygmy Staff and Hercules Beetle. The Tiki armor provides a base defense of 35, a 30% damage boost for "minions" such as the pygmies summoned by the Pygmy Staff, and +4 maximum minion capacity. The maximum minion capacity does not affect the Frost Hydra. A rather different choice that can catch some people off guard. However, the Tiki armor is pricey, at 150 for just the full set, and another 80 for the Pygmy Necklace and Hercules Beetle accessories. Also, minions do NOT currently attack players in PvP, so this armor is not recommended.
Tiki armor: 1.2 introduced the new "summoner"-type class, with respective armor, accessories, and weapons, such as the Pygmy Staff and Hercules Beetle. The Tiki armor provides a base defense of 35, a 30% damage boost for "minions" such as the pygmies summoned by the Pygmy Staff, and +4 maximum minion capacity. The maximum minion capacity does not affect the Frost Hydra. A rather different choice that can catch some people off guard. However, the Tiki armor is pricey, at 150 for just the full set, and another 80 for the Pygmy Necklace and Hercules Beetle accessories. Also, minions do NOT currently attack players in PvP, so this armor is not recommended.
![]()
![]() Spooky armor: Introduced in 1.2.1, the Spooky armor, Unlike the Tiki armor, which is more based on attrition than pure damage, gives a bigger boost to minion damage at the cost of less minions summoned at any one time and less defense. The Spooky armor's damage boost stacks with the Hercules Beetle and Necromantic Scroll. The main drawback to Spooky armor is its availability; you can only get the materials required for it during a Pumpkin Moon. Also, minions do NOT currently attack players in PvP, so this armor is not recommended.
Spooky armor: Introduced in 1.2.1, the Spooky armor, Unlike the Tiki armor, which is more based on attrition than pure damage, gives a bigger boost to minion damage at the cost of less minions summoned at any one time and less defense. The Spooky armor's damage boost stacks with the Hercules Beetle and Necromantic Scroll. The main drawback to Spooky armor is its availability; you can only get the materials required for it during a Pumpkin Moon. Also, minions do NOT currently attack players in PvP, so this armor is not recommended.
File:Frost armor male.png![]() Frost armor: Introduced in 1.2, the Frost armor provides less defense than the Hallowed or adamantite armor, but is more suited for glass cannon-esque players due to the increased attack power and speed provided. Equipping the full set also provides melee and ranged attacks with the Frostburn debuff, dealing 6 damage per second, which further adds on to the Frost armor's DPS. It is only available by killing Ice Golems, which only spawn in snow biomes during a blizzard. A risky but rewarding set if used properly.
Frost armor: Introduced in 1.2, the Frost armor provides less defense than the Hallowed or adamantite armor, but is more suited for glass cannon-esque players due to the increased attack power and speed provided. Equipping the full set also provides melee and ranged attacks with the Frostburn debuff, dealing 6 damage per second, which further adds on to the Frost armor's DPS. It is only available by killing Ice Golems, which only spawn in snow biomes during a blizzard. A risky but rewarding set if used properly.
![]()
![]()
![]() Hallowed armor: Hallowed armor is the best armor in the game as of 1.1, with a whopping 50 defense with the Hallowed Mask. Each of the hats, like all Hardmode armors, has a special class bonus. The downside is that each piece requires the corresponding Cobalt, Mythril, and Admantite counterparts, along with some difficult to get souls (pre 1.2, in 1.2 all you need is some hallowed bars).
Hallowed armor: Hallowed armor is the best armor in the game as of 1.1, with a whopping 50 defense with the Hallowed Mask. Each of the hats, like all Hardmode armors, has a special class bonus. The downside is that each piece requires the corresponding Cobalt, Mythril, and Admantite counterparts, along with some difficult to get souls (pre 1.2, in 1.2 all you need is some hallowed bars).
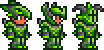 Chlorophyte armor: Introduced in 1.2, Chlorophyte armor is overall considered a step up from the Hallowed armor; better defense (56 with the melee set) and a useful set bonus. Chlorophyte armor's set bonus gives the wearer a permanent buff that fires a crystal leaf after hitting an enemy, similar to the orichalcum armor's set bonus.
![]()
![]() Turtle armor: Introduced in 1.2, Turtle armor is considered the optimal armor for tanking other melee users due to its high defense and set bonus. Turtle armor's set bonus reflects all melee damage taken back to non-player targets.
Turtle armor: Introduced in 1.2, Turtle armor is considered the optimal armor for tanking other melee users due to its high defense and set bonus. Turtle armor's set bonus reflects all melee damage taken back to non-player targets.
![]() Shroomite armor: Introduced in 1.2, Shroomite armor has three different headgear options for different ranged options; you can pick between boosting arrows, bullets, or rockets. The shroomite armor set bonus, regardless of the headgear chosen, makes the wearer enter a "stealth mode" over a time-frame of 1.5-2 seconds when not moving. When stealthed, ranged weapon damage, critical chance, and knockback is greatly increased, making people with the Sniper Rifle absolutely deadly. (For the purpose of the helmet slots, the Flamethrower is considered a bullet weapon, the Stake Launcher is considered an arrow weapon, and the Stynger and Jack 'O Lantern Launcher are considered rocket weapons. The Piranha Gun and Star Cannon are not boosted by any of the three helmet choices.)
Shroomite armor: Introduced in 1.2, Shroomite armor has three different headgear options for different ranged options; you can pick between boosting arrows, bullets, or rockets. The shroomite armor set bonus, regardless of the headgear chosen, makes the wearer enter a "stealth mode" over a time-frame of 1.5-2 seconds when not moving. When stealthed, ranged weapon damage, critical chance, and knockback is greatly increased, making people with the Sniper Rifle absolutely deadly. (For the purpose of the helmet slots, the Flamethrower is considered a bullet weapon, the Stake Launcher is considered an arrow weapon, and the Stynger and Jack 'O Lantern Launcher are considered rocket weapons. The Piranha Gun and Star Cannon are not boosted by any of the three helmet choices.)
![]()
![]() Spectre armor: Introduced in 1.2. Contrary to what most people would think, the full set is NOT the best Mage armor in the game for PvP. If you are wearing a Spectre Hood, set yourself onto a team that your enemies are not on (aka not the default team, nor the same team as them. This negates any healing of your opponent). This can make the healing effect more useful, but it will still reduce your damage by 40%. Neither the Spectre Hood nor the Spectre Mask provide the most magic damage possible. For full magic damage, replace the Spectre Hood with a Chlorophyte Headgear, and keep the rest of the armor on.
Spectre armor: Introduced in 1.2. Contrary to what most people would think, the full set is NOT the best Mage armor in the game for PvP. If you are wearing a Spectre Hood, set yourself onto a team that your enemies are not on (aka not the default team, nor the same team as them. This negates any healing of your opponent). This can make the healing effect more useful, but it will still reduce your damage by 40%. Neither the Spectre Hood nor the Spectre Mask provide the most magic damage possible. For full magic damage, replace the Spectre Hood with a Chlorophyte Headgear, and keep the rest of the armor on.
![]() Beetle armor: Introduced in 1.2.3, the Beetle armor is considered an upgrade to the Turtle armor set, and has two different chestplate options. The Scale Mail chestplate provides great melee stats for those who focus on damage. The set bonus with the Scale Mail will give a buff that increases the user's melee damage and melee speed as long as they stay in combat. The Shell chestplate, when worn with the rest of the armor, provides higher defense than the Turtle armor. The set bonus with the Shell gives a three-level defense-boosting buff, gaining a level of the buff after around 4 seconds of not getting hit. The defense buff lasts indefinitely until the user gets hit, in which case a level of the defense buff gets taken down and the timer for a new level resets.
Beetle armor: Introduced in 1.2.3, the Beetle armor is considered an upgrade to the Turtle armor set, and has two different chestplate options. The Scale Mail chestplate provides great melee stats for those who focus on damage. The set bonus with the Scale Mail will give a buff that increases the user's melee damage and melee speed as long as they stay in combat. The Shell chestplate, when worn with the rest of the armor, provides higher defense than the Turtle armor. The set bonus with the Shell gives a three-level defense-boosting buff, gaining a level of the buff after around 4 seconds of not getting hit. The defense buff lasts indefinitely until the user gets hit, in which case a level of the defense buff gets taken down and the timer for a new level resets.
Accessories
Accessories come in four different types, three of which are used for PvP: Movement, Regenerative, and Combat. This section addresses various pros, cons, and alternatives to the accessories that may be used in PvP, as well as giving very useful information on some like Hermes Boots and Band of Regeneration.
There appears to be a misconception that many classes, particularly rushing classes or ones that stay close to the enemy receive far better survivability from Bands of Regeneration than they do with Cobalt Shields (or Obsidian Skulls), when they actually provide relatively little survivability in PvP's fast-paced combat.
Movement
![]() Anklet of the Wind: Useful for characters that want to get in and out of combat faster and have an easier time dodging or chasing people down. The boost stacks with Shadow armor, speed modifiers on accesories, and aglet to reach a max of approx. +56%. However the movement speed is capped at +40%, which brings the blocks to activate hermes boots down to (28-> 17) .
Anklet of the Wind: Useful for characters that want to get in and out of combat faster and have an easier time dodging or chasing people down. The boost stacks with Shadow armor, speed modifiers on accesories, and aglet to reach a max of approx. +56%. However the movement speed is capped at +40%, which brings the blocks to activate hermes boots down to (28-> 17) .
![]() Cloud in a Bottle or
Cloud in a Bottle or ![]() Blizzard in a Bottle or
Blizzard in a Bottle or ![]() Sandstorm in a Bottle or
Sandstorm in a Bottle or ![]() Fart in a Jar: Useful for changing direction easier in midair, dodging projectiles while in the air, or gaining a slight extra amount of time before hitting the ground while falling. The biggest upside of Cloud in a Bottle is that the change of direction is instant, and not gradual like when using Angel/Demon Wings or Rocket Boots. It is also useful for breaking falls, since it does prevent fall damage (as of v1.03). Shiny Red Balloon jumps higher overall.
Fart in a Jar: Useful for changing direction easier in midair, dodging projectiles while in the air, or gaining a slight extra amount of time before hitting the ground while falling. The biggest upside of Cloud in a Bottle is that the change of direction is instant, and not gradual like when using Angel/Demon Wings or Rocket Boots. It is also useful for breaking falls, since it does prevent fall damage (as of v1.03). Shiny Red Balloon jumps higher overall.
![]() Hermes Boots: Boost does not stack with an Anklet of the Wind or Shadow armor, however, both decrease the amount of distance required to reach the movement boost. In a simple test it took 28 blocks for unaided Hermes Boots to activate. An Anklet reduces the number of blocks needed by 11%(28-> 25). Players looking for land speed should consider how far it will take them to activate Hermes.
Hermes Boots: Boost does not stack with an Anklet of the Wind or Shadow armor, however, both decrease the amount of distance required to reach the movement boost. In a simple test it took 28 blocks for unaided Hermes Boots to activate. An Anklet reduces the number of blocks needed by 11%(28-> 25). Players looking for land speed should consider how far it will take them to activate Hermes.
![]() Lucky Horseshoe: This item is useful early in the game, however there are alternatives to using this, effectively freeing an accessory slot. Grappling Hook/Ivy Whip can be used to latch onto the ground/walls, Cloud in a Bottle can be used to break the fall (as of 1.0.3), and Rocket Boots can be used to reduce speed before hitting the ground. Later in the game, wings can completely negate fall damage at all times, not to mention giving the ability to fly.
Lucky Horseshoe: This item is useful early in the game, however there are alternatives to using this, effectively freeing an accessory slot. Grappling Hook/Ivy Whip can be used to latch onto the ground/walls, Cloud in a Bottle can be used to break the fall (as of 1.0.3), and Rocket Boots can be used to reduce speed before hitting the ground. Later in the game, wings can completely negate fall damage at all times, not to mention giving the ability to fly.
![]() Rocket Boots: Keeps the speed boost from Hermes while in flight. Very useful as they do not drain any Mana so spell casters can use them much more efficiently now (as of 1.0.5), effectively giving them better jump than Cloud in a Bottle or Shiny Red Balloon. However eternal uninterrupted flight is no longer possible as they will only provide 1 second of lift. To recharge lift the player much either touch the ground or use a Grappling Hook/Ivy Whip.
Rocket Boots: Keeps the speed boost from Hermes while in flight. Very useful as they do not drain any Mana so spell casters can use them much more efficiently now (as of 1.0.5), effectively giving them better jump than Cloud in a Bottle or Shiny Red Balloon. However eternal uninterrupted flight is no longer possible as they will only provide 1 second of lift. To recharge lift the player much either touch the ground or use a Grappling Hook/Ivy Whip.
![]() Shiny Red Balloon: Increases jump height, thus also increasing length of gaps one can jump. Shiny Red Balloon's jump is higher than Cloud in a Bottle's double jump. The balloon also boosts the power of other accessories which help the player ascend, like Cloud in a Bottle, Rocket Boots and Angel Wings.
Shiny Red Balloon: Increases jump height, thus also increasing length of gaps one can jump. Shiny Red Balloon's jump is higher than Cloud in a Bottle's double jump. The balloon also boosts the power of other accessories which help the player ascend, like Cloud in a Bottle, Rocket Boots and Angel Wings.
![]() Panic Necklace: Increases movement speed by about 100% when damage is taken (including spikes and fall damage). Usually not worth the accessory slot, but can be used at low health to escape battle quickly when a Magic Mirror is not available.
Panic Necklace: Increases movement speed by about 100% when damage is taken (including spikes and fall damage). Usually not worth the accessory slot, but can be used at low health to escape battle quickly when a Magic Mirror is not available.
![]() Angel Wings (or any other type of Wings): Allows flight for a short time, and prevents fall damage. It also can slow falling when the jump key is held. This effect stacks with Rocket Boots/Spectre Boots/Lightning Boots, which allows for reaching even higher heights.
Angel Wings (or any other type of Wings): Allows flight for a short time, and prevents fall damage. It also can slow falling when the jump key is held. This effect stacks with Rocket Boots/Spectre Boots/Lightning Boots, which allows for reaching even higher heights.
![]() Obsidian Horseshoe: Combines the effects of the Lucky Horseshoe and the Obsidian Skull, but does not provide much of an edge in combat.
Obsidian Horseshoe: Combines the effects of the Lucky Horseshoe and the Obsidian Skull, but does not provide much of an edge in combat.
![]() Spectre Boots: Has the effects of Rocket Boots and Hermes Boots, allowing an accessory slot to be freed.
Spectre Boots: Has the effects of Rocket Boots and Hermes Boots, allowing an accessory slot to be freed.
![]() Cloud in a Balloon or
Cloud in a Balloon or ![]() Blizzard in a Balloon or
Blizzard in a Balloon or ![]() Sandstorm in a Balloon or
Sandstorm in a Balloon or ![]() Fart in a Balloon: Has the effects of the Shiny Red Balloon and the Cloud / Blizzard / Sandstorm in a Bottle / Fart in a Jar. Combined with Spectre/Rocket Boots or any Wings, it allows for massive heights to be reached.
Fart in a Balloon: Has the effects of the Shiny Red Balloon and the Cloud / Blizzard / Sandstorm in a Bottle / Fart in a Jar. Combined with Spectre/Rocket Boots or any Wings, it allows for massive heights to be reached.
![]() Diving Gear: Allows for better underwater combat, but overall does not help the player very much in PvP.
Diving Gear: Allows for better underwater combat, but overall does not help the player very much in PvP.
![]() Ice Skates: Increases movement speed when on Ice Blocks. Not worth the accessory slot unless the arena/opponent's base uses Ice Blocks as a floor.
Ice Skates: Increases movement speed when on Ice Blocks. Not worth the accessory slot unless the arena/opponent's base uses Ice Blocks as a floor.
![]() Neptune's Shell: Allows for better underwater combat by increasing underwater speed, lets you breathe underwater, and gives you infinite swimming. However, it does not work in lava.
Neptune's Shell: Allows for better underwater combat by increasing underwater speed, lets you breathe underwater, and gives you infinite swimming. However, it does not work in lava.
![]() Master Ninja Gear: Allows wall grabs/wall jumping, dashing (double-tap a direction), and a chance to "dodge" attacks.
Master Ninja Gear: Allows wall grabs/wall jumping, dashing (double-tap a direction), and a chance to "dodge" attacks.
![]() Lightning Boots: Allows for incredibly fast speeds as it combines the effects of the Spectre Boots, Aglet, and Anklet of the Wind.
Lightning Boots: Allows for incredibly fast speeds as it combines the effects of the Spectre Boots, Aglet, and Anklet of the Wind.
![]() Lava Waders: Gives a temporary seven-second (14-second if equipped with a Lava Charm) immunity to lava, as well as an immunity to Meteorite and Hellstone, plus allowing walking on both water and lava, like the Water Walking Potion. Useful if the arena has a lot of water or lava, but otherwise conditional.
Lava Waders: Gives a temporary seven-second (14-second if equipped with a Lava Charm) immunity to lava, as well as an immunity to Meteorite and Hellstone, plus allowing walking on both water and lava, like the Water Walking Potion. Useful if the arena has a lot of water or lava, but otherwise conditional.
![]() Frostspark Boots: Allows for incredibly fast speeds and provides greater traction and speed while on ice. It doesn't provide any greater speed boosts than the Lightning Boots, however.
Frostspark Boots: Allows for incredibly fast speeds and provides greater traction and speed while on ice. It doesn't provide any greater speed boosts than the Lightning Boots, however.
![]() Arctic Diving Gear: When equipped, generates light while underwater, increases underwater breath time, and gives greater traction and speed on ice. The best aquatic movement accessory available pre-Hardmode.
Arctic Diving Gear: When equipped, generates light while underwater, increases underwater breath time, and gives greater traction and speed on ice. The best aquatic movement accessory available pre-Hardmode.
![]() Hoverboard: Protects against fall damage and allows flight like Wings do, but can provide a horizontal speed boost by holding Down and Jump at the same time.
Hoverboard: Protects against fall damage and allows flight like Wings do, but can provide a horizontal speed boost by holding Down and Jump at the same time.
Regenerative
![]() Band of Regeneration: It takes 600-800 seconds (Depending if the player stays in combat, moves or stay still, which influence natural HP regeneration) to fully regenerate, whereas using four Healing Potions takes about 300. Although generally considered a survivability item, it provides little help in combat, as high-tier weapons will usually end a duel in mere seconds. Having a supply of Healing Potions or even Regeneration Potions handy is a slightly faster alternative, effectively freeing one accessory slot that one could use instead for other accessories. Not a recommended item for a "deathmatch" style PvP, but a defensive character in a strategic game could find the improved regeneration useful.
Band of Regeneration: It takes 600-800 seconds (Depending if the player stays in combat, moves or stay still, which influence natural HP regeneration) to fully regenerate, whereas using four Healing Potions takes about 300. Although generally considered a survivability item, it provides little help in combat, as high-tier weapons will usually end a duel in mere seconds. Having a supply of Healing Potions or even Regeneration Potions handy is a slightly faster alternative, effectively freeing one accessory slot that one could use instead for other accessories. Not a recommended item for a "deathmatch" style PvP, but a defensive character in a strategic game could find the improved regeneration useful.
![]() Philosopher's Stone: The Philosopher's Stone is useful to players with weaker armor, who take lots of damage, or are melee users, as they will often be in the middle of fighting. It reduces potion sickness by 15 seconds, for a total of 45 seconds.
Philosopher's Stone: The Philosopher's Stone is useful to players with weaker armor, who take lots of damage, or are melee users, as they will often be in the middle of fighting. It reduces potion sickness by 15 seconds, for a total of 45 seconds.
![]() Nature's Gift: Since it slightly reduces Mana consumption, it is best if used by someone who relies mostly on Magic attacks: Its effect, if stacked with the Band of Starpower and Jungle armor's bonuses, can make it easy to spam powerful spells with little to no recovery time.
Nature's Gift: Since it slightly reduces Mana consumption, it is best if used by someone who relies mostly on Magic attacks: Its effect, if stacked with the Band of Starpower and Jungle armor's bonuses, can make it easy to spam powerful spells with little to no recovery time.
![]() Mana Flower: The Mana Flower provides an even larger bonus to Mana consumption than the Nature's Gift, and uses Mana Potions automatically when necessary. However, this accessory is unnecessary as you can use a hotkey to consume a mana potion manually. You are better off taking a different accessory in its place.
Mana Flower: The Mana Flower provides an even larger bonus to Mana consumption than the Nature's Gift, and uses Mana Potions automatically when necessary. However, this accessory is unnecessary as you can use a hotkey to consume a mana potion manually. You are better off taking a different accessory in its place.
![]() Magic Cuffs: Replenishes your mana equal to the damage you take before defense is applied. Any good Mage should try to avoid taking damage as much as they can, so this accessory isn't really worth it. You can instead use a hotkey to consume a mana potion when needed.
Magic Cuffs: Replenishes your mana equal to the damage you take before defense is applied. Any good Mage should try to avoid taking damage as much as they can, so this accessory isn't really worth it. You can instead use a hotkey to consume a mana potion when needed.
![]() Charm of Myths: The Charm of Myths combines the effects of the Philosopher's Stone and the Band of Regeneration, allowing another accessory slot to be used.
Charm of Myths: The Charm of Myths combines the effects of the Philosopher's Stone and the Band of Regeneration, allowing another accessory slot to be used.
Combat
![]() Cobalt Shield: An excellent item for most characters. The multiple knockbacks from fast hitting items like the Megashark and Muramasa can be devastating in tight areas. Nearly mandatory for characters that rush or dart around to prevent being focused and rendered far less-mobile or lose a Hermes Boots speed boost.
Cobalt Shield: An excellent item for most characters. The multiple knockbacks from fast hitting items like the Megashark and Muramasa can be devastating in tight areas. Nearly mandatory for characters that rush or dart around to prevent being focused and rendered far less-mobile or lose a Hermes Boots speed boost.
![]() Feral Claws: Effectively increases melee DPS by 12%. An excellent accessory which actually increases your own damage output. Using it with the Shadow armor further enhances offensive capabilities.
Feral Claws: Effectively increases melee DPS by 12%. An excellent accessory which actually increases your own damage output. Using it with the Shadow armor further enhances offensive capabilities.
![]() Obsidian Skull: The bonus effect is not quite as useful as the Cobalt Shield in combat, however it does give good survivability and protects you from Hellstone traps and flooring. Cobalt Shield can also be equipped.
Obsidian Skull: The bonus effect is not quite as useful as the Cobalt Shield in combat, however it does give good survivability and protects you from Hellstone traps and flooring. Cobalt Shield can also be equipped.
![]() Shackle: Due to the way defense works in PvP, this item will only negate 1 damage when one is used with the Molten armor, 2 will be needed when using the second tier of armors. This item also does not give an extra benefit like Cobalt Shield and Obsidian Skull do. Therefore this item becomes far more useless.
Shackle: Due to the way defense works in PvP, this item will only negate 1 damage when one is used with the Molten armor, 2 will be needed when using the second tier of armors. This item also does not give an extra benefit like Cobalt Shield and Obsidian Skull do. Therefore this item becomes far more useless.
![]() Obsidian Shield: Has the effects of the Cobalt Shield, but has an added bonus of 1 defense, which can be helpful in the long run. It also provides immunity from Meteorite and Hellstone traps.
Obsidian Shield: Has the effects of the Cobalt Shield, but has an added bonus of 1 defense, which can be helpful in the long run. It also provides immunity from Meteorite and Hellstone traps.
![]() Ranger Emblem: An overall 'class' weapon for players that use mainly bows or guns, it increases damage by a significant amount. (15%)
Ranger Emblem: An overall 'class' weapon for players that use mainly bows or guns, it increases damage by a significant amount. (15%)
![]() Warrior Emblem: An overall 'class' weapon for players that use mainly melee weapons, it increases damage by a significant amount. (15%)
Warrior Emblem: An overall 'class' weapon for players that use mainly melee weapons, it increases damage by a significant amount. (15%)
![]() Sorcerer Emblem: An overall 'class' weapon for players that use mainly magic weapons, it increases damage by a significant amount. (15%)
Sorcerer Emblem: An overall 'class' weapon for players that use mainly magic weapons, it increases damage by a significant amount. (15%)
![]() Avenger Emblem: A 12% damage increase to all weapons. This is a very helpful accessory for anybody trying to get max DPS or does not fit inside a single class configuration.
Avenger Emblem: A 12% damage increase to all weapons. This is a very helpful accessory for anybody trying to get max DPS or does not fit inside a single class configuration.
![]() Star Cloak: A good accessory that doubles as a weapon in close quarters. It causes stars to fall (30 damage each) when you are hurt by any source, including drowning, damaging enemies close to you.
Star Cloak: A good accessory that doubles as a weapon in close quarters. It causes stars to fall (30 damage each) when you are hurt by any source, including drowning, damaging enemies close to you.
![]() Titan Glove: Increases knockback by a whopping 70%, bumping many weapons up to "insane" knockback, which is great for driving enemies back. It also works on ranged weapons and spells.
Titan Glove: Increases knockback by a whopping 70%, bumping many weapons up to "insane" knockback, which is great for driving enemies back. It also works on ranged weapons and spells.
![]() Moon Charm: Changes the player into a werewolf at nighttime, increasing melee damage and speed, defense, movement speed, jump height, and health regeneration. A viable choice for a melee player.
Moon Charm: Changes the player into a werewolf at nighttime, increasing melee damage and speed, defense, movement speed, jump height, and health regeneration. A viable choice for a melee player.
![]() Moon Shell: Combines the effects of the Moon Charm with the effects of the Neptune's Shell, thus freeing up an equipment slot. The Neptune's Shell effects will override the Moon Charm's effects if the wearer is underwater at night.
Moon Shell: Combines the effects of the Moon Charm with the effects of the Neptune's Shell, thus freeing up an equipment slot. The Neptune's Shell effects will override the Moon Charm's effects if the wearer is underwater at night.
![]() Cross Necklace: Good for melee players and players in the heat of battle, it doubles the period of invincibility after being hurt. (Not as powerful as other accessories in combat.)
Cross Necklace: Good for melee players and players in the heat of battle, it doubles the period of invincibility after being hurt. (Not as powerful as other accessories in combat.)
![]() Band of Starpower: Increases max Mana by 20, very useful for anyone who uses lots of magic attacks. However, any accessory with the "Arcane" Property gains this effect, making the item far less appealing
Band of Starpower: Increases max Mana by 20, very useful for anyone who uses lots of magic attacks. However, any accessory with the "Arcane" Property gains this effect, making the item far less appealing
![]() Star Veil: Combines the effects of the Star Cloak and the Cross Necklace into a single accessory, allowing usage of another accessory slot.
Star Veil: Combines the effects of the Star Cloak and the Cross Necklace into a single accessory, allowing usage of another accessory slot.
![]() Ankh Charm: Protects the wearer from many different debuffs. The only debuffs players have to worry about in PvP, however, are Poisoned and Confused. It is still useful to prevent those debuffs, and debuffs from any nearby enemies.
Ankh Charm: Protects the wearer from many different debuffs. The only debuffs players have to worry about in PvP, however, are Poisoned and Confused. It is still useful to prevent those debuffs, and debuffs from any nearby enemies.
![]() Ankh Shield: Combines the effects of the Ankh Charm and the Obsidian Shield, along with providing a grand total of 4 defense without any prefixes. A prime defensive accessory in free-for-all or 1v1 PvP.
Ankh Shield: Combines the effects of the Ankh Charm and the Obsidian Shield, along with providing a grand total of 4 defense without any prefixes. A prime defensive accessory in free-for-all or 1v1 PvP.
![]() Paladin's Shield: Provides the biggest defense bonus of all accessories without prefixes or other special modifiers, at +6 defense. It also protects against knockback and reduces damage taken by allies (by taking the damage yourself) when the wearer is above 25% HP. When taking damage from others, you still react as if you took damage, activating effects such as the Star Cloak's stars. An excellent choice in team-based PvP.
Paladin's Shield: Provides the biggest defense bonus of all accessories without prefixes or other special modifiers, at +6 defense. It also protects against knockback and reduces damage taken by allies (by taking the damage yourself) when the wearer is above 25% HP. When taking damage from others, you still react as if you took damage, activating effects such as the Star Cloak's stars. An excellent choice in team-based PvP.
![]() Frozen Turtle Shell: When equipped, provides an immense defense boost (+30) when below 25% health. It provides an extra bit of protection and allows the wearer to either tank a surprising amount of damage until he/she dies or run away to heal up, then rejoin the fight. Effective when used in combination with the Paladin's Shield.
Frozen Turtle Shell: When equipped, provides an immense defense boost (+30) when below 25% health. It provides an extra bit of protection and allows the wearer to either tank a surprising amount of damage until he/she dies or run away to heal up, then rejoin the fight. Effective when used in combination with the Paladin's Shield.
![]() Sun Stone or
Sun Stone or ![]() Moon Stone: When equipped during the day or the night (for Sun Stone and Moon Stone, respectively), increases defense by 4 and all damage dealt by 10%. Equipping both provides the stat boost at all times. The Sun Stone is more viable due to its higher accessibility and longer effective time. (15 minutes of day vs. 9 minutes of night)
Moon Stone: When equipped during the day or the night (for Sun Stone and Moon Stone, respectively), increases defense by 4 and all damage dealt by 10%. Equipping both provides the stat boost at all times. The Sun Stone is more viable due to its higher accessibility and longer effective time. (15 minutes of day vs. 9 minutes of night)
![]() Celestial Stone: Provides a minor boost to many stats, including damage, melee speed, and defense. An excellent choice overall.
Celestial Stone: Provides a minor boost to many stats, including damage, melee speed, and defense. An excellent choice overall.
Buffs
Spelunker Potion / Battle Potion /: Not worth the slot as far as PvP goes.
![]() Water Walking Potion: It doesn't provide any direct advantage, but as it can be used to cross water and lava pools fast and safely it can give someone an edge in aquatic combat, as anyone else that falls in will be considerably slowed down.
Water Walking Potion: It doesn't provide any direct advantage, but as it can be used to cross water and lava pools fast and safely it can give someone an edge in aquatic combat, as anyone else that falls in will be considerably slowed down.
![]() Featherfall Potion: Very, very useful. With the buff, you have control over your fall speed. Not holding any buttons give you a slow fall speed, holding up will slow your fall speed further, and holding down will give you the same fall speed as you would have without the buff. Also, the buff will make you jump higher, and, if you have a flight accessory, will boost your flight height.
Featherfall Potion: Very, very useful. With the buff, you have control over your fall speed. Not holding any buttons give you a slow fall speed, holding up will slow your fall speed further, and holding down will give you the same fall speed as you would have without the buff. Also, the buff will make you jump higher, and, if you have a flight accessory, will boost your flight height.
![]() Obsidian Skin Potion: Good idea to carry on you in-case of lava moat/trap.
Obsidian Skin Potion: Good idea to carry on you in-case of lava moat/trap.
![]() Gills Potion: Useful for when you need to hide in water and/or lava (you can breathe in lava with this potion, and, if you have Obsidian Skin, not take damage from it). Contrary to what the description may imply, you can breathe in air, water, and lava.
Gills Potion: Useful for when you need to hide in water and/or lava (you can breathe in lava with this potion, and, if you have Obsidian Skin, not take damage from it). Contrary to what the description may imply, you can breathe in air, water, and lava.
![]() Regeneration Potion: Decent for combat as it is equivalent to 4 bands of regeneration, lasts 5 minutes and is easy to craft, regenerating nearly as much HP as six Healing Potions would over time.
Regeneration Potion: Decent for combat as it is equivalent to 4 bands of regeneration, lasts 5 minutes and is easy to craft, regenerating nearly as much HP as six Healing Potions would over time.
![]() Swiftness Potion: Good for the speed loving type, it offers 25% movement speed boost.
Swiftness Potion: Good for the speed loving type, it offers 25% movement speed boost.
![]() Ironskin Potion: Reduces 4 damage per hit; is a highly advisable buff for use in PvP.
Ironskin Potion: Reduces 4 damage per hit; is a highly advisable buff for use in PvP.
![]() Mana Regeneration Potion/
Mana Regeneration Potion/![]() Magic Power Potion: Useful for spell-casters.
Magic Power Potion: Useful for spell-casters.
![]() Invisibility Potion: To actually become invisible with this potion, a player would either be required to remove all armor or to wear the full set of familiar clothes in the social slot (which is much wiser). Wings also should be equipped, just turned visibly off, as of 1.2.3. There is a great benefit in being able to move around without being seen, although your weapon can be seen when you use it. Some servers ban this item.
Invisibility Potion: To actually become invisible with this potion, a player would either be required to remove all armor or to wear the full set of familiar clothes in the social slot (which is much wiser). Wings also should be equipped, just turned visibly off, as of 1.2.3. There is a great benefit in being able to move around without being seen, although your weapon can be seen when you use it. Some servers ban this item.
![]() Thorns Potion: When you are attacked, this potion deals 1/3 of the resulting damage back to your attacker! They'll be beating themselves up! However, only a viable option for players who plan on dueling with melee very often as it does not affect people who attack you with a ranged weapon. Good with Turtle armor because enemies who attack you with melee will take more damage than they deal.
Thorns Potion: When you are attacked, this potion deals 1/3 of the resulting damage back to your attacker! They'll be beating themselves up! However, only a viable option for players who plan on dueling with melee very often as it does not affect people who attack you with a ranged weapon. Good with Turtle armor because enemies who attack you with melee will take more damage than they deal.
![]() Archery Potion: Only use if you plan on using a bow as your main weapon. This is usually a bad strategy as many players prefer the speed of the gun, but when using something like a Chlorophyte Shotbow or Tsunami, this can become a viable option.
Archery Potion: Only use if you plan on using a bow as your main weapon. This is usually a bad strategy as many players prefer the speed of the gun, but when using something like a Chlorophyte Shotbow or Tsunami, this can become a viable option.
![]() Hunter Potion: Good to avoid sneak attacks.
Hunter Potion: Good to avoid sneak attacks.
![]() Gravitation Potion: The most effective way of reaching high places and evading enemies. However, it is the most difficult buff to create. Can be a suitable replacement for Rocket Boots, freeing up an accessory slot.
Gravitation Potion: The most effective way of reaching high places and evading enemies. However, it is the most difficult buff to create. Can be a suitable replacement for Rocket Boots, freeing up an accessory slot.
![]() Dangersense Potion
Dangersense Potion: A godsend for PVP, the Dangersense Potion will illuminate all traps, lava, spikes, cobwebs, and pressure plates, allowing you to avoid these traps with ease. A must-have for any player who plans to enter an enemy base.
![]() Lifeforce Potion: Another godsend for PvP, the Lifeforce Potion increases maximum life by 20%, giving pre-Hardmode players a maximum total of 480 health, and Hardmode players a maximum total of 600 health. The additional health usually is the difference between life and death.
Lifeforce Potion: Another godsend for PvP, the Lifeforce Potion increases maximum life by 20%, giving pre-Hardmode players a maximum total of 480 health, and Hardmode players a maximum total of 600 health. The additional health usually is the difference between life and death.
![]() Love Potion
Love Potion/![]() Stink Potion: Can be used to reveal invisible players, such as stealthed enemies with Shroomite armor or enemies buffed with Invisibility Potions. It's not as useful as weapons that inflict certain debuffs however, as these potions will affect teammates too, meaning that you could accidentally reveal your team's spy.
Stink Potion: Can be used to reveal invisible players, such as stealthed enemies with Shroomite armor or enemies buffed with Invisibility Potions. It's not as useful as weapons that inflict certain debuffs however, as these potions will affect teammates too, meaning that you could accidentally reveal your team's spy.
Flasks currently do not inflict debuffs on other players. The Flask of Party still creates confetti on hitting with melee attacks, though.
Player Classes/ Strategies
There are various combinations of armors and accessories that can make a player ideal for a certain role, such as attacking, defending, supporting and so on. Of course, anyone can make up their own strategies, or adopt different ones together in order to be ready for any situation.
Ninja of the Night
This stealthy ninja wears the ninja clothes in the social slots, melee Hallowed Armor in the armor slots and has the Mechanical Glove, Master Ninja Gear, Star Veil, Frostspark Boots, and Ankh Shield, all reforged to Violent or Menacing. Of course, this fighter happens to have a legendary Muramasa. The swing speed is extremely fast, slightly short of the Megashark fire rate and far below in damage. Give this lovely set of weapons to anyone that hates those pure melee fighters and wants them to die slowly by one damage point after another. Note that the continual knockback means that most normal swords cannot even touch you.
If you don't care much for the cosmetics, using a Cutlass is a better option, as it has 3x as much damage, 4x as much knockback, and about twice the speed of the Muramasa. Also, one may wish to instead use Familiar clothes combined with an Invisibility Potion for the full stealth effect.
Tip: as you will most likely be sneaking around in dark hallways that could be filled with traps, it's a good idea to keep a Shadow Orb with you, as this is a quick, dim source of light that can be toggled on and off easily. It can also be used as a strategy for fooling enemies by running in a straight line with it turned on, then turning it off and quickly heading in a different direction. This can mislead enemies so you can sneak up on them easily. Another option for light, if you have the resources, is night owl potions, though these only last a certain amount of time and you have to keep restocking them.
Note: this class is much less helpful against rangers and wizards, as the ninja needs to be close to the target to attack. A solution to this would be to use a good Boomerang, some type of beam sword, or even a flail to maintain the melee style as well as attack from a distance.
Soldier
With full hallowed armor (any helmet-based on preference), Godly Gungnir, Legendary Excalibur, Unreal Megashark, Godly Drax, Mythical Rainbow Rod, etc. and with all accessories (Spectre Boots, Wings, Obsidian Shield, and another two accessories) reforged to Menacing, this character, with buffs, is practically perfect for DPS-addicted, multi-tasking veterans.
WARNING: The soldier role may not be fitted to all players. Requirements are having quick reaction time and perfect accuracy. The point is that while you may easily be damaged, you can pay it back without mercy! Also, use dodging instead of the decent defense. Otherwise a Star Cannon will give you a tough time.
Durable fighter
Set up with Molten armor or hardmode armors w/ helmet and Defense or Regeneration accessories: this is the setup that grants the highest possible defense. Due to the armors' bonuses, it works well with melee weapons. Spears are a good choice, because of their long reach and augmented damage. Flails won't benefit from the damage bonus, but will allow to easily mow down enemies in a wide area in front of the user.
The Durable Fighter might want to sacrifice some of the accessories' defense for agility-enhancing accessories.
The Hardmode equivalent would wear Defensive Beetle armor or Turtle Armor, with warding accessories, and a Warrior Emblem. This combination would make you highly durable, even to endgame weapons and boss ambushes, while still being able to dish out good damage.
Quick fighter
An attacker that exploits the Shadow armor's agility boost to become faster and nimbler. Although weaker than the one above in offensive and defensive terms, its speed, especially if further enhanced by agility-boosting accessories, makes it harder to hit by melee and ranged users alike. Thanks to their excellent maneuverability, they can easily pick off melee users with quick shots from a gun, or rapidly close in and hack away at ranged users with fast-swinging swords like the Muramasa, Blade of Grass, or (Hardmode) Shroomite Digging Claw. Since they rely entirely on their ability to kill enemies before they have a chance to retaliate, Feral Claws is a recommended accessory.
Supporter
When the others fight the enemy head-on, the Support Attacker assists allies from a safe distance. They can either don the Jungle armor and cast spells in the heat of the battle to help damage the enemies, or use the weaker Meteor armor and pick off multiple opponents with the Space Gun. Explosives, throwables, Bows and Guns also work wonders, especially if used in combination with the Necro armor. Since they're unlikely to confront the enemy face-to-face, their ideal accessory setup is either one that regenerates Health and (for magic users) Mana, or one that increases their speed, making them able to run where they're needed, or retreat fast.
Defender
When there is a point to be defended (could be a base, but also a vantage point, a construction site or such), the ability to stall the enemy with traps and improvised defenses becomes of paramount importance. Along with the Hallowed armor for maximum defense, the best thing to do is to use terrain-modifying tools, such as the Sandgun and Dirt Rod, along with Spiky Balls, Grenades and Water/Lava Buckets to slow down the enemy's advance. As a weapon, pistols are a good balanced weapon to defend oneself in a pinch.
Bomber
This strategy exploits the Gravitation Potion's effect to fly indefinitely over the enemy's strategic points, damaging them by shooting downwards a variety of mostly gravity-based projectiles, including bullets, sand pellets, explosives, Lava or Spiky Balls. Throwables and arrows are fine too, but the enemy will be able to pick them up afterward (with the exception of Bones). Also with the new update a Rocket Launcher might be used to deal serious damage, or a North Pole can be used to devastate any opponent caught below. As of 1.2 the Gravitation Potion's effect is a lot more disorienting, so if you find it difficult you may use a Hoverboard combined with the Ice Rod for resetting your flight time. With some agility it is possible to use Water and Lava to create a block of Obsidian in mid air, enabling the player to drop massive amounts of Sand on the enemy, or create a small barrier to intercept projectiles from an enemy's counter-attack.
With the Ice Rod, this strategy can be downright lethal, but Winged characters can fly high enough to catch a Bomber. Be warned! Using an Ice Rod will allow you to drop sand, make shields... This can help extend some of your survivability.
Saboteur
The Saboteur's strategy is pretty tricky: the Invisibility Potion can help greatly in infiltrating the enemy's ranks, and hindering them in a variety of ways: making the terrain rough or hard to cross, surprising enemies by attacking them when they least expect it, blowing up the enemy base with Dynamite/Bombs, or ultimately use Corrupt Seeds to turn part of the enemy's territory into Corruption, or hiding blocks of Meteorite to spawn Meteor Heads. Another act of sabotage can be digging under their base, thus tampering with their traps or create an easy way through for your team, or even using boss-summoning items when enemies are on screen, and exploit the boss's aggro to guide it toward them when they're trying to take it down.
However, with the latest patch, Hallowed armor along with Familiar Clothes can be used to be make you invisible. Add Ironskin and 5 Warding Accessories, and you can boost your defense to 80, which will turn you into a durable, deadly enemy.
One extremely effective strategy for wreaking havoc inside the enemy base is to use a Mechanical Skull to summon Skeletron Prime, just as day is about to break...
Scout
This certain play style is possible with either the Shadow Armor or the Necro Armor or even the Mythril Armor, While using either the Megashark, Hallowed Repeater or the Star Cannon. For the Hallowed Repeater, Cursed arrows are absolutely devastating, easily capable of destroying enemy players. Hellfire arrows are great as well, as if you are short on a Bomber and feel the need to create large hole quickly you may do so. With the Megashark you are advised to use either Cursed Bullets for picking off players or either Crystal Bullets or Meteor Shot for crowd control. With the Star Cannon, feel free to use the high DPS of the weapon to your advantage. If used properly, entire teams may be destroyed. Another viable stratagy, though sounding odd, is to use holy arrows in combination with the Chlorophyte Shotbow. Though sacrificing in terms of direct DPS, the falling stars may distract or even kill an unprepared player. Any and everything that ups movement speed should be used.
Machine Gunner
Alright, this is not a simple play style. Defense? Done. Charging the enemy base? Finished. Getting rid of the boss the other team's saboteur just summoned? Piece of cake. Either a Minishark, Megashark or Chain Gun are highly and I mean highly recommended to be your primary. As a melee secondary heavy damage blades (Breaker Blade, any beam firing sword) or spears (Gungnir, Mushroom Spear, Chlorophyte Partisan) may be used, but high knock back may be more important. Knockback prefixes (i.e. Legendary, Bulky) and Titan Glove accessory or its derivatives are useful as well. Try to get a Megashark with either the Unreal or Rapid Prefix by using the Reforge option with the Goblin Tinkerer. Use Regeneration and large potions where possible, because you want to fill most of your inventory with ammunition, because you will be burning through it. Very quickly. So what you need to do is simply rain bullets on your enemy when they come out to defend their base. When used correctly this class is devastating. When used incorrectly it gets rid of your gold fast. Recommended armors and accessories are any and everything that helps with reducing ammo consumption. It will be noted, however, that the Cobalt Shield and Band of Regeneration are useful, the Band of Regeneration less so. Flying is also useful, so wings are useful to rain death from above, especially the Hoverboard because it allows you to fly straight while gunning them down. It should be noted, that the use of a Cobalt Shield is not needed. You can take an advantage of the knockback, since you are using ranged weapons.
It's recommended you use Explosive or Chorophyte bullets for this play style, allowing for greater chances to hit enemies. Meteor Shot also works well in enclosed spaces.
Spy or Thief
A class which requires much speed and attention. A thief's inventory and equipment may contain Shadow armor or Hallowed armor with the helmet, Familiar Clothes, lots of Invisibility Potions, a Wire Cutter, Shadow Orb, and Magic Mirror. Their role is to sneak in the enemy base, disarm traps, destroy light sources, steal things from chests, and get info about their strategies. If an enemy starts suspecting the presence of a thief, he needs to stop. If the enemy goes around throwing Explosives or swinging a weapon, the thief needs to teleport away to his spawn point with the Magic Mirror. Advanced thieves may want to light up a area, but if they summon a Shadow Orb, it will be seen. If the thief changes course unlike the enemy, he will be suspected by the moving orb. Don't use Hermes Boots, Cloud in a Bottle, Cloud in a Balloon, Rocket Boots or Spectre Boots. They leave a little trail, which can be fatal if seen. However, speed boosting items or potions and ranged weapons are recommended. Great strategy for Hogwarts Castle like PvP servers.
Explosives Expert
The EE is a class used for splash-damage combat and mining. The equipment checklist is right here: Flamethrower, Gel (For ammo, Sticky Glowsticks and Sticky Bombs), Bombs, Grenades, Dynamite, Any Bow or Repeater with Hellfire Arrows, Shadow Orb or Fairy Bell, Magic Mirror, Explosives (Block), Wrench, Wire, Wire Cutter, Lever/Pressure Plate/Switch, Any weapon that doesn't use ammo. Also, if you're heading into battle alongside your allies in a base siege, bring a Rocket Launcher/Grenade Launcher with Rocket IIs or Rocket IVs as ammo (because they can destroy tiles).
This class can cost a bomb (pun intended) so you will need a big purse. Also, build a Gel Factory near your house. You could also use Bomb Statues
Frost Hydra Spam
This trick sounds a little odd. You find a hiding place and wait until a person comes by. Click the player with the Staff of Frost Hydra (which means spawning Hydras directly at them), thus damaging them due to the fact that Hydras damage players when they touch them. Then, you just have to repeat the process until the player dies. They deal a significant amount of damage (100). The disadvantage is, however, the fact that you can't touch flying players, so you might want to consider making a long 3 block high tunnel, with you using an invisibility potion or some sort. Since the Hydras spawn instantly, they won't be expecting such a cold welcome (pun quite intended.)
GENERAL RECOMMENDED ITEMS:
Spooky/Tiki Armor - Boosts damage. Spooky is superior, because you can only have one Hydra at any given time (you won't need multiple Hydras anyway.)
Papyrus Scarab, Necromantic Scroll, Hercules Beetle - Boosts damage.
Anklet of the Wind - So you can outrun your opponent and not making the opponent offscreen.
Aglet - Same reason, but the boost is very little.
METHOD 1
Items:
Staff of the Frost Hydra (obviously.)
Invisibility Potion.
Familiar Social Armor Set.
A lot of blocks (Lihzahrd Bricks are recommended since they are nigh indestructible) to build the tunnel.
This method is the above method, using potions to surprise the enemy. You are completely invisible since you are wearing Familiar Armor. A computer with a wide screen is recommended, since you may see more than the enemy, so you can do an initial surprise since the enemy can't see you swinging the staff, for the first swing at least.
METHOD 2
Items: Staff of Frost Hydra.
An underground tunnel (yes, this is not an item but you'll need it).
A lot/even more blocks (something that blends in if its an underground tunnel).
So this is a little different. It doesn't have to be an underground tunnel, but its recommended since you require less work. OK, so, the plan is, since when you hide in somewhere high up the ceiling or down below the floor, you can't be seen, because you will be shrouded in darkness. This method is more reliable since your opponent has no idea where you are, but requires more effort.
I think its a pretty good technique, if you can manage to do execute it. You do have to note, however, when using some nigh indestructible blocks, such as Lihzahrd Bricks, to make it not look suspicious. That way, the art of the unexpected.
Crowd Control
A more defensive role set, the job of the Crowd Control is keeping large groups of players away from his team's gates while being able to weather serious punishment. Because of the nature of this class (and the equipment required to excel at it), it's best suited for Hardmode players.
Any weapon with a high quantity of knockback and area-of-effect is more than ideal. For range-oriented players, a Shotgun (or even better, a Tactical Shotgun) with Exploding Bullets as ammunition will do this job well. Those who are more aligned towards melee will probably want to opt for the Breaker Blade or Dao of Pow (the latter works best).
As far as armor is concerned, the best set is Beetle armor, simply because it has the highest defense rating. You'll want to focus more on damage reduction when playing Crowd Control, rather than extra bonuses to yourself - this is especially useful if you intend to go melee. Good accessories for this role set are an Ankh Shield (to protect against knockback and Debuffs players may fire at you), plus any others that increase defense or knockback. If the correct combinations are used, the player's defense can be buffed to more than 100, and combined with the Ankh Shield, the best Crowd Control player is a frustratingly resilient opponent in battle.
Sniper
This role is excellent for virtually any task that doesn't require the player to be mobile, and one can wipe enemy players wearing even the toughest armor (unless said player is wearing full Beetle Armor with the defensive set bonus, or is fully built for defense in general) off the map with a single shot assuming they obtain the correct modifiers for their equipment (for Accessories the best modifier is Menacing).
Obviously the Sniper Rifle will be the weapon of choice for this role, and as far as armor is concerned, Shroomite Armor is the best (use the mask,) because of its set bonus, Stealth. However, it's advised to wear something in the Vanity slot if you want to go completely invisible. This hides you from players hunting for you, and the armor itself provides a nice damage bonus.
Bring along a Magic Mirror or a bunch of Recall Potions so that in the event that you are spotted, you can flee back to your base (remember to set your spawn point there!) to elude your pursuers.
Bunker Buster
The philosophy behind this offense-oriented role is simple; why bother ambling over (or under) defenses when you can simply blast your way through them? The bunker buster is similar to the aforementioned explosives expert, but he takes a pivotal role in, and is better suited for, active combat, whereas the explosives expert is primarily associated with defense.
Recommended equipment is similar to the explosives expert, with the most important being a Rocket/Grenade Launcher using Rocket III/Rocket IV (the former to avoid self-imposed redundancy should your team wish to capture the base instead of pummel it to pixelated dust). Don't use the Snowman Cannon, because the rockets will track and follow nearby enemies which can make it difficult to destroy the defenses themselves. Armor should be Shroomite (wear the helmet) to provide damage bonuses to enemies caught in your blasts.
Retaliator
This is a complex set used for taking enemies by surprise. Armor: Turtle Armor only. Accessories: Bee Cloak, Paladin's Shield, Frozen Turtle Shell, Ankh Shield, and one other accessory of your choice, all turned visibly off and reforged to warding. Weapons: any melee weapons. Vanity: possibly use a different armor or even Familiar Clothes to trick enemies into thinking you're a different class. Potions: Thorns Potion
Strategy: simply charge into an enemy base and let things hit you. All players and enemies will recieve 133% of the damage they inflict on you, which will throw them completely off guard if you're wearing a different armor type in vanity. In addition, when you take damage, it will rain stars and bees on your opponents. The paladin's shield may not inflict damage on the enemies that attacked your ally, but it will cause stars to damage everything around you. Also, at 1/4 health, you will become much more durable with the frozen turtle shell, making enemies have to do a lot more to kill you and still be taking damage themselves. Also, the ankh shield will allow you to penetrate attacks without taking knockback as well as immunity to most debuffs and 4 more defense.
If you want to be more risky, replace the ankh shield with a normal obsidian shield, sacrificing 2 defense for the ability to be poisoned. This sounds redundant, but purposefully poisoning yourself can create a wall of stars on either side of you- as the star/bee cloak reacts to any damage and poison deals 2-3 1-point hits per second, your cloak will start going crazy, raining stars at a very high rate.
Traps and defenses
Note: Dangersense Potions will effectively counter most of these traps
Rough terrain
Some small pits, hills and barriers, combined with some cobwebs over a large area will considerably slow down anyone trying to charge through the base at full speed.
Counter: use Gravitation Potions or Rocket Boots/Wings to fly over the obstacles.
Pit trap - view summary for details.
Sand barrier
A large underground space filled completely with Sand will force enemies trying to tunnel their way to the base to either give up, try to maneuver around it, or clear it with explosives forcing them to reveal their position. A 1-block wide tunnel near the spot they will likely stall at will allow the defenders to flood the tunnel with Lava for a quick kill.
Counter: Avoid it altogether, or clear it quickly with Dynamite/Rocket II/Rocket IV
Advanced sand barrier
Similar to the sand barrier above, the advanced variant adds lava to the equation. Having a large reservoir of lava above the sand barrier will discourage opponents from using explosives to clear the blockage. In addition, when they do clear it, they will be flooded with lava. Alternately, placing the lava outside visual range above the blockage will increase the chance that your opponents will accidentally flood themselves with lava by using explosives. You can discourage your opponents from simply going under the trap by adding lava beneath the flooring as well. Finally, making the tunnel only 6ft high, and lining it with Hellstone or Spikes will further reduce enemy maneuverability. If the top and bottom of the tunnel is lined with lava, you can also remove every second block along the bottom to reduce the availability of blocks to counter the lava flow. The primary disadvantage to this tactic is the large amount of lava that can be required.
Counter: Avoid it altogether, use water or Obsidian Skin Potion to neutralize the lava, or bring blocks to stop the lava with before the sand is fully released.
Bomb Road Trap
Make a path of either Dungeon Bricks or Hardmode Metal, place a long line of Explosives Blocks underneath, wire it to a lot of Pressure Plates, and then you run. For even more effect, you can make a Lava Lake on top of the trap, or add some Inactive Stone Blocks to the entrances, and the link them with the Explosives. The Lava Lake gets blown apart, filling up the crater, and the Inactive Stone Blocks activate, trapping the target.
Pit trap
A pit trap is seen when a player digs multiple holes that are 4ft (2 blocks) wide and about 40ft (20 blocks) deep. At the bottom of the pit, spikes are usually placed. In some occurrence, lava may be placed at the bottom in small puddles. Alternatively, if a player gets trapped in a pit trap, the owner of the trap can drop mass amounts of sand on the trapped player to defeat them. The pit trap becomes more efficient if lined with Hellstone Bricks, as this will likely burn players attempting to get out. One can also place a one-block floor and remove it from range with the Dirt Rod. This is efficient at night if there isn't light around because this is impossible to see under the floor in such case. Another variant of this is to place an active stone block ceiling to the trap, which can be as thick as you want, and have it all wired to a singular pressure plate on the centre of the ceiling. When the pressure plate is stood on, it will deactivate the stone blocks, leaving the victim to fall to their death. The downsides of this are that it can take a long time to reset, uses a lot of wire and can be spotted by holding a wire-related device.
Counter: Fly over the traps with Rocket Boots or escape with a Grappling Hook and an Obsidian Skull equipped. By using the Hook, a player can also slingshot himself out quickly if their timing is right. If the enemy is using a Dirt Rod as visibility is low, one can cast a Shadow Orb, throw some Glowsticks or use a ranged weapon that emits light to detect a hidden trap.
Sand trap
A sand trap is seen when a player uses webbing to uphold sand. This may seem counter intuitive, but sand deals a lot of damage on contact with the player mesh. Because the webbing is so easy to destroy, the sand gains much more malleability in how it can be used. Often players can be led into a room and then blocked off by sand or encased in sand and then shot down with arrows, or more sand can be dropped on them, or a lava trap can be used to drop lava onto them. Usually there will be a dart trap pointed at the webs and a pressure plate. When someone steps on the plate the dart trap shots a dart through the webs thus releasing the sand.
Counter: Keep some sturdy blocks at hand to create an emergency barrier against the falling sand. An Ice Rod can also be very useful.
Spike trap
A spike trap is seen when a player has raided a dungeon of its spikes and mindfully put them in locations that are effective in whittling away health. These spikes can be used to damage other players. Spikes are often best used when they are out of sight of the player and placed on walls or ceilings. When a player puts spikes on the wall or ceiling a player will hesitate to grapple, leaving the target open for a sand trap.
Counter: Look for an alternative way around, or use the Ivy Whip to latch in between two walls without touching either of them.
Lava trap - view summary for details.
Lava trap
A lava trap is seen when a player takes lava from the -2100ft level and uses buckets to move it up to his or her fortress. This lava is then held in place in a funnel shaped container, which is corked off by a web/sand cork. A player using cobweb should also consider using dart traps connected to pressure plates near the place where lava falls. This way, the poison darts will tear the cobweb and the trap will be activated. This technique coupled with the sand trap is a sure way to deal good amounts of damage, and the player can also become trapped.
Counter: Keep water handy to temporarily stave off the lava, or have a Lava Charm or Lava Waders equipped.
Moats
Moats, while not only for PvP (also for Goblin Armies), are very effective. To build one you either need a lot of water, or better, lava. First, build a giant moat (as big as possible, the bigger the better), then fill it with water/lava. Build a bridge over it. Now, when you know that enemies are coming, mine out the bridge (while able to get back into your house, of course), and watch for them. If they attempt to re-build the bridge, either risk it by trying to mine the bridge out, or attempt to get behind them and knock them in the water/lava. This isn't the best tactic, but it can still add an extra line of defense to your base.
Counter: Use Rocket Boots to fly over them.
Lihzahrd Guard Tower
Even simpler to construct than most of the traps here, but no less effective. It involves using Lihzahrd Bricks to build a tower with firing ports to allow rangers/mages to shoot through. This gives players the benefit of having a surprisingly strong defense that is immune to most pickaxes and explosive weapons. Wooden Spikes can be placed on the walls to stop people from grappling over the tower without getting killed or hurt enough to allow a second line of defense to finish them off.
Counter: Keep a Picksaw by your side, as well as a few blocks (or grenades) to deter enemy fire while you dig into the tower. You can also fly over, or dig underneath it.
Lava tubing
This technique is used to drown players; however, it is very hard to accomplish due to the amount of lava required. The player must first start off with a hallway that is tubed or water tight, then the top and bottom of the tube must be spaced one block apart and Obsidian Brick/Ore will be placed, then the spacing between the brick and obsidian is filled with lava. This technique is done on both the top and bottom of the tube, then it must be filled with water. This technique, however difficult, yields a very very hot liquidy death for any traveling player.
Counter: Take extra care while traveling in narrow corridors, and try to stay undetected. A Magic Mirror also helps.
2012 machine (Also known as Project F-word The World, or PFTW for short)
It is an ambitious project, but its power is devastating. It should be built high enough for the enemies to not notice, for example 300-400 feet above ground, and consist in a small reservoir of lava that funnels the liquid onto a block that splits the flow in two, letting each of the outgoing flows hit another block and split again, and again. The result will be a literal downpour of lava upon anyone unlucky enough to not have a shelter, although with a considerable delay due to the difference in height. Even better, the aftermath will see the whole area covered with a layer of lava, making it dangerous for anyone to cross. It can be further powered up by placing masses of sand held up by Wood Platforms and diverting the lava so that it burns through the platforms, adding a deadly rain of debris to the already hellish scenario.
Counter: Obsidian Skin Potion, a Lava Charm, Lava Waders, or make a barrier and start digging down. You can also fly away from the area.
Meteor Head/Corrupt guards
Simply put 50 blocks of Meteorite or Corrupt a wide area in front of your base, so that Meteor Heads or Eaters will spawn just outside of the base (they won't spawn anywhere covered by a wall). To avoid the Meteorite from being destroyed, it is best to build it in a shape that makes it harder to lay bombs on (for example, a triangle pointing up), building it up in the air, and put a layer of Obsidian, Ebonstone or Dungeon Bricks around it.
Counter: Tungsten Pickaxe or better for Meteorite, Purification Powder or Holy Water for Corruption. If available, a Cleantaminator should do nicely.
Hellstone flooring
Very, very simple. You just make the floor of your base Hellstone, will deal continuous damage and (if without Obsidian Skull/Shield/Horseshoe) make it extremely difficult to move through, as you will take knockback upon contact. Also, if the enemies try to destroy the hellstone, it will spawn lava, making passage even harder. However, it will require your entire team have an obsidian skull in their accessory slot.
You could also use Meteorite, but if the floor is too long, 50 blocks or more, Meteor Heads will start spawning, and Meteorite is not immune to Bombs/Dynamite, unlike Hellstone.
Counter: Equip an Obsidian Skull, Obsidian Shield, Obsidian Horseshoe, Ankh Shield, Obsidian Water Walking Boots, or Lava Waders, or use a Nightmare/Deathbringer pickaxe or better/drill.
Chest barrier
An expensive barrier involving chests or other storage items planted on tiles and filled with junk, all lined up as a physical barrier. Storage items and the tiles they are planted on are not effected by any type of explosive. The chest itself cannot be removed until it is emptied of contents, wasting a considerable amount of an intruder's time and attention. Because storage items are in the background, intruders can fire projectiles or throw explosives through the gaps; to thwart attacks, a wall of a material like Dungeon Brick can be placed on the inside, just far enough away that it cannot be mined by Molten or greater pickaxe from the distance intruders are kept away.
Counter: Avoid it altogether, or use Invisibility to extend the time you can remove items from chests undetected.
Spike Trapdoor
This trap requires much more attention on the operator's part than the others, but the layout is incredibly simple. Hide Active Stone Blocks among ordinary Stone Blocks, dig a pit underneath the active stone blocks, cover the edges with Spikes (if the Lihzahrd is available for exploration, use Wooden Spikes as they deal far more damage), rig the "trapdoor" up to a wire network and a switch (could be expensive), and wait. When an enemy player walks over the blocks, flick the switch, wait for them to hit the bottom, close the trap again, and listen to their screams of agony as they die a slow, painful death. A player with fast reflexes can snag an entire team of hapless opponents with this vicious trap. Even better yet, Use Actuators on a wooden bridge or tunnel four or more blocks deep to be less suspicious.
Counter: A player with a Grappling Hook of some sort can disable the entire trap by latching onto the stone as they fall, as long as they stay there. Also players with the Magic Mirror can simply teleport to spawn rather than face the trap itself, surviving the ordeal altogether.
Spear Tunnel
This trap requires access to the Lihzahrd as it uses Spear Traps, but it can devastate invading enemies who aren't careful, and setting it up is very simple. Simply dig a long tunnel, place the traps on the ceiling, and have Lihzahrd Pressure Plates beneath them. Rig them so that each plate triggers the trap(s) directly above them. The longer the tunnel, the more damage will be done. The trap is especially dangerous if there is no light source inside of the tunnel, because the players can't see the plates as well. Just remind your team not to use the same passage for when they want to exit the base...
Counter: Use Hermes Boots/Spectre Boots to dodge the falling spears.
Boulder Tunnel
Give attackers a nasty surprise by way of thanks for their visit. Dig a long tunnel, as with the Spear Tunnel trap, but place a boulder at your end of the tunnel. Ideally, you'll also want to build a ramp so that the boulder can gain momentum - a high-speed boulder thundering down a three-block high tunnel will rip through potentially huge numbers of enemy players without them even knowing what hit them.
Counter: Avoid it altogether, or (if you have incredibly fast reflexes and a spare block to hand) place something in the boulder's path to stop it in its tracks before it causes too much damage. You can also, if you have a pickaxe/drill, dig underneath the tunnel and surprise the trap's operator from below.
Land Mines
Simple, yet effective, just two or three Land Mines can kill an enemy player. Be careful, as these can also be dangerous to you and your allies, and they must be re-planted after exploding as Land Mines disappear after use. You could also wire up some Explosives to some pressure plates. Note that Land Mines do have some knock-back, and can launch the attacker away from their own death, so try to lay them out in a tight space or tunnel. You can disguise Land Mines by placing them behind a Waterfall, or Paint them to match the ground or background.
Counter: Having a sharp eye and avoiding them completely.
Wall of Dart Traps
This is a very simple trap recommended for beginner players. Place dart traps in a vertical line with wire connecting them all to a switch at the bottom. When players approach, simply flip the switch and every player within range of the traps is poisoned. Though players can easily remove the traps once they get close, they will still have taken some damage, which can help greatly in the long run. You may want to put blocks like dungeon bricks or even better lihzahrd bricks in the way so it's harder to reach the traps. Also, if you have access to the lihzahrd temple, using super dart, flame, spear, or spikeball traps would be immensely more effective. This trap can also be helpful against goblin/ pirate invasions.
Counter: If you see one of these built, find another way around it or simply destroy it if it's unmanned. Also, a bezoar/ medicated bandage/ ankh charm/ ankh shield will protect from the effects of the poison, and if you have a high defense along with that, the dart traps should do next to nothing. However, if stronger traps are used, avoid them to the best of your ability, or as before, destroy them.
Lava Beds
Simple concept, extremely difficult to carry out. Someone playing as Ninja of the Night or Saboteur is best suited to this job.
Step 1: Find out where the other team's spawn is. Step 2: Hide in their base until they are all away from spawn. Step 3: Dump lava in their spawn room and seal it in.
This is so effective, some servers may ban it. Every time a player uses a Magic Mirror, they will be teleported into a puddle of lava. Also, they will be killed every time they respawn.
Counter: If you know one of these is active, manually walk back to your base and take out the lava. You could also move your spawnpoint, have Lava Waders equipped, or have an Obsidian Skin Potion active.
Transportation
This can be very important and can help you surprise your enemies. Using tunnels or a platform in the sky can be helpful so are wings. Using movement accessories can help with these. An "Underground Railroad" can help extremely with movement. A simple way to build one is to use safe houses like the real thing. Or if your feeling complicated and a long tunnel filled with active stone blocks should do the trick.. Add a switch or lever connected to them all. Extra switches, levers, and pressure plates can be added and strung up to traps in case of intruders.
Notes
- As of 1.2, any player that enables PvP will no longer be visible on the Minimap, However this doesn't apply if the player is on the same team.
- If killed by PvP damage, players will not drop coins.