Welcome to Terraria! Whether you are a new player (increasingly unlikely after 4 years on the scene), or perhaps a returning player who can’t remember if it’s the blinkroot or the moonglow that goes in that shine potion, hopefully this guide can be of some help to you. At least it will be more useful than the other Guide.
When progressing through Terraria, many players can be confused about where they should go and what they should do next. This is not a design oversight: Terraria is an open-ended game and unlike most games, you are not forced to go anywhere or do anything. You are free to set your own goals and follow through with them, whether you are a builder, fighter, explorer, collector, or whatever else. This walkthrough merely aims to provide a logical order of progression through Terraria’s many different environments, called biomes, generally in order of increasing difficulty. But there is certainly no requirement to visit each biome, or in this order.
If you are unsure of what map size to choose as a new player, choose small. Even in a small world a player can face long travel times, and it would still take hundreds of hours to explore every cave in a small world at a normal pace. A more accurate description of the map sizes might perhaps be Large, Grande, and Venti.
New players may also want to refer to this guide: Getting Started
The Forest: Starting Out
Forest Biome
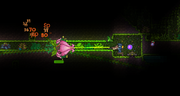
Monsters: Green Slime, Blue Slime, Red Slime, Purple Slime, and Pinky
Monster Drops: Gel
Notable Resources: Wood, Copper or Tin, Iron or Lead, Mushrooms, Daybloom, Goldfish
Notable Chest Contents: Aglet, Blowpipe, Spear, Wooden Boomerang, Throwing Knife, Glowstick, Climbing Claws, Umbrella, Grenade, Shuriken
Recommended Equipment: Starting equipment
Recommended Life: 5 hearts
New players will almost always spawn in the Forest biome (rarely the player will spawn in the Snow biome.) This biome has the weakest monsters in the game.
A newcomer could easily be lulled into a false sense of security upon entering into the bright world surrounded by cute bunnies and harmless slimes. Don’t be deceived. You have 15 minutes before night falls and you are ripped into pieces by packs of zombies, if you are not prepared. Your goal in the daylight remaining to you should be to kit yourself out with some better starting equipment from your surroundings and find a source of shelter, preferably underground, to pass the night.
The first thing you should do is cut down several trees (using your axe, aim for the lowest block), as wood is needed for many things, then build a Work Bench, and then probably, a Wooden Sword, and perhaps a Wooden Bow, as your starting weapons are next to useless.
Next, you should explore your surroundings. There are usually a few Chests on or near the surface near your starting point, which will often contain useful weapons and other items. If you are lucky (1/8 chance per chest), you’ll find a Spear, which is one of the best starting weapons, especially against zombies, the biggest threat in the early going. There will also almost always be at least one cave entrance close by leading Underground.
Once you have explored your surroundings and cracked open all the chests and pots in sight, you should head to the safety of Underground before night falls to continue your search for useful items and resources.
For a more experienced player, you may wish to consider another option. The new Cactus/Ebonwood/Shadewood equipment is as effective as Copper/Iron, and far quicker to obtain, albeit at serious personal risk. Note that the Jungle always generates in a world opposite from the Snow and Dungeon, the Snow often generates close to spawn, and frequently the Corruption/Crimson generate just after or in the Snow biome, especially in small worlds. It is preferable to travel through the Snow as it is faster and safer than the Jungle, and knowing this, one can often quickly reach the Corruption/Crimson. Once there, it is advised to use any buff potions you may have picked up on the way (don’t forget to craft any arrows you’ve found into flaming arrows), nip in, cut one tree, duck out, make a Ebon/Shadewood Sword/Bow, then use the new weapon(s) you’ve made to defend yourself while you chop down a few more trees to make the armor. It only takes a minute or two and then you will have sufficient equipment to survive every surface biome as well as the caverns (if you’re careful.)
It should be emphasized that it is very easy to die doing this, it is a gamble, as there may not be corruption/crimson at all on one side of the world, and sometimes when the corruption/crimson generates in the snow, there will only be boreal trees around. On the other hand, this strategy frequently does pay off and allows you to quickly obtain superior starting equipment. Even if you don’t find shadewood/ebonwood trees, you can usually at least encounter numerous chests, a desert or even a pyramid, and collecting cactus is even faster and easier (tip: aim for the block under the cactus.)
Night
Monster Drops: Shackle, Lens, Black Lens, Zombie Arm
Notable Resources: Stars
Recommended Weaponry: Iron or Ebonwood/Shadewood Broadsword and Bow, Spear, Throwing Knives, Shuriken
Recommended Life: 6 hearts
Zombies and Demon Eyes will spawn on the surface at night, regardless of the biome. They are much stronger than the day monsters.
It is recommended to stay underground during nighttime until you are strong enough to easily deal with zombie packs, as there is little to be gained and much to lose for a new character outside after dark. If you do (inevitably) find yourself outside at night, any weapon that pierces multiple times, such as the Spear (if you find one), Throwing Knives, and Shuriken are very useful. A bow + flaming arrows also tend to deal more damage than most other starting weapons. If you are only used to playing other games, it is easy to forget your greatest ability: the power to move blocks.
Going Under
Underground
Monsters: Blue Slime, Red Slime, Yellow Slime, Pinky, Blue Jellyfish, Giant Worm
Monster Drops: Gel, Glowstick, Whoopie Cushion
Notable Resources: Copper or Tin, Iron or Lead, Silver or Tungsten, Gems, Blinkroot, Crystal Heart
Chest Contents: The same as surface chests; pots are more common than on surface
Recommended Equipment: Starting equipment
Recommended Life: 5 hearts
The underground can be identified by its background (pictured to the right). It is the first layer below the surface. Copper and Iron deposits can be found in this layer. Silver and Gold can also be found, though infrequently.
The short depth of this layer (particularly on small worlds), combined with its limited rewards, means you will probably not be spending too much time here before moving on to the more lucrative Caverns. Copper/Tin are highly abundant, but with the advent of comparable cactus and wood based gear which are far quicker to acquire, a once borderline useless ore is now almost completely useless (save for the gem staves.)
For a more in-depth guide on mining, see Mining Techniques
Caverns
Monsters: Black Slime, Mother Slime, Baby Slime, Pinky, Giant Worm, Skeleton, Cave Bat, Blue Jellyfish, Piranha, Undead Miner, Tim
Monster Drops: Gel, Whoopie Cushion, Hook (crafting material), Wizard Hat, Robot Hat
Notable Resources: Copper or Tin, Iron or Lead, Silver or Tungsten, Gold or Platinum, Gems, Silt, Obsidian, Glowing Mushrooms, Blinkroot, Crystal Heart
Chest Contents: Band of Regeneration, Magic Mirror, Angel Statue, Cloud in a Bottle, Hermes Boots, Enchanted Boomerang, Jester's Arrow, Extractinator, Flare Gun
Recommended Weaponry: Iron broadsword or equivalent, Iron bow or equivalent, or any of the surface Chest weapons.
Recommended Life: 6 hearts
The Caverns can be identified by their background (pictured to the right). It is the second layer below the surface. This layer is by far the largest pre-hardmode biome. The Caverns are divided into two halves. The upper half contains lakes of water, while the lower half’s lakes are instead lava. All pre-hardmode ores except Hellstone can be found frequently in this layer (demonite and crimtane rarely.) Caves of glowing mushrooms can also be encountered.
The Caverns are a massive biome with many useful items and treasures, and as such, players may find themselves spending a lot of time here. Although its monsters can prove quite dangerous for a new adventurer, the greatest threat in this layer may actually be the danger of falling into its vertiginous chasms, frequently with the aid of the ever-helpful bats. In Terraria, it seems the difference between stubbing your toe and breaking both your legs can only be the height of a handful of blocks. Should you find yourself falling to your doom, don’t forget there are a number of items that can break your fall: Cloud in a Bottle’s double jump, grappling any surface, including the ground you’re about to hit, even an Umbrella. Pools of water (2+ blocks deep) and cobwebs will also save you if you’re lucky enough to fall into them.
This ever-present danger is closely followed by the devious and near-invisible traps sprinkled generously throughout the inky blackness. Once confined solely to the Dungeon, apparently the thoughtful developers decided that stepping on things that kill you was such a good time that they spread them to the rest of the subsurface layers. At least these ones can be disarmed. A bold, fearless new adventurer skipping heedlessly through the caves for the first time will quickly meet with a boulder landing on their head, or even more hilariously, a landmine powerful enough to bring down a skyscraper. Hopefully, the adventurer will be able to share the developers’ sense of humour when this occurs, particularly if their character was hardcore. Needless to say, tread with extreme caution, and take advantage of the helpful new Dangersense Potion if you wish to avoid retrieving your own head. Using generous amounts of light sources is one of the best ways to mitigate both of these dangers. The Flare Gun, Mining Helmet, and Shine Potions can prove useful additions to the usual sources.
Although there are many helpful items to be collected in this layer, probably at the top of the list will be a Grappling Hook and a Magic Mirror. Both of them will make getting around much easier and faster. Fortunately, with the gem hooks, it is trivial to obtain one, and Magic Mirrors are also very common. Besides these two, a player may want to craft a Gem Staff, as even after being nerfed, they still tend to outclass most other weapons at this stage of the game, limited mostly by the number of stars you’ve managed to collect so far.
Note that should you descend too far, you will actually find yourself in the Underworld. This will be marked by a change in music and background to lava walls, and Underworld enemies will start spawning which you probably won’t want to face at this juncture.
Building a Base
A typical base
Once you’ve filled your pockets with dirt, you may want to consider starting to build a base, as now you have some building materials and money to buy things. A base can take anywhere from a single in-game day to more than an in-game week to complete, depending on the player's tastes. It is not necessary, however, to build the entire base right away. Waiting to build the majority of the base can be advantageous, as it will allow the player to use the large stores of blocks they will end up gathering as a by-product of mining. Regardless of when or what the player builds, it is recommended to build houses for the Guide, Merchant and Nurse, a campfire, and an area for storage and crafting before progressing.
For a more in-depth guide on building bases, see Bases
The Surface: Beyond the Forest
Once the player obtains strong enough weapons many mid-tier biomes open up. These biomes contain crafting materials as well as other treasures.
Desert Biome
Monster Drops: Antlion Mandible
Notable Resources: Cactus, Waterleaf
Recommended Weaponry: Cactus Sword, Ebon or Shadewood Bow, or equivalent
Recommended Armor: Cactus, or Ebon or Shadewood
Recommended Life: 6 hearts
The desert doesn't contain much of interest other than crafting materials. The monsters in the desert are in the lower-mid tier, and can be easily dealt with using ranged weapons. If you visit the desert very early on you can craft equipment from cactus, which is slightly stronger than wooden equipment.
If you are lucky, your desert may contain a Pyramid, either sticking slightly out of the sand, or buried just underneath. Digging down through the Pyramid's sandstone walls will bring you to a chamber with a chest which may contain a Flying Carpet or Sandstorm in a Bottle, both very useful accessories.
Snow Biome
Monsters: Ice Slime, Zombie Eskimo
Monster Drops: Gel, Eskimo armor
Notable Resources: Shiverthorn
Recommended Equipment: Starting equipment
Recommended Life: 5 hearts
The surface of the snow biome contains little of interest besides Shiverthorn and as an access point to the Underground Snow.
Underground Snow Biome
Monsters: Ice Slime, Ice Bat, Snow Flinx, Spiked Ice Slime, Undead Viking, Cyan Beetle
Monster Drops: Snowball Launcher, Viking Helmet
Notable Resources: Shiverthorn
Chest Contents: Ice Boomerang, Ice Blade, Ice Skates, Snowball Cannon, Blizzard in a Bottle, Flurry Boots, Fish (item)
Recommended Weaponry: Ebon/Shadewood or equivalent Sword, Bow, Gem Staff
Recommended Armor: Cactus, or Ebon or Shadewood
Recommended Life: 8 hearts
The Underground Snow biome, which you can enter while exploring the cave layer, is slightly more difficult due to Spiked Ice Slimes. Though there is not a large quantity of ore or gems in the snow biome, it is still worth exploring for its unique chest contents.
Jungle Biome
Monsters: Piranha, Snatcher, Jungle Bat, Jungle Slime, Doctor Bones (night only)
Monster Drops: Gel, Hook (crafting material), Robot Hat, Archaeologist's Hat
Notable Resources: Moonglow, Jungle Rose, Jungle Spores
Recommended Weaponry: Ebon or Shadewood Sword, Bow, Gem Staff
Recommended Armor: Cactus, or Ebon or Shadewood
Recommended Life: 8 hearts
The jungle is one of the more difficult surface biomes. The Underground Jungle should not be attempted until later on.
Corruption Biome
Monsters: Eater of Souls, Devourer, Corrupt Goldfish
Monster Drops: Rotten Chunk, Worm Tooth
Notable Resources: Ebonwood, Vile Mushroom, Deathweed, Demonite
Shadow Orb Contents: Ball O' Hurt, Band of Starpower, Musket, Shadow Orb, Vilethorn
Recommended Weaponry: Ebonwood Sword, Bow, Gem Staff
Recommended Armor: Ebonwood or Cactus
Recommended Life: 8 hearts
The corruption can be a challenging biome due to swarms of Eaters of Souls. Smashing Shadow Orbs can yield very powerful items. Beware though, as breaking three Shadow Orbs will result in the Eater of Worlds being summoned. Demonite is found in small deposits in this biome, though a Gold Pickaxe is needed to mine it. You can use Purification Powder, Bombs, and/or Dynamite to destroy Ebonstone before you’ve defeated Eater of Worlds. You can also get Unholy Arrows here by killing Devourers and combining their Worm Teeth with regular arrows.
You may wish to cover the chasms with blocks, as that can prevent Eaters from harassing you and knocking you down to your death. Rope is also very useful here to ascend and descend the chasms rapidly and safely.
Crimson Biome
Monsters: Crimera, Face Monster, Blood Crawler, Blood Feeder
Monster Drops: Vertebrae
Notable Resources: Shadewood, Deathweed, Crimtane Ore
Demon Heart Contents: The Undertaker, The Rotted Fork, Crimson Rod, Panic Necklace
Recommended Weaponry Shadewood Sword, Bow, Gem Staff
Recommended Armor: Shadewood or Cactus
Recommended Life: 8 hearts
Sometimes the Crimson will replace the Corruption in your world. The Crimson monsters are perhaps more difficult than the Corrupt ones, but cave generation is different: instead of deep holes, it contains one big neuron-shaped cave that you can walk down more easily. Demon hearts are similar to Shadow Orbs; break them to obtain good loot and get a chance for a Meteorite to land. Each third demon heart you break will summon the Brain of Cthulhu boss, which is the Crimson counterpart to the Eater of Worlds, though much more difficult to kill, due to its teleporting abilities.
Ocean Biome
Monsters: Shark, Pink Jellyfish, Crab, Squid, Sea Snail
Monster Drops: Glowstick, Shark Fin, Diving Helmet, Jellyfish Necklace, Black Ink, Purple Mucos
Notable Resources: Palm Wood, Coral
Chest Contents: Breathing Reed, Flipper, Trident, Beach Ball, Water Walking Boots
Recommended Weaponry Shadewood Sword, Bow, Gem Staff
Recommended Armor: Shadewood or Cactus
Recommended Life: 8 hearts
Oceans are always found at the edge of the world, usually next to beaches containing Palm Trees and decorative seashells and starfish. Water Chests are found at the very bottom of the ocean typically in the deepest parts. New characters may have problems working in this biome because of sharks and a lack of air supply. Gills Potions can help in this regard.
Even without underwater breathing aids, you can loot the ocean chests by quickly running along the bottom and then teleporting home with the Magic Mirror before you drown (this can be made easier with Hermes Boots, Swiftness Potions, and Water Walking potions.) If you do this quickly, no sharks should bother you.
As you continue your exploration of the surface, you should also expect to encounter this event:
Blood Moon Event
Monsters: Corrupt Bunny, Corrupt Goldfish, The Groom
Monster Drops: Bunny Hood, Top Hat
Notable Resources: Deathweed Seeds
Criteria: 1 player with at least 120 life, not a new moon
Chance: 1/9
During a Blood Moon bunnies and goldfish will turn hostile, and the spawn rate of all monsters on the surface will increase dramatically. Additionally zombies will become able to spawn near NPC's and force doors open (you can prevent this by blocking the doors with a block or platform on the inside.) This is the only time deathweed will bloom, and some NPC's will also sell special wares. If you do not wish to fight in a Blood Moon, you should probably seek shelter underground where you will be beyond its effects.
Eye of Cthulhu
If the player meets all three of the following requirements, Eye of Cthulhu has a 1:3 chance of spawning each night:
- Eye of Cthulhu has not been defeated in the current world
- At least one player in the world has ten or more hearts(200 HP)
- Three NPCs are present in the world
Shortly before Eye of Cthulhu appears, the player receives the message "You feel an evil presence watching you". Note that leaving the game and reopening it at this point will cancel the fight. Many players prefer to fight Eye of Cthulhu on their own terms by using a Suspicious Looking Eye to summon it at the beginning of the night as the Eye has to be defeated by dawn. Ranged weapons such as Shuriken or a Bow and an arena (see the Terrain preparation section in the Guide: Eye of Cthulhu strategies) will make the fight a lot easier.
Eye of Cthulhu
Life: 2800
Damage: 15 (First Stage), 23 (Second Stage)
Defense: 12 (First Stage), 0 (Second Stage)
Minions: Servant of Cthulhu (8 Life, 12 Damage, 0 Defense)
Drops: Lesser Health Potions Unholy Arrows; Demonite Ore and Corrupt Seeds/Crimtane Ore and Crimson Seeds
Recommended Weaponry: Enchanted Boomerang or an Ice Boomerang, Gold Bow with unholy arrows, Musket or The Undertaker, Shurikens, Throwing Knives, Emerald Staff or higher, Ice Blade, Vilethorn is also recommended.
Recommended Armor: Silver, Ranged Weapons,
Recommended Buffs:Hunter Potions, Ironskin Potions, Regeneration Potions
Recommended Life: 10 hearts
Piercing weapons are most efficient on Eye of Cthulhu, as they will damage it multiple times each attack. Melee weapons are not very effective on Eye of Cthulhu as it will usually fly out of reach. In its first stage, Eye of Cthulhu spawns minions and will try to ram the player. When Eye of Cthulhu has less than 1400 life, it will morph into its second stage. In its second stage, Eye of Cthulhu will stop spawning minions, but it will begin to move much faster, and do much more damage with each attack. If the player has Silver armor, piercing weapons or strong weapons and plenty of potions, Eye of Cthulhu shouldn't pose a major threat.
For more information, refer to Guide:Eye of Cthulhu strategies
Eater of Worlds / Brain of Cthulhu
After Eye of Cthulhu is defeated, the player should fight either the Eater of Worlds or the Brain of Cthulhu, depending on whether the world has Corruption or Crimson respectively.
Either boss will spawn upon smashing every third Shadow Orb or Demon Heart in a world. It is also possible to spawn them using Worm Food or the Bloody Spine. However smashing orbs/hearts will drop treasures like Vilethorn and Ball O' Hurt that can help defeat the boss.
Eater of Worlds
Life: 65 (Head), 150 (Body), 220 (Tail)
Damage: 22 (Head), 13 (Body), 11 (Tail)
Defense: 2 (Head), 4 (Body), 8 (Tail)
Drops: Demonite Ore, Shadow Scale
Recommended Weaponry: piercing weapons, gem staves, Gold Bow with Unholy or Jester's arrows
Recommended Armor: Silver, Ironskin Potions, Hunter Potions
Recommended Life: 12 hearts
Eater of Worlds has 50 segments. When one segment is destroyed, the two separated sections will become a new worm. Piercing weapons are extremely effective against this boss, as they will damage Eater of Worlds many times. Melee weapons are also effective. It is safer to fight this boss in an enclosed area, because the monsters that spawn in the corruption are noticeably more difficult to deal with in the open. The Eater of Worlds must be fought in the corruption biome. If the player leaves the corruption biome at any point during the battle with the Eater of Worlds, the boss will run away and will have to be resummoned.
For more information, refer to Guide:Eater of Worlds strategies
Brain of Cthulhu
Life: 1000 (body), 100 (creeper)
Damage: 30 (body), 20 (creeper)
Defense: 14 (body), 10 (creeper)
Drops: Crimtane Ore, Tissue Sample
Recommended Weaponry: Piercing Weapons, staves, Gold Bow with unholy or jester arrows
Recommended Armor: Silver, Ironskin Potions, Hunter Potions
Recommended Life: 12 hearts
The Brain of Cthulhu is the Crimson boss and can be summoned using the Bloody Spine. Players will notice that it's very similar to the previous Eye of Cthulhu boss. It has two stages (very similar to the Eye of Cthulhu boss) which are each slightly different. At the start, it spawns enemies called Creepers which must be killed in order to damage the boss. After it's health reaches 1000, it enters a second stage, with increased defense and speed. The Brain of Cthulhu can also teleport around the player. It is considered to be harder than the Eater of Worlds.
For more information, refer to Guide:Brain of Cthulhu strategies
The most significant aspect of these bosses is that the Demonite Ore, Shadow Scales, Crimtane Ore, and Tissue Samples they drop can be used to craft the Nightmare Pickaxe and Deathbringer Pickaxe, which are used to mine the next ore tier.
A Meteorite
Monsters: Meteor Head
Notable Resources: Meteorite
Recommended Equipment: Shadow or Crimson, Obsidian Skull, Dynamite
Recommended Life: 12 hearts
Meteor blocks will damage the player when touched. If you managed to harvest Obsidian in the Cavern layer by mixing water and lava, craft an Obsidian Skull to prevent this damage. Meteor Heads will constantly spawn when there are 50 or more meteorite blocks in the area, so it is recommended to mine the meteorite as quickly as possible. Dynamite is very effective on meteorite for this reason. A few sticks of dynamite can mine most of the biome single handedly, minimizing the Meteor Head threat.
Smashing orbs/hearts has a 50% chance of spawning a meteor somewhere in the world. If a meteor spawns, and Dynamite is available, track it down and use the Dynamite or Sticky Bombs to mine it.
Smashing orbs/hearts will also lead to the following event:
Goblin Army Event
Monsters: Goblin Peon, Goblin Thief, Goblin Warrior, Goblin Archer, Goblin Sorcerer
Monster Drops: Spiky Ball, Harpoon
Criteria: 1 player with at least 200 life, 1 Shadow Orb or Demon Heart
Chance: 1/3 for first invasion, 1/15 afterwards. Can be summoned with a Goblin Battle Standard
Once you have smashed a Shadow Orb or Demon Heart, the goblin army has a 1 in 3 chance of invading each dawn. Once the first wave has been defeated, these odds drop to 1 in 15. The army makes its way to the center of the map, where you must defeat 80 goblins (plus 40 per additional player) to drive off the invasion. Of the goblin types, the sorcerer is the most annoying due to its ranged attacks and ability to teleport.
The Dungeon
After obtaining some combination of shadow, crimson, and meteor equipment, the player should explore either the underground jungle or the dungeon. The dungeon is preferred, as it contains more weapons and offensive items than the Jungle. The Dungeon can be found near the right or left edge of the map. To gain entrance to the dungeon, Skeletron must be defeated. To summon Skeletron, talk to the Old Man in front of the dungeon at night.
Skeletron
Life: 4400 (Head), 600 (Hand)
Damage: 32 (Head), 32 (Hand)
Defense: 10 (Head), 10 (Hand)
Recommended Equipment: Shadow, Crimson or Meteor, piercing weapons, Ironskin Potions
Recommended Life: 15 hearts
Like with other bosses, piercing weapons are very effective against Skeletron. Melee weapons are of limited effectiveness, as Skeletron floats out of reach for much of the time. Like with other bosses, a player with a large stock of potions shouldn't have too much trouble with this boss.
For more information, refer to Guide:Skeletron strategies
After Skeletron has been defeated in a world, players should be able to enter the dungeon unimpeded.
Dungeon Biome
Monsters: Angry Bones, Big Boned, Short Bones, Blazing Wheel, Cursed Skull, Dark Caster, Spike Ball, Dungeon Slime
Monster Drops: Bone, Golden Key
Notable Resources: Switch, Life Crystal, Water Bolt, various lights, furniture, and decorations
Chest Contents: Aqua Scepter, Blue Moon, Cobalt Shield, Handgun, Magic Missile, Muramasa, Shadow Key
Recommended Equipment: Shadow, Crimson, or Meteor
Recommended Life: 15 hearts
Monsters respawn very quickly in the dungeon, so it can be difficult to progress. Movement enhancing items, such as the Grappling Hook or Cloud in a Bottle are highly recommended. Many of the surfaces in the dungeon are covered in damaging spikes, making it difficult to progress without some sort of movement aid.
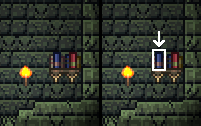
Water Bolt Tome on a shelf
It is recommended to get all of the treasures in the dungeon, as they are all useful for further progression. Water Bolt can also be found on bookshelves (pictured).
A Floating Island
Monsters: Harpy
Monster Drops: Feather, Giant Harpy Feather
Notable Resources: Silver or Tungsten, Gold or Platinum
Chest Contents: Shiny Red Balloon, Starfury, Lucky Horseshoe
Recommended Equipment: Gold or Platinum, Gravitation Potions
Recommended Life: 10 hearts
The easiest way to locate floating islands is to fly across the map using Gravitation potions at certain heights with the aid of a Depth Meter. Floating islands are typically found around 475ft on small maps, at 500-700ft on medium maps, and at 600-1000ft on large maps. In addition to several ore deposits and a chest, each island contains unique blocks and furniture. Looting floating islands is dangerous due to the constantly-spawning harpies.
The Underground Jungle
After completing the Dungeon, the player should next go to the Underground Jungle. The Underground Jungle can be found by mining directly downward from the surface jungle.
Underground Jungle Biome
Monsters: Hornet, Little Stinger, Big Stinger, Man Eater, Jungle Bat, Piranha, Dragon Stinger
Monster Drops: Stinger, Vine, Hook (crafting material), Robot Hat
Notable Resources: Moonglow, Jungle Spores, Jungle Rose, Nature's Gift
Chest Contents: Feral Claws, Anklet of the Wind, Staff of Regrowth, Boomstick, Seaweed
Recommended Equipment: Shadow, Crimson, Meteor, or Necro; Dungeon weapons
Recommended Life: 15 hearts
The underground jungle is the second-most difficult biome in pre-hardmode. An improperly geared player will have a difficult time surviving in this biome. Much like the corruption's Eater of Souls, the Underground Jungle's hornet will persistently swarm the player, while shooting poisonous stingers at them. The Minishark is particularly potent at taking care of hornets. If you have a Water Bolt and a decent amount of mana, you can simply spam the weapon in directions, and due to its ability to bounce and pierce, you can easily take out several enemies without the need to aim so precisely. When aim isn't a problem, you can focus on dodging the lunges of the Man Eater and the stingers of the Hornet.
The risk of exploring the Underground Jungle can pay off. Some of the best items pre-hardmode can be found in or crafted from items in the Underground Jungle, such as Ivy Whip or Jungle armor.
The player should also look for a Hive so that he can kill the Queen Bee boss and get access to the Witch Doctor and imbuement flasks.
Queen Bee
Life: 3400
Damage: 30
Defense: 8
Drops: Bottled Honey, Beenade, Bee Gun, Honey Comb, Bee Keeper, Hive Wand, Bee costume, Nectar
Recommended Equipment: Shadow with Thorn Chakram for melee, Jungle with Waterbolt for magic, and Necro with Minishark and Meteor Bullets for ranged; Cloud, Blizzard or a Sandstorm in a bottle.
Recommended Life: 15 hearts
The Queen Bee is a boss found in the Jungle Hives. It spawns when you break the Queen Larva in the Hive, or by using the Abeemination. It has three attack patterns:
- charging at you horizontally
- Shooting poisonous stingers at you.
- Shooting bees at you(bullet users beware!)
Beating this boss is necessary to get the Witch Doctor NPC and get the access to imbuement flasks. On the console version, be sure to beat this boss at your first try, as the Abeemination is VERY hard to craft on the console version.
The Underworld
After exploring the Underground Jungle, the player should go to the Underworld (also referred to as "hell"). The Underworld can be found covering the entire bottom of the map. It is reached by digging down from the caverns.
The Underworld
Monsters: Lava Slime, Hellbat, Fire Imp, Demon, Voodoo Demon, Bone Serpent
Monster Drops: Demon Scythe, Obsidian Rose, Guide Voodoo Doll, Plumber's Hat
Notable Resources: Hellstone, Fireblossom, Hellforge, Demon Torch
Chest Contents: Dark Lance, Flower of Fire, Sunfury, Flamelash
Recommended Equipment: Shadow, Crimson, Meteor, Jungle, or Necro; Jungle or Dungeon weapons; Obsidian Skull; Water Walking Potion, Obsidian Skin Potion, Night Owl Potion
Recommended Life: 20 hearts
The underworld is a very dangerous biome. Special care should be taken when working around lava. Lava damage can kill a player with 400 health in 10 seconds flat. Be cautious when mining Hellstone; lava spawns each time a block of hellstone is mined. The enemies in this biome are also very dangerous. Fire Imps can shoot through walls; Hellbats are hard to hit and have a very damaging attack; Bone Serpents behave like other worms and can tunnel through solid blocks; and Demons use a spell called Demon Scythe which can be particularly damaging if it isn't dodged.
The best items pre-hardmode can be found in or crafted from items found in this biome. The player should try to locate Shadow Chests, opened with the Shadow Key found in the Dungeon.
Be very careful when killing Voodoo Demons, particularly from range, as their voodoo doll can then drop into lava, summoning a very unwelcome Wall of Flesh!
Although the Underworld is theoretically the most difficult biome in pre-hardmode in Terraria, mining Hellstone is reasonably easy and safe and can be done with relatively low-level equipment, especially with the aid of Obsidian Skin potions and Obsidian Skull. Water Walking potions are also very helpful, allowing you to walk on lava, and Night Owl potions do a great job of lighting up hell.
Before Summoning the Wall of Flesh
Defeating the Wall of Flesh will activate hardmode. Once a world has entered hardmode, there is no way to change the world back to normal mode. There is no turning back once the Wall of Flesh has been defeated. Hardmode is very difficult and will make what were once menial tasks very difficult and tedious. It is highly recommended that the player make as many preparations as possible before they summon the Wall of Flesh.
The following is a checklist of things to be done before the Wall of Flesh is summoned:
- Obtain maximum health. If the player has not already done so, gather Life Crystals until the Life Bar has 20 hearts (400HP). The player may need to make several expeditions into the various underground biomes to do so.
- (Magic Users Only) Obtain maximum mana. Any player that uses spells should gather Fallen Stars until the Mana Bar has 10 Stars. Note: Magic-user oriented gear will often add Mana Stars to the player's maximum mana. Ensure that the mana bar has 10 stars without any magic enhancing items equipped.
- Gather Underworld-tier equipment. This must include a Molten Pickaxe. Other equipment will depend on personal tastes and can include but is not limited to: Molten Armor, Fiery Greatsword, Flamarang, Molten Fury, Phoenix Blaster, Sunfury, Flower of Fire, Flamelash, Demon Scythe and Dark Lance. Certain characters may opt to use Shadow Armor, Crimson Armor, Meteor Armor, Necro Armor, or Jungle Armor instead of Molten Armor. The Night's Edge is recommended over the other pre-hardmode swords if one has the resources to obtain it.
- Gather useful accessories and miscellaneous items, such as: Hermes Boots, Lucky Horseshoe, Cobalt Shield, Band of Regeneration, Band of Starpower, Nature's Gift, Feral Claws, Ivy Whip, and Magic Mirror. Many of these accessories can be combined at the Tinkerer's Workshop.
- Gather materials. Materials such as Copper and Iron will be needed to craft the items that summon mechanical bosses. Iron/Lead Ore and Gold/Platinum Ore are used in Ironskin Potions and Spelunker Potions, respectively. Other materials, such as Wood, Stone, and Sand, should be stockpiled.
- Gather potion ingredients. In hardmode, potions like Healing Potions, Ironskin Potions, and Regeneration Potions can be essential to survival. Other potions can also be useful, depending on the equipment setup the player is using. Gather a large stock of potion ingredients. Consider creating "farms" for more important ingredients. For more information on farming, see Guide:Gardening.
- Search for Demon Altars or Crimson Altars. Many Demon Altars and Crimson Altars can be found in the Corruption/Crimson, so explore each Corruption/Crimson biome in the world. Dig tunnels to visible Demon Altars or Crimson Altars. They need to be easily accessible when hardmode begins.The reason for this is after defeating the Wall of Flesh it will drop the Pwnhammer which can be used to break demon/crimson altars and spawn many useful ores. Do NOT break demon/crimson altars without the Pwnhammer as this will cause high damage to the player.
- Consider creating quarantines. Corruption, Crimson and Hallow biomes are very dangerous, and can spread and "ruin" natural biomes. Quarantining the natural biomes can protect them from the corruption/hallow. It is especially important to protect the Jungle because it contains ore and loot necessary for late Hardmode. For more information on how to do this, read Guide: Containing the Hallow/Corruption.
- Pick out a set of weapons and accessories, and reforge them. Defense is arguably the most valuable accessory stat for hardmode. Look for weapon stats that increase weapon damage and speed, or decrease mana cost. For more information about item prefixes, see Reforge.
- Consider farming money. Reforging Hardmode weapons is prohibitively expensive. Some vendors sell new, more expensive items in Hardmode. For more information on farming money, see Guide:Making money.
- Build a house for the Truffle. The Truffle is an NPC who sells the Mushroom Spear, which has a very high base damage. This spear is very useful in surviving hardmode. However, it can be only obtained when you have defeated at least one hardmode boss. For the Truffle, it is recommended to make an artificial mushroom biome in the overworld.
Ensure that all of the necessary preparations are made. Again, there will be no turning back once the Wall of Flesh is defeated. Anything that is not finished now will be much harder to do later.
Wall of Flesh
To summon the Wall, you must drop a Guide Voodoo Doll dropped by Voodoo Demons into the lava in the Underworld.
Wall of Flesh
Life: 8000 (Eyes, Mouth), 320 (The Hungry)
Damage: 11-15 depending on health (Eye laser), 50 melee (Eyes, Mouth), 30-75 depending on health (The Hungry)
Defense: 12 (Mouth), 0 (Eyes), 10-40 depending on health (The Hungry)
Drops: Pwnhammer; Breaker Blade, Clockwork Assault Rifle, Laser Rifle, Warrior Emblem, Ranger Emblem, or Sorcerer Emblem
Recommended Equipment: Shadow, Crimson, Necro, Jungle, or Molten; Ranged Underworld-tier weapons with AoE or piercing; Spectre Boots, Grappling Hook, Ironskin Potions, Regeneration Potions, Water Walking Potions
Recommended Life: 20 hearts
The Wall of Flesh will spawn just outside of the screen in the direction closest to the end of the world and start moving slowly towards you, speeding up as its health decreases. Due to the Wall of Flesh's tongue ability and The Hungry's short range, ranged weapons are highly recommended. Piercing and AoE weapons are very effective for taking out the hungry.
Consider building an arena for this fight, since the terrain in the Underworld is hostile enough to make success almost impossible otherwise. A long, uninterrupted land bridge of 500 blocks or more is ideal.
Once Wall of Flesh is defeated you will receive a message which says "The ancient spirits of light and dark have been released." You have now entered Hardmode.
Hardmode
Destroying the Wall of Flesh causes drastic changes in the world. A new biome, called the Hallow, covers a significant portion of the surface, and reaches deep underground. A large area has also been covered with corruption and extends deep below the surface. New, stronger monsters inhabit many of the biomes in the world, making them much more dangerous than before. The most dangerous monsters are those that live in the Underground Corruption, Underground Crimson, and Underground Hallow. Extreme caution is advised when exploring this new world. Enemy health goes up drastically, attack skyrockets, and even Demon Scythes may only do 10-20 damage to enemies with +100 health. YOU WILL DIE. It's not called hardmode for nothing. As stated before, use extreme caution.
Consider fighting the Wall of Flesh multiple times before proceeding. Many of the Wall of Flesh's drops can be useful for Hardmode.
The next main objective is to kill the three mechanical bosses: The Twins, The Destroyer, and Skeletron Prime. However, a player with equipment from normal mode will find themselves significantly outclassed by these mechanical bosses. Any player who wishes to fight these bosses should take time to gather Hardmode gear and accessories. Most of this gear is crafted from the new Hardmode ores, Cobalt / Palladium, Mythril / Orichalcum, and Adamantite / Titanium. However, these ores do not initially exist in a Hardmode world. They must be spawned by destroying Demon Altars or Crimson Altars with the Pwnhammer.
Smashing Altars
The easiest place to find altars is in the original Corruption or Crimson biomes, at the bottom of chasms. Be prepared for new enemies in the desert and at night. The Hallow will need to be crossed in order to reach some of the biomes on the map. In rare cases, a Corruption/Crimson biome can be converted to Hallow upon initiation of hardmode. These biomes still contain Demon/Crimson Altars.
New Monsters: Possessed Armor, Wandering Eye, Wraith, Clown (Blood Moon), Werewolf (Full moon)
Recommended Equipment: Molten
Be cautious when exploring the surface at night. New, more powerful monsters come out at night. A player used to traveling at night may find it difficult to progress when they are out after dark.
Desert Biome (Hardmode)
New Monsters: Mummy (unconverted desert only), Dark Mummy (Corrupted/Crimson Desert) Light Mummy (Hallowed Desert)
Monster Drops: Dark Shard (Corrupt/Crimson Desert) or Light Shard (Hallowed Desert)
Recommended Equipment: Molten
Natural deserts typically don't last long in hardmode. When corrupted, crimsoned, or hallowed, they become very similar to their respective biomes. Hardmode deserts are the only places where the Mummy can be found.
New Monsters: Corruptor, Slimer, Corrupt Slime
Recommended Equipment: Molten
Corruption now spreads through the world at a fast clip. Players that are new to Hardmode should move through this biome as quickly as possible. An undergeared player will be easily overwhelmed in this biome.
New Monsters: Herpling, Crimslime, Blood Jelly
Monster Drops: Meat Grinder
Recommended Equipment: Molten
Crimson spreads identically to corruption, and is just as dangerous. Maybe even worse, since the Herpling, wich has no corrupt counterpart exists. They are very fast, have a low hitbox, high health and defense, absurd attack power and are generally a pain to deal with, even mid-hardmode. Their only significant weakness, or rather, lack of strength, is rough terrain, as they will have difficulty reaching the high speeds they often use to surprise players. Extra caution is advised, especially in flat terrain.
Hallow Biome
Monsters: Pixie, Unicorn, Gastropod (night only)
Monster Drops: Pixie Dust, Unicorn Horn
Recommended Equipment: Molten
The Hallow spreads rapidly through the world, just like the Corruption. Be wary of the seemingly whimsical denizens of the Hallow. All of them are hostile, and are just as dangerous as their corrupted counterparts. Like with the evil biomes, players new to Hardmode should avoid staying in this biome for longer than necessary.
Once the player reaches the corruption or crimson, they should enter the correct chasm quickly. The chasms are much less exposed than the surface. Destroy altars methodically. Each time an altar is destroyed, wraiths will spawn and attack the player. Take time to kill the Wraiths after breaking each altar to avoid getting overwhelmed, or quickly smash a few and teleport back home (not recommended).
Each altar destroyed will spawn ore in various places throughout the world, spawning them more densely deeper down. The first altar destroyed will spawn Cobalt / Palladium. The second altar destroyed will spawn Mythril / Orichalcum. The third altar destroyed will spawn Adamantite / Titanium. The pattern will repeat with additional altars destroyed, spawning more Cobalt, then more Mythril, then more Adamantite. It is advantageous to destroy as many altars as possible before proceeding to mine the new ores. Take time to explore the chasms and destroy any altars found in them. Note, however, that each altar destroyed may spawn a new block of Ebonstone, Crimstone, or Pearlstone somewhere in the world, causing the respective biomes to spread from another location.
Mining Hardmode Ores
Once enough ore has been spawned, the player should begin mining Cobalt/Palladium with a Molten Pickaxe. Mythril/Orichalcum and Adamantite/Titanium can not be mined with normal mode pickaxes. Proceed with extreme caution. The most difficult biomes in Hardmode are found underground. The player should bring a stock of Ironskin potions, Regeneration potions, and Spelunker potions to use as they mine. If the player created a hellevator in normal mode, they should use it to access the lower layers quickly. Hardmode ores are more abundant deeper underground.
New Monsters: Toxic Sludge, Digger, Possessed Armor (night)
Recommended Equipment: Molten, Molten Pickaxe
This previously trivial biome has had its difficulty increased significantly. Hardmode Ores are not very common in this layer. It is best to pass through to lower layers.
New Monsters: Armored Skeleton, Skeleton Archer, Giant Bat, Digger, Angler Fish (water), Green Jellyfish (water)
Recommended Equipment: Molten, Molten Pickaxe
This biome is very dangerous, but it is less dangerous than the Underground Corruption and the Underground Hallow. It is for this reason that this biome is one of the ideal biomes for mining hardmode ores. Don't underestimate the monsters in this biome. All of the monsters in this biome are very strong; the Armored Skeleton's "Broken Armor" debuff is particularly lethal, even for an endgame character. Consider returning to town and talking to the Nurse if hit by the debuff. They sometimes drop Armor Polish, which prevents the debuff and will be very helpful later on.
Underground Hallow
Monsters: Chaos Elemental, Illuminant Bat, Illuminant Slime, Enchanted Sword
Monster Drops: Soul of Light
Notable Resources: Crystal Shard
Recommended Equipment: Mythril or Palladium; Ironskin Potions and Regeneration Potions
This is one of the most difficult biomes in Terraria. It is recommended to mine elsewhere until Mythril Armor or better is obtained. Chaos Elementals and Enchanted Swords can easily reach the player, even when they are boxed in.
Underground Corruption
Monsters: Clinger, Corrupt Slime, Corruptor, Cursed Hammer, Devourer, Slimer, World Feeder
Monster Drops: Soul of Night, Cursed Flame
Recommended Equipment: Mythril or Palladium; Ironskin Potions and Regeneration Potions
As with the Underground Hallow, it is recommended that the player avoid this biome until they obtain Mythril Armor. The denizens of this biome will make mining extremely difficult for a player without hardmode armor.
Underground Crimson
Monsters: Ichor Sticker, Floaty Gross, Blood Jelly, Blood Feeder, Crimson Axe
Monster Drops: Soul of Night, Ichor
Recommended Equipment: Mythril or Palladium; Ironskin Potions and Regeneration Potions
Like the underground Corruption and Hallow, the Crimson should be avoided early on in hardmode.
Underground Mushroom Biome
Monsters: Fungi Bulb, Anomura Fungus, Mushi Ladybug, Giant Fungi Bulb, Fungo Fish
Monster Drops: None
Recommended Equipment: Mythril or Palladium; Ironskin Potions and Regeneration Potions
The player can find Truffle Worms in this biome, which are used to summon Duke Fishron. The other monsters in the biome don't drop any special items. Their health is comparable to those of other underground biomes and their attacks, especially those of the Giant Fungi Bulb, can be very dangerous.
It can be very difficult to survive long enough in Hardmode biomes to mine enough ore. If the player finds they are having difficulty mining, they should consider looking for ores in the ceiling of the Underworld. This biome has the same mobs as it did pre-Hardmode, making it considerably safer than almost anywhere else in the world.
Aim to upgrade to a Cobalt Drill or Palladium Drill as quickly as possible. The Cobalt Drill and its counterpart can mine Mythril/Orichalcum. The first 100 Mythril/Orichalcum ore mined should be used to craft a Mythril Anvil and then a Mythril Drill (or their Orichalcum counterparts). The Mythril Drill can mine Adamantite/Titanium (as can the Palladium Drill on console, letting you get a head start if you had Palladium instead of Cobalt. However, the drill's power was reduced in 1.2.3., so this exploit no longer works on PC.). The first 30 Adamantite/Titanium ore mined should be used to create an Adamantite Forge or Titanium Forge. Upgrading to an Adamantite Drill or Titanium Drill isn't crucial, as it does not grant access to any new ores.
Be mindful when opening chests. A seemingly innocuous treasure chest may be a Mimic posing as a chest. Mimics will chase the player when they approach or when attacked. A good approach is to shoot any chests with a ranged weapon before opening them. This will cause any Mimics to break their ruse and attack. With this danger comes great reward, as Mimics can drop items that are incredibly useful in hardmode, such as the Cross Necklace.
Use any leftover ore to upgrade armor, then weapons, and the chainsaw last. Keep mining until enough Adamantite or Titanium is collected to craft a full set of armor, and any weapons or tools the player may want.
Collecting Souls
Collecting souls (and other miscellaneous items) is the last task the player should complete before fighting the mechanical bosses. There are three types of souls dropped by normal monsters: Soul of Light, Soul of Night, and Soul of Flight. Soul of Light can be obtained from any monster found in the Underground Hallow. Soul of Night can be obtained from any monster found in the Underground Corruption or Crimson. Soul of Flight can be obtained from Wyverns. The order in which the player obtains these souls does not matter. However, it can be advantageous to gather Souls of Flight first, as the Wings can be very useful when navigating the Underground Hallow or Underground Corruption.
Soul of Flight
Wyverns can be found at very high altitudes, at around the same level as Floating Islands. Look for Wyverns on Floating Islands, as it is much easier to fight them this way. Another popular method is to fight them in the air using Gravitation potions.
A Floating Island (Hardmode)
New Monsters: Wyvern
Monster Drops: Soul of Flight
Recommended Equipment: Adamantite, Piercing Weapons (Demon Scythe is particularly effective), Gravitation, Ironskin, Regeneration
The only hardmode addition to floating islands is the Wyvern enemy. These Wyverns are of interest because they drop Souls of Flight, which are required to craft wings.
Wyverns are very difficult to kill. They fly through the air using the same AI as worms, but they move much faster, do much more damage, and have a lot more life. They are very difficult to dodge and attack at the same time. Piercing weapons are very effective against the Wyvern, like with all segmented monsters.
Soul of Light
Souls of Light can be found by killing enemies in the Underground Hallow. Underworld Enemies spawned below the Underground Hallow will also drop Souls of Light. Keep a stock of Regeneration potions and Ironskin potions when exploring this biome. The easiest way to deal with hallowed enemies is to grapple to the ceiling and shoot at them with a ranged weapon. The opposite is true when dealing with Illuminant Bats. Drop to the ground and swing a melee weapon to deal with them. Try to gather crystal shards while looking for souls. Try to gather at least 50 souls, although more is better. If the Hallow in your world went through a Spider Nest, you can also farm the spiders, taking advantage of their fast spawn rate, for Souls of Light.
Soul of Night
Souls of Night can be found by killing enemies in the Underground Corruption and Crimson. Underworld Enemies will also drop Souls of Night if they spawn below the Underground Corruption or Crimson. Much of the same rules apply with this biome. Use Ironskin and Regeneration potions when exploring. Try not to stay in one place for too long in this biome. Clingers and Corruptors can both shoot projectiles, and World Feeders can easily attack a stationary player. Make use of the Rocket Boots and/or Wings to dodge projectiles and keep moving around. Gather at least 50 souls, more is better. Look for Cursed Flames or Ichor while gathering souls. Also, the spider nest farming method works well for Souls of Night too.
Miscellaneous Items
There are a few other important items not mentioned above.
- Pixies from the surface Hallow will drop Pixie Dust, which is needed to make Greater Healing Potions, or combined with Unicorn Horns to make Holy Arrows.
- Mummies from Corrupted Desert will drop Dark Shards; Mummies from Hallowed Desert will drop Light Shards. Collect these to craft the Dao of Pow.
- Biome Key Molds have an extremely rare chance to drop from enemies in the five main biomes (Hallow, Corruption, Crimson, Jungle, and Snow). These allow you to craft keys to open the Biome Chests in the Dungeon, which contain extremely powerful items.
- Mimics can appear in just about any biome. Look for Mimics using Hunter Potions. Hunt for mimics until one drops a Philosopher's Stone.
The Three Mechanical Bosses
Once you have a stockpile of the various hardmode resources, it's time to begin preparing to defeat the first three hardmode bosses. Each must be summoned with an item that can be crafted or dropped by enemies. It's also possible for one to spawn on its own at sunset, though the player will probably not be able to defeat it unless they are well prepared.
Recommended Equipment for Mechanical Bosses
Following is a list of equipment recommendations for use against the mechanical bosses. This is not an exhaustive list; other items may prove to be effective. This list assumes no Hardmode bosses have been defeated yet:
Ranged Characters
Recommended Weapons: Adamantite or Titanium Repeater or Clockwork Assault Rifle or Uzi
Recommended Armor: Titanium armor with Titanium Helmet, Adamantite Armor with Adamantite Mask
Recommended Accessories: Frostspark Boots, Wings, Ranger Emblem, Obsidian Shield, Star Veil Charm of Myths; all with Defense (highly recommended) or Damage enhancing prefixes
Recommended Buffs: Ironskin Potion, Regeneration Potion, Shine Potion, Swiftness Potion, Bowl of Soup, Archery Potion (with Adamantite or Titanium Repeater)
Magic Characters
Recommended Weapons: Laser Rifle, Flamelash, or Crystal Storm/Golden Shower. (Golden Shower works extremely well against the Destroyer when you aim along the arc of the Destroyer.) Also, the Crystal Storm, being the mana Megashark of the game, works very well against all hardmode bosses.
Recommended Armor: Titanium armor with Titanium Headgear, Adamantite Armor with Adamantite Headgear
Recommended Accessories: Frostspark Boots, Wings, Mana Flower, Celestial Cuffs, Star Veil, Obsidian Shield, Charm of Myths; all with Defense (highly recommended) or Damage enhancing prefixes
Recommended Buffs: Ironskin Potion, Regeneration Potion, Shine Potion, Swiftness Potion, Mana Regeneration Potion, Magic Power Potion, Bowl of Soup, Crystal Ball
Melee Characters
Recommended Weapons: Dao of Pow, Titanium Sword, Beam Sword, Frostbrand or Titanium Trident, or Mushroom Spear, Flamarang, Bananarang
Recommended Armor: Titanium armor with Titanium Mask, Adamantite Armor with Adamantite Helmet
Recommended Accessories: Frostspark Boots, Wings, Warrior Emblem, Star Veil, Obsidian Shield, Charm of Myths; all with Defense (highly recommended) or Damage enhancing prefixes
Recommended Buffs: Ironskin Potion, Regeneration Potion, Shine Potion, Swiftness Potion, Bowl of Soup, Ale
Summoning Characters
Recommended Weapons: Spider Staff, Queen Spider Staff, Imp Staff
Recommended Armor: Spider armor
Recommended Accessories: Panic Necklace, Wings, Avenger Emblem, Star Veil, Obsidian Shield, Frostspark Boots, Charm of Myths; all with Defense (highly recommended) or Damage enhancing prefixes
Recommended Buffs: Ironskin Potion, Regeneration Potion, Shine Potion, Swiftness Potion, Bowl of Soup, Ale, Summoning Potion,Healing Potion
Building a Hardmode Arena
Proper terrain preparation is almost completely essential to successfully defeat all three mechanical bosses. Players who intend to solo the hardmode bosses will find the task very challenging without an adequate arena.
For solo players, build a very long bridge out of wood platforms. The bridge should be at least 1000 platforms long, but 2500 is recommended. Build the bridge a large distance from the ground; the ground should not be visible from any part of the bridge. Place blocks at each end of the bridge to prevent running off of the sides.
For team players, the arena can be much shorter. A team arena can be between 250-500 platforms long, but should also have 2-3 separate rows. Space the rows so they are not too close together, but are reachable with rocket boots.
Consider setting up Heart Statues and Star Statues on 1 Second Timers, as well as Heart Lanterns, Campfires, and pools of Honey as these can make the battles much easier.
Fighting the Mechanical Bosses
The Destroyer is arguably the easiest of the three bosses, and should be fought first. The Destroyer has a chance of spawning naturally at sunset with the message "You feel vibrations deep below..." It can also be summoned by using a Mechanical Worm at night. Fight The Destroyer first if you prefer melee, as its souls can be used to craft Light Discs.
The Destroyer
Life: 80000
Defense: 0 (Head), 30 (Body), 35 (Tail)
Damage: 60 (Head), 40 (Body), 20 (Tail), 22 (Death Laser)
Minions: Probes
Drops: 20-44 Hallowed Bar, 20-40 Soul of Might, 5-15 Greater Healing Potion
Recommended Equipment: See above section "Recommended Equipment for Hardmode Bosses"
The Destroyer is the hardmode version of Eater of Worlds. The Destroyer uses worm AI, burrowing into the ground and making long sweeping passes at the player. The Destroyer is much longer than the Eater of Worlds, and moves much faster. Unlike the Eater of Worlds, the Destroyer does not break into segments. The Destroyer's segments all have a shared life of 80000. All of its segments will be destroyed when this this life reaches 0. The Destroyer will release Probes as it takes damage. Probes will drop hearts when killed. If the Destroyer is not defeated before the sun rises, it will run away.
Piercing weapons and AoE weapons are particularly effective against this boss. The Destroyer will frequently try to trap you with its body. Use the grappling hook to get out of these situations. The Destroyer's drops come from its head when it is killed. When its health is very low, wait until the head is visible before finishing it off.
As of 1.2, hallowed equipment (except for the Drax/Pickaxe Axe, which is necessary for progression) doesn't require boss souls, only Hallowed Bars, which you can farm up from the Destroyer. This means that the next 2 hardmode bosses can be easily skipped - especially considering that the Flamethrower and Magical Harp are seemingly underpowered compared to something like Death Sickle. Rainbow Rod is useful, though.
The next 2 bosses are roughly the same at the level of difficulty, so you it's up to you to decide who to fight now. Skeletron Prime is recommended for the ranged player, as you can make a Flamethrower.
Skeletron Prime
Life: 25000 (Head), 6000 (Cannon), 8000 (Saw), 8000 (Vice), 5000 (Laser)
Defense: 25 (Head), 50 (Head, while spinning), 25 (Cannon), 40 (Saw), 35 (Vice), 20 (Laser)
Damage (Melee): 50 (Head), 100 (Head, while spinning), 30 (Cannon), 52 (Saw), 45 (Vice), 29 (Laser)
Damage (Grenade): 40
Damage (Laser): 25
Drops: 19-35 Hallowed Bar, 20-40 Soul of Fright, 5-15 Greater Healing Potions
Recommended Equipment: See above section "Recommended Equipment for Hardmode Bosses"
Skeletron Prime is the hardmode version of Skeletron. Skeletron Prime behaves very similarly to its predecessor. It alternates between attacking with its various appendages and using a deadly spinning attack with its head. Skeletron Prime has very high life and can take a long time to kill. If Skeletron Prime is not defeated before the sun rises, it will use an attack that instantly kills the player on touch.
The damage from all of its arms can add up quickly. Try to destroy the arms before focusing on the head. The Prime Saw and Prime Vice are very difficult to avoid and should be destroyed first. The Prime Laser is only a medium threat and should be killed after the Vice and Saw. The Prime Cannon can be ignored. There are two methods to avoiding Skeletron Prime's attacks. The first is to use the maximum speed of Hermes Boots to stay out of reach (Prime Saw will always be able to keep up), combined with well-timed jumps to throw off the aim of Skeletron Prime's spinning head attack. The second method is to use Gravitation potions for a similar effect, though it can be harder to dodge some of Skeletron Prime's attacks this way.
The last of the three mechanical bosses are the Twins. This boss is the hardest of the three for most players, and should be defeated last. The Twins have a chance of spawning at sunset with the message "This is going to be a terrible night..." They can also be summoned by using a Mechanical Eye at night. The Twins are recommended for magic and summoning players, as the Rainbow Rod, Magical Harp, and Optic Staff are very good weapons

The Twins
Retinazer
Life: 20000
Defense: 10 (First Stage), 25 (Second Stage)
Damage (Melee): 50 (First Stage), 75 (Second Stage)
Damage (Laser): 20 (First Stage), 25 (Second Stage), 20 (Second Stage, Rapid Fire)
Spazmatism
Life: 20000
Defense: 10 (First Stage), 35 (Second stage)
Damage (Melee): 50 (First Stage), 75 (Second Stage)
Damage (Cursed Flame): 25 (First Stage), 30 (Second Stage)
Drops: 20-35 (Hallowed Bar), 20-40 Soul of Sight, 5-15 Greater Healing Potion (Drops from last boss to be killed)
Recommended Equipment: See above section "Recommended Equipment for Hardmode Bosses"
The Twins are the hardmode version of Eye of Cthulhu. Both Twins will alternate between their signature attack (Laser for Retinazer, Cursed flame for Spazmatism), and charging at the player. The two choose attacks independently of the other. There will be times when one uses their signature while the other charges, when they both use their signature, and when they both charge. When a Twin gets down to half health (12000 hp), it will transform into a more powerful second stage. They will gain a rapid-fire version of their signature attack and a much more damaging melee attack. The first Twin killed will not yield any drops. When the second Twin is killed, the listed drops will appear where it was killed. The eyes can be killed in any order. If the Twins are not defeated before the sun rises, they will run away.
Each twin is much more dangerous in its second stage. Focus on one Twin at a time, and only move on to the second Twin when the first is destroyed. Retinazer's stage one signature is less dangerous, so kill Spazmatism first. The Twins have a charging attack that is extremely difficult to dodge. This charging attack will cripple a player if they can't consistently dodge it. There are two methods to dodging the attacks, like with Skeletron Prime. The first method is to reach max running speed with Hermes Boots and use timed jumps to throw off the trajectory of the charge. Jump just as a Twin is about to start a charge, while maintaining run speed. This will cause the charging Twin to charge too high, and then overcorrect as they try to charge again. The second method is to use Gravitation Potions and constantly fall - they won't be able to catch up to you. If a Twin is off screen too long, it will despawn like any other enemy. This can be used to make Spazmatism despawn and simplify the fight greatly.
Return to the Underground Jungle
Once any mechanical boss has been defeated, new challenges unlock, and the player gains access to new materials to work with, starting with the souls and bars dropped by the boss. Hallowed Bars can be used to craft Hallowed Armor and several melee weapons, but most importantly the Drax or Pickaxe Axe which will be used to harvest the next tier of ore. The new souls (Might, Fright, and Sight) are used to craft 2-3 new weapons and tools each.
Once any mechanical boss is defeated, changes are made to the Underworld and the Underground Jungle, and a new event has a chance of occuring.
Monsters: Pirate Deckhand, Pirate Deadeye, Pirate Corsair, Pirate Crossbower, Pirate Captain, Parrot
Monster Drops: Coin Gun, Lucky Coin, Discount Card, Cutlass, golden furniture, sailor outfit
Recommended Armor: Hallowed Armor
Recommended Weaponry: Death Sickle, Chlorophyte Saber, Chlorophyte Partisan, Optic Staff, Golden Shower, Uzi, Megashark
It can occur after certain conditions are met, or alternatively, when the player uses a Pirate Map.
When a Pirate Invasion spawns or is summoned using a Pirate Map, a message will appear saying "Pirates are approaching from the (East/West)!" When the Pirates' initial wave reaches the spawn, their arrival is announced with "The Pirates have arrived!" See Pirate Invasion for more info and tips.
The Solar Eclipse is a very rare event and one recommended for melee characters. You may need to do many before obtaining every item.
Monsters: Frankenstein, Swamp Thing, Reaper, Vampire, Eyezor
Monster Drops: Death Sickle, Moon Stone, Broken Hero Sword, Broken Bat Wing, Eye Spring
Recommended Equipment: Hallowed or Chlorophyte
Solar eclipses occur randomly at dawn and last throughout the day, much like the Blood Moon. The enemies here are extremely dangerous and it may require gear from the hardmode jungle and dungeon to efficiently farm them. The Death Sickle is good for melee characters for high DPS and piercing ability. Sword users should also take special note of the Broken Hero Sword that rarely drops -- one can create the True Excalibur or True Night's Edge, while three are required for the Terra Blade.

The Underworld (Hardmode)
New Monsters: Lava Bat, Red Devil
Monster Drops: Magma Stone, Unholy Trident, Fire Feather
Recommended Equipment: Hallowed
Two new enemies now spawn in the Underworld. Lava Bats are simply a stronger version of the Hellbat. Red Devils are the real danger, being able to deal over 100 damage with their trident attack. It's recommended that the player does anything they need to do in the Underworld (such as farming the Wall of Flesh for its special drops) before defeating mechanical bosses; otherwise, doing anything here may become much harder.
Underground Jungle (Hardmode)
New Monsters: Moth, Moss Hornet, Angry Trapper, Arapaima, Giant Tortoise
Monster Drops: Uzi, Bezoar, Turtle Shell, Butterfly Dust, Tattered Bee Wing
Notable Resources: Chlorophyte Ore, Life Fruit
Recommended Equipment: Hallowed
Now that one or more of the mechanical bosses have been defeated, chlorophyte ore spawns throughout the underground jungle, and life hearts can occasionally be found growing amongst the foliage. Harvesting these two items should be top priority. Life fruits increase the player's health by 5, up to a maximum of 500, and chlorophyte can be crafted into weapons and armor a step above hallowed equipment.
Players using melee or ranged weapons can make even better armor by acquiring an additional material. Creating a house in the glowing mushroom biome will spawn the Truffle NPC, who sells the autohammer. The autohammer turns chlorophyte bars into shroomite bars, which are used to create Shroomite armor, the best armor in the game for ranged attackers. Giant Tortoise drop Turtle Shell, which when combined with Chlorophyte Bars make Turtle armor, a powerful melee armor set.
Plantera
Also found in the underground jungle is a mysterious purple bulb. Destroying this bulb with a drill or pickaxe summons the boss Plantera.
Plantera
Life: 30000
Defense: 14
Damage: 50
Drops: Temple Key, Grenade Launcher, Pygmy Staff, Venus Magnum, Nettle Burst, Leaf Blower, Flower Pow, Wasp Gun, Seedling, The Axe
Recommended Equipment: Chlorophyte, Turtle, or Shroomite; piercing weapons
Plantera is one of the easier bosses if you have an arena. Simply bomb out a large cave and put a short wall in the middle of the cave. Put platforms below the wall so that you have a place to grapple to, and summon Plantera. Run around the wall you built and you should be fine.
Upon defeating Plantera, the message "Screams are echoing from the dungeon..." appears, and powerful new enemies are added to the dungeon. The boss also drops the Temple Key, which is used to open the Jungle Temple.
Lihzahrd Temple
Lihzahrd Temple
Monsters: Lihzahrd (NPC) Flying Snake, Golem
Monster Drops: Lihzahrd Power Cell, Lizard Egg
Recommended Equipment: Chlorophyte, Turtle, or Shroomite
After defeating Plantera, you will pick up a Temple Key that is used to unlock the door to the Lihzahrd (also known as the Jungle Temple). It is small compared to the normal dungeon, but it contains far more traps.
Golem
At the bottom of the Lihzahrd there is a boss room with a lihzahrd altar. Using a lihzahrd power cell on it summons the Golem.

Golem
Life: 15000 (Head), 8000 (Body), 6000 (Fist)
Defense: 24
Damage: 70
Drops: Stynger, Stynger Bolt, Possessed Hatchet, Sun Stone, Eye of the Golem, Picksaw, Heat Ray, Staff of Earth, Golem Fist, Golem Trophy, Beetle Husk
Recommended Equipment: Chlorophyte, Turtle, or Shroomite and post-Plantera weapons
The Golem drops the Picksaw, which enables the player to mine Lihzahrd Brick. The Stynger is a very effective explosive weapon. Possessed Hatchet and Golem Fist are melee weapons with considerable range. Beetle Husk can make the best form of melee armor. Heat Ray and Staff of Earth are efficient in the Hardmode Dungeon, where you should go next. The bonuses of the Sun Stone and Eye of the Golem will help as well.
Return to the Dungeon

Dungeon Biome (Hardmode)
New Monsters: Rusty Armored Bones, Blue Armored Bones, Bone Lee, Paladin, Tactical Skeleton, Dungeon Spirit, Skeleton Commando, Necromancer, Giant Cursed Skull, Diabolist, Ragged Caster, Skeleton Sniper
Monster Drops: Shadowbeam Staff, Keybrand, Ectoplasm, Sniper Rifle, Rifle Scope, Tactical Shotgun, Paladin's Shield, Paladin's Hammer, Wisp in a Bottle, Magnet Sphere, Tabi, Black Belt, Spectre Staff, Inferno Fork
Recommended Equipment: Hallowed, Chlorophyte, Shroomite, Turtle, Beetle
After defeating Plantera, the dungeon's difficulty increases dramatically. There are stronger enemies and new drops from each. Also note that the dungeon has 5 biome-related chests. To unlock each one, you may need to defeat many of the respective biome's enemies to get a key mold, which is used to craft the key to unlock the chest. Dungeon Spirits, which may spawn after the player kills enemies in the dungeon, drop Ectoplasm, which is used to craft Spectre armour, an endgame armour for mages.
Duke Fishron
Duke Fishron may be summoned by fishing in the Ocean biome whilst using a Truffle Worm as bait.
Life: 50000
Defense: 50
Damage: 100 (melee)
Drops: Fishron Wings, Flairon, Tsunami, Razorblade Typhoon, Tempest Staff, Bubble Gun
Recommended Equipment: Chlorophyte, Turtle, Beetle, Shroomite, or Spectre, Greater Healing Potions and hardmode-Dungeon-tier weapons; Gravitation Potions
To defeat the Duke, use your gravity potion, fly up into the air and move in one direction while firing at the Duke. Try not to fly into a Floating Island or the top of the map.
Duke Fishron's drops are very useful during the moon invasions and it is recommended to defeat the Duke before summoning the moons. However, some players may need Moon-tier weapons to defeat the Duke, especially those with magic- or melee-based builds. Once some of the Duke's drops are acquired, it becomes much easier to defeat the Duke again.
The Pumpkin Moon
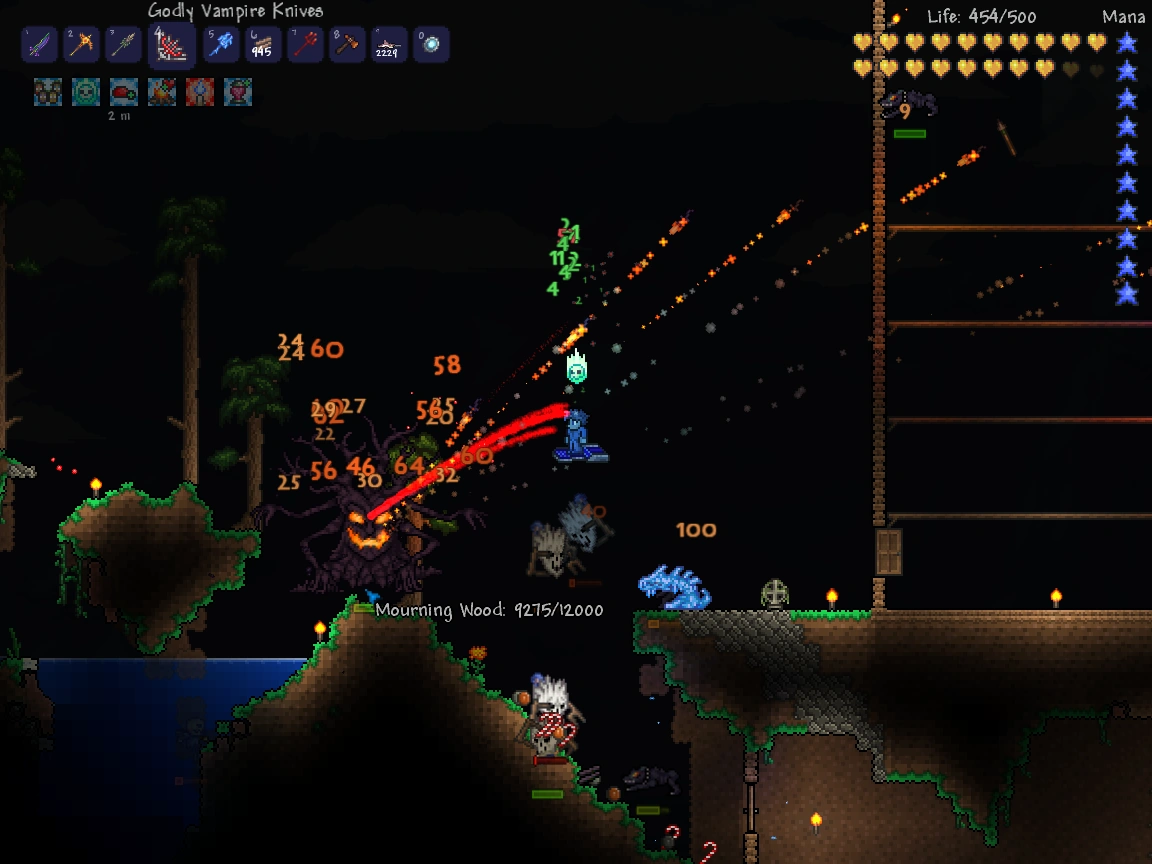

Pumpkin Moon
Monsters: Scarecrow, Splinterling, Hellhound, Poltergeist, Mourning Wood, Headless Horseman, Pumpking
Monster Drops: Scarecrow costume, Spooky Wood, Cursed Sapling, Spooky Twig, Spooky Hook, Necromantic Scroll, Stake Launcher, Mourning Wood Trophy, Jack 'O Lantern Mask, The Horseman's Blade, Pumpking Trophy, Candy Corn Rifle, Raven Staff, Jack 'O Lantern Launcher, Bat Scepter, Black Fairy Dust, Spider Egg
Recommended Equipment: Chlorophyte, Turtle, Spectre, or Shroomite
The Pumpkin Moon is summoned at night using the Pumpkin Moon Medallion. Unlike the Blood Moon and Solar Eclipse, enemies appear in up to 15 consecutive waves, similar to an invasion. During this event, the moon turns orange with a jack 'o lantern face.
The Frost Moon
Pumpkin Moon
Monsters: Present Mimic, Flocko, GingerBread, Zombie Elf, Elf Archer, Nutcracker, Yeti, Elf Copter, Everscream, Krampus, Ice Queen, Santa-NK1
Monster Drops: Christmas Tree Sword, Festive Wings, Razorpine, Christmas Hook, Everscream Trophy, Blizzard Staff, North Pole, Ice Queen Trophy, Snowman Cannon, Baby Grinch Mischief's Whistle, Reindeer Bells, Elf Melter, Chain Gun, Santa-NK1 Trophy
Recommended Equipment: Chlorophyte, Turtle, Spectre, or Shroomite
The Frost Moon is summoned at night using the Naughty Present. It is the most difficult event in the game, as it is meant for endgame players. Like the Pumpkin Moon, enemies appear in 15 standard waves as well as 5 extra bonus waves. During this event, the moon changes color to look like the face of a snowman.
Endgame
After defeating the moon invasions and acquiring all their drops, the player is free to do whatever they want. They may build a large castle or PvP with other top-tier players, or they may try to be the most powerful Terrarian in the world. The only end is the player's imagination! (Until the 1.3 update)
Something you could do :
- Reach top tier in fishing
- Beat multiple Bosses at once
- Find bugs so developers can fix them
- Play on an online server
- Acquire the best weapons and tools
- Try to complete the game as a different Class
- Get every single Trophy and Banner