mNo edit summary |
|||
| Line 1: | Line 1: | ||
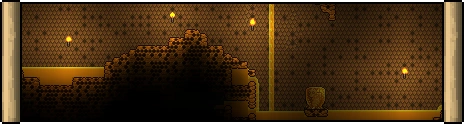
| + | [[File:BiomeBannerHive.png|center]] |
||
| − | {{npc infobox |
||
| + | {{dablink|For the background object, see [[Beehive]].}} |
||
| − | | type = Boss |
||
| + | [[File:BeeHive.jpg|thumb|right|300px|A Bee Hive.]] |
||
| − | | environment = The Underworld |
||
| + | [[File:Beehive.png|thumb|right|300px|The Larva.]] |
||
| − | | ai = Wall of Flesh Body AI<!-- main segment --> |
||
| + | A '''Bee Hive''' is a mini-[[biome]] located in the [[Underground Jungle]]. It is made from [[Hive]] blocks and contains [[Honey]] and typically one [[Larva]]. Destroying the Larva summons the [[Queen Bee]] [[boss]]. Any projectile, tool, weapon, or enemy will destroy the Larva, generally with a single hit, so caution should be taken around Larva when one is not ready to fight the Queen Bee. |
||
| − | | id = 113 |
||
| − | | damage = 50 melee |
||
| − | | life = 8000 (shared) |
||
| − | | defense = 12 |
||
| − | | knockback = 100 |
||
| − | | money = {{gc|8}} |
||
| − | | Healing Potion|5-15 | 100% |
||
| − | | Pwnhammer|1| 100% |
||
| − | | Breaker Blade|1| 16.67% |
||
| − | | Clockwork Assault Rifle|1| 16.67% |
||
| − | | Laser Rifle|1| 16.67% |
||
| − | | Warrior Emblem|1| 16.67% |
||
| − | | Sorcerer Emblem|1| 16.67% |
||
| − | | Ranger Emblem|1| 16.67% |
||
| − | | Wall of Flesh Mask|1|14.29%{{pc icon}} |
||
| − | | Wall of Flesh Trophy|1|10% |
||
| ⚫ | |||
| ⚫ | |||
| − | The '''Wall of Flesh''' is a [[Boss]] located in [[The Underworld]]. It is the final and most difficult Boss in [[Pre-Hardmode]]. Beating it will trigger [[Hardmode]]. |
||
| + | {{Biome |
||
| + | |monsters=<nowiki /> |
||
| + | :{{item link|Queen Bee|size=40px}} (boss) |
||
| + | '''From destroying [[Hive]] blocks:''' |
||
| − | To defeat the Wall of Flesh, you must attack its eyes or its mouth. They all share the same life counter, so shooting at any of the three will deplete the boss' total health. Shooting at the eyes causes the most damage, as they have the lowest defense. Its other body parts are transparent to weapons, so attacking those will not deplete its health. |
||
| + | :{{item link|Bee}} |
||
| + | |drop= |
||
| − | == Summoning == |
||
| + | '''From Queen Bee:''' |
||
| − | [[File:2013-10-15_00003.jpg|thumb|300px|The Wall of Flesh summoned.]] |
||
| + | :{{item link|Bee Gun|size=30px}} |
||
| − | The Wall of Flesh is summoned when a [[Guide Voodoo Doll]] is dropped into [[lava]] in The Underworld while the [[Guide]] is alive (this must be done in The Underworld; lava in any other [[layer]] will not work). This kills the Guide and summons the boss. It can be done either by killing the [[Voodoo Demon]] that carries the Doll while it flies above a lava pool, or by picking up the dropped Doll and throwing it into the lava yourself. In the {{mobile icon}}[[mobile version]], you can either throw it into lava '''OR''' tap it in your hotbar. |
||
| + | :{{item link|Bee Keeper|size=25px}} |
||
| + | :{{item link|The Bee's Knees|size=25px}} |
||
| + | :{{item link|Honey Comb|size=20px}} |
||
| + | :{{item link|Nectar|size=20px}} |
||
| + | :{{item link|Hive Wand|size=20px}} |
||
| + | :{{item link|Bee Hat|size=20px}} |
||
| + | :{{item link|Bee Shirt|size=20px}} |
||
| + | :{{item link|Bee Pants|size=20px}} |
||
| + | :{{item link|Beenade}} |
||
| + | :{{il2l|Queen Bee Trophy|Queen Bee <br /> Trophy|size=20px}} |
||
| + | |drop2= |
||
| − | If the Guide is not alive when the Doll is destroyed, the Wall of Flesh will not spawn, and the Doll will be wasted. If you have already summoned the Wall of Flesh recently, make sure the Guide has respawned before attempting to summon the Wall again. On the PC and console versions, one can use the housing menu to see which NPCs are still alive. |
||
| + | '''From Queen Bee (cont.):''' |
||
| + | :{{item link|Bottled Honey|size=20px}} |
||
| + | :{{item link|Queen Bee Mask|size=20px}} |
||
| + | :{{item link|Bee Wax|size=20px}} {{pc icon}} {{mobile icon}} |
||
| + | :{{item link|Honeyed Goggles|size=20px}} {{pc icon}} {{mobile icon}} |
||
| + | :{{item link|Hive Pack|size=20px}} (in [[Expert Mode]] only) {{pc icon}} |
||
| + | '''From terrain:''' |
||
| − | The Wall of Flesh's sweep direction is determined by its spawn location. Spawning it anywhere left of the center of the world will cause it to sweep from left to right, while spawning it right of center will cause it to sweep right to left. Maximum fight space can be achieved by spawning it at the extreme right or left of the world, though these areas have fewer natural structures and may require additional lava survival gear or construction. |
||
| + | :{{item link|Hive}} |
||
| + | :{{item link|Hive Wall}} |
||
| + | :{{item link|Honey}} |
||
| ⚫ | |||
| − | == |
+ | == Achievement == |
| + | [[File:Achievement_Wheres_My_Honey.png]] '''Where's My Honey?''' is the [[achievement]] you earn when you enter your first Bee Hive ({{pc icon}} only). |
||
| − | The Wall of Flesh is very large, occupying the entire screen vertically. Once spawned, it steadily sweeps across the map in a single direction, forcing the player to constantly move away for the duration of the fight while contending with the Underworld's usual hazards. The Wall moves faster as it gets more wounded. It must be killed before it reaches the end of the map, otherwise it will despawn and all living players in the underworld will die (with the unique death message "<PLAYERNAME> was Licked"). |
||
| + | ==Notes== |
||
| − | Keep this behavior in mind when preparing an [[Arena]], as the fight will take you many screens away (unless you are already using [[Hardmode]] gear). Any platform you build will need to be very long (ie. tile length reaching in the thousands). |
||
| + | *If the hive appears to not have Larvae, do not swing your weapons under [[Honey]] unless you are ready to fight [[Queen Bee]]. The Larvae may spawn under the surface of the Honey, concealing the location of one or more Larvae. Destroying Larvae under honey may result in a surprise attack from Queen Bee. Breaking Hive blocks will result in the spawning of a Bee and Honey. |
||
| ⚫ | |||
| − | * The Wall has small mouths called The Hungry, each attached by a long vein, which move towards and damage players. As the Wall of Flesh's main body takes damage, they deal more damage and become more resistant to attacks. When they've suffered enough damage, they detach and chase players. |
||
| + | *Honey forms pools at the bottom of hives. The honey provides a regeneration buff, but it will greatly slow the player's mobility and make dodging difficult. |
||
| − | * The Wall's eyes fire lasers. As its health decreases, the lasers increase in damage, speed, and frequency. |
||
| + | *Honey and [[Honey Block]]s spawn naturally in small amounts in the vicinity of a Bee Hive, which can help in locating one. |
||
| − | * The Wall burps [[Leech]]es from its mouth that chase players. |
||
| + | *If the hive is large enough, one may be able to construct an arena out of it by clearing the walls of the hive and adding [[Wooden Platform]]s. This is not only useful for the [[Queen Bee]] fight, but also for the [[Plantera]] fight. |
||
| + | *Beware of pouring water onto the honey when the Larvae is partly submerged into the honey pool, since water and honey create honey blocks. This will break the Larvae, causing an unwanted fight to occur. |
||
| + | ==Trivia== |
||
| − | Immediately upon the Wall of Flesh's spawning, the player is afflicted with the [[Horrified]] debuff, which prevents fleeing from the battle. Players that attempt to leave the Underworld or get behind the Wall of Flesh are grabbed by [[The Tongue]] and pulled directly into the Wall of Flesh's mouth, inflicting serious damage. If the player teleports beyond the reach of the tongue by using a [[Magic Mirror]], [[Recall Potion]] or other means of quick transport, the debuff instead kills them immediately, returning the message “<PLAYER NAME> tried to escape”. |
||
| + | *More than one Bee Hive can exist in a world. |
||
| + | *The size of Bee Hives can influence the number of Larvae. Larger Hives can contain 2 Larvae, and smaller Hives have a low chance of containing no Larvae at all. |
||
| − | == |
+ | == History == |
| + | {{history|1.2.4|Increased spawn rate.}} |
||
| − | When the Wall of Flesh is killed, it leaves its drops in a floating, fully enclosed box of [[Demonite Brick]]s to prevent its drops from falling into lava. One of the drops is always the [[Pwnhammer]], which becomes an essential tool. |
||
| ⚫ | |||
| + | {{biomes}} |
||
| − | After defeating the Wall for the first time, your world will enter [[Hardmode]], and will be filled with tougher enemies. This will also generate two diagonal stripes of [[The Hallow]], and [[Corruption]] or [[Crimson]], in a "V" pattern from the center of the Underworld all the way to the [[Surface]] (and higher, as [[Floating Islands]] in these paths will also be converted). |
||
| + | [[Category:Environments]] |
||
| + | {{translation project}} |
||
| + | [[fr:Ruche d'Abeilles]] |
||
| − | '''''Note:''' See [[Hardmode]] for more extensive information.'' |
||
| + | [[ru:Пчелиный улей]] |
||
| − | |||
| − | == Components == |
||
| − | {| |
||
| − | |- style="vertical-align:top" |
||
| − | |{{npc infobox |
||
| − | | name = Wall of Flesh Eye |
||
| − | | id inpiecuvhdfuivbfeuvbeifubvefiubvfifeunviuefbvef |
||
| − | |||
| − | | knockback = 100 |
||
| − | | damage = 11-15 eye laser (depending on health)<br>50 melee |
||
| − | | life = 8000 (shared) |
||
| − | | defense = 0 |
||
| − | }} |
||
| − | |{{npc infobox |
||
| − | | name = Wall of Flesh Mouth |
||
| − | | image = Wall of Flesh (technical).png |
||
| − | | id = 114 |
||
| − | | ai = |
||
| − | | knockback = 100 |
||
| − | | damage = 70 melee |
||
| − | | life = 8000 (shared) |
||
| − | | defense = 15 |
||
| − | }} |
||
| − | |- style="vertical-align:top" |
||
| − | |{{npc infobox |
||
| − | | name = The Hungry |
||
| − | | id = 115 |
||
| − | | ai = Man Eater AI |
||
| − | | damage = 30 (WoF health 75%+)<br>45 (WoF health 50%+)<br>60 (WoF health 25%+)<br>75 (WoF health <25%) |
||
| − | | life = 240 |
||
| − | | defense = 10 (WoF health 75%+)<br>20 (WoF health 50%+)<br>30 (WoF health 25%+)<br>40 (WoF health <25%) |
||
| − | | knockback = -10 |
||
| − | }} |
||
| − | |{{npc infobox |
||
| − | | name = The Hungry II |
||
| − | | id = 116 |
||
| − | | ai = Demon Eye |
||
| − | | damage = 30 |
||
| − | | life = 80 |
||
| − | | defense = 6 |
||
| − | | knockback = 20 |
||
| − | | Heart|1|75% |
||
| − | }} |
||
| − | |} |
||
| − | |||
| ⚫ | |||
| − | * Take care to avoid accidentally letting a [[Voodoo Demon]] drop its Doll into Lava, as this will also summon the Wall of Flesh. |
||
| − | * If you have problems getting the Guide to spawn, make sure there isn't an [[Event]] in progress. Traveling back to your world's original [[spawn]] point can reveal an ongoing event, like a [[Goblin Invasion]], and allow you to complete it. It also must be [[day]]time for the Guide to respawn. |
||
| − | |||
| ⚫ | |||
| − | {{strategies|Guide:Wall of Flesh strategies}} |
||
| − | * Target the eyes rather than the mouth, since the eyes have 0 defense. |
||
| − | * You can also target the mouth, because it is safer due to the fact that the eyes shoot lasers, and getting close to the eyes can heavily damage you. |
||
| − | * Mobility-enhancing items, such as [[Gravitation Potion]], [[Rocket Boots]] and various [[Hooks]] can make traversing the underworld much easier. Similarly, items like [[Obsidian Skin Potion]]s and [[Lava Waders]] can mitigate the underworld's ambient hazards. |
||
| − | * You may want to make a backup of your world in case you discover that you weren't ready for Hardmode yet. |
||
| − | * The Wall of Flesh attempts to cover the entire Underworld cavern space by moving its eyes up and down; it orients by existence/absence of [[Ash block]]s 4-5 tiles above and beneath the eyes. That means making a bridge out of [[ash]] will make the eyes stay at constant height 4-7 blocks from the bridge. |
||
| − | * [[Water Walking Potion]], [[Lava Waders]], [[Rocket Boots]]/[[Spectre Boots]], or [[Obsidian Skin Potion]] are of great help in mitigating the Underworld's many lava pools. |
||
| − | |||
| − | == History == |
||
| − | {{History|1.2.3|Now has a chance to drop the [[Wall of Flesh Mask]].}} |
||
| − | {{History|1.2|Now has a chance to drop the [[Wall of Flesh Trophy]].}} |
||
| ⚫ | |||
| − | |||
| − | {{Master Template Characters |
||
| − | | show-boss = yes |
||
| − | }} |
||
| − | [[ru:Стена плоти]] |
||
Revision as of 13:57, 26 May 2016
For the background object, see Beehive.
A Bee Hive.
The Larva.
A Bee Hive is a mini-biome located in the Underground Jungle. It is made from Hive blocks and contains Honey and typically one Larva. Destroying the Larva summons the Queen Bee boss. Any projectile, tool, weapon, or enemy will destroy the Larva, generally with a single hit, so caution should be taken around Larva when one is not ready to fight the Queen Bee.
Contents
| Bee Hive | |||||||||||
|---|---|---|---|---|---|---|---|---|---|---|---|
| Characters | Unique Drops | ||||||||||
From destroying Hive blocks: |
From Queen Bee:
|
From Queen Bee (cont.):
From terrain: | |||||||||
Achievement
File:Achievement Wheres My Honey.png Where's My Honey? is the achievement you earn when you enter your first Bee Hive (Template:Pc icon only).
Notes
- If the hive appears to not have Larvae, do not swing your weapons under Honey unless you are ready to fight Queen Bee. The Larvae may spawn under the surface of the Honey, concealing the location of one or more Larvae. Destroying Larvae under honey may result in a surprise attack from Queen Bee. Breaking Hive blocks will result in the spawning of a Bee and Honey.
Tips
- Honey forms pools at the bottom of hives. The honey provides a regeneration buff, but it will greatly slow the player's mobility and make dodging difficult.
- Honey and Honey Blocks spawn naturally in small amounts in the vicinity of a Bee Hive, which can help in locating one.
- If the hive is large enough, one may be able to construct an arena out of it by clearing the walls of the hive and adding Wooden Platforms. This is not only useful for the Queen Bee fight, but also for the Plantera fight.
- Beware of pouring water onto the honey when the Larvae is partly submerged into the honey pool, since water and honey create honey blocks. This will break the Larvae, causing an unwanted fight to occur.
Trivia
- More than one Bee Hive can exist in a world.
- The size of Bee Hives can influence the number of Larvae. Larger Hives can contain 2 Larvae, and smaller Hives have a low chance of containing no Larvae at all.
History
- 1.2.4: Increased spawn rate.
- 1.2: Introduced.
Biomes and Structures
Mini-Biomes
-
 Bee Hive
 - Granite Cave
- Graveyard()
- Jungle Temple
- Marble Cave
- Meteorite
- Oasis
- Spider Cave
Structures and Other Biomes
Template:Translation project