No edit summary |
Tag: Visual edit |
||
| Line 1: | Line 1: | ||
| + | This guide deals with the events currently implemented in Terraria as of 1.3. |
||
| − | {{item infobox |
||
| − | |type = Weapon |
||
| − | |damage = 65 |
||
| − | | damagetype = Throwing |
||
| − | |knockback = 8 |
||
| − | |stack = 99 |
||
| − | |tooltip = A small explosion that will not destroy tiles<br>Very bouncy |
||
| − | |consumable = Yes |
||
| − | |velocity = 6.5 |
||
| − | |rare = 0 |
||
| − | |use = 39 |
||
| − | |sell = {{cc|20}} |
||
| − | |id = 3116 |
||
| − | }}{{pc only}} |
||
| − | A '''Bouncy Grenade''' is a consumable throwable explosive item made of [[Pink Gel]]s and [[Grenade]]s. They are the opposite of [[Sticky Grenade]]s and will bounce off of surfaces instead of sticking to them. |
||
| − | == |
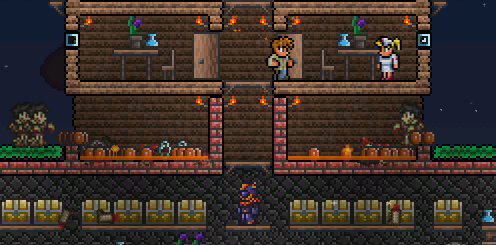
+ | == [[Blood Moon]] == |
| + | [[File:Blood Moon Defense.png|thumb|right]] |
||
| ⚫ | |||
| + | Blood Moons are events that has a 1/10 chance of occuring each night once the player has 120 life or more, and can be a hassle for newer players who are caught unaware. Not only does the monster spawn rate increase dramatically during a Blood Moon, but the max amount of enemies that can be on screen also rises significantly, allowing swarms of enemies to appear at one time. Additionally, monster spawns completely ignore reduced spawn rates by way of NPCs. [[Zombies]] can break open doors during this event, posing significant danger to NPCs inside houses. However, there are ways to profit from Blood Moons if one is prepared, especially thanks to rare spawns like [[The Groom]]. |
||
| − | {{crafting recipe |
||
| − | | tool = By Hand |
||
| − | |item1 = Grenade |
||
| − | |amount1 = 2 |
||
| − | |item2 = Pink Gel |
||
| − | |resultAmount = 2 |
||
| − | }} |
||
| + | Generally, Blood Moons can be seen safely through by simply staying in your base, as long as all doors are either prevented from opening inwards or simply barricaded by blocks. In the Console and Mobile versions, Blood Moons do not spawn truly dangerous enemies; they simply increase the spawn rate and maximum onscreen limit while introducing one new enemy, The [[Drippler]].There are also rare variations such as [[Corrupt Bunnies]] and [[Corrupt Goldfish]]. This means that players who are adept at handling zombies and [[Demon Eye|Demon Eyes]] have little to fear from this event. In hardmode, the Blood Moon becomes harder as [[Clowns]] will spawn. |
||
| − | == History == |
||
| − | {{history|1.3.0.1|Introduced.}} |
||
| − | {{Explosives}} |
||
| − | {{Master Template Consumables}} |
||
| + | == [[Goblin Army]] == |
||
| − | [[fr:Grenade Rebondissante]] |
||
| + | [[File:Stuck Goblins.png|thumb|right]] |
||
| − | {{translation project}} |
||
| + | [[Goblins]] will appear at the spawn point and kill any [[NPC]]s they find. They will continually spawn until their army limit is reached before the event will end. This group has multiple types of units with different attack patterns, so strategies for dealing with them will differ depending on the type of goblin. |
||
| + | |||
| + | *The [[Goblin Sorcerer]] will teleport no matter where the player(s) are and will shoot a projectile at you. |
||
| + | *The [[Goblin Thief]] is a fast paced enemy that can jump high and open doors faster than other goblins. |
||
| + | *The [[Goblin Peon]] is 2 blocks tall and can destroy doors. |
||
| + | *The [[Goblin Warrior]] has more health and does more contact damage to players. |
||
| + | *The [[Goblin Archer]] will shoot wooden arrows at the player(s). |
||
| + | *The [[Goblin Summoner]] is a [[Hardmode]]-exclusive goblin that is much stronger than the others, but drops much greater loot. |
||
| + | |||
| + | If the player is strong enough to easily handle the goblins, a long, flat field near the base would be the best place to deal with the army, as it would be close enough to the spawn point to appear while keeping the goblins away from the NPCs. Weapons that can do damage to multiple enemies at once such as the Space Gun or Jester's Arrows are useful for taking out crowds. |
||
| + | |||
| + | Digging a pit on both sides of your base is a simple but effective way of holding back most of the goblins, save for sorcerer and archer goblins. Just simply dig a hole five deep by six wide or dig the pit next to a wall so when the goblins try to jump the pit they will hit the wall and fall into the pit. The downside to using a pit by itself, (without lava or other traps), is that after taking out the sorcerers and archers you still need to take care of the goblins in the pit. However, you can use the [[Spiky Ball]]s dropped from the goblins you killed earlier and throw them into the pit to take them out from a safe distance. |
||
| + | |||
| + | You can also build a simple active stone/inactive stone door to prevent goblins and enemies in general from entering. |
||
| + | |||
| + | == [[Pirate Invasion]] == |
||
| + | [[File:Easy-terraria-pirates.jpg|thumb|right]] |
||
| + | [[File:Pirate Invasion Strategy.png|thumb|right]] |
||
| + | The Pirate Invasion is basically the Hardmode version of the Goblin Army. A step up from goblins, these pirates will give you a hard time if you don't you how to effectively deal with them. The Pirate Invasion has multiple types of units with different attack patterns. The event currently contains six (seven in PC) enemies, the [[Pirate Crossbower]], the [[Parrot]], the [[Pirate Deckhand]], the [[Pirate Deadeye]], the [[Pirate Corsair]], the [[Pirate Captain]], and the PC-exclusive [[Flying Dutchman]]. The player can summon the event using the pirate map which has a 1% chance to drop from mobs in the Ocean biome. The event can also happen on its own, with a 1/30 chance if it is has not happened yet in the world. The Pirate Invasion can easily give 1-2 platinum if the player does not die. |
||
| + | |||
| + | If you want to face the pirates head-on you must be prepared. Defeating these pirates is not an easy feat for a fresh hardmode player. You will want to use weapons that pierces multiple enemies at once, such as Jester's arrows or the Magical Harp. Alternatively, you can make sure the pirates stay below you, with you on a wooden platform. Then use some kind of high-level Spear to slay the attackers. When a captain attacks, focus all of your attention on him, because he will stop attacking when attacked. If you have the Uzi or Minishark/Megashark it is a good tactic to continually fly over the pirates and shoot at them. On the PC version, the Flying Dutchman will rain down cannonballs on you while spawning more of the basic pirate enemies. To take it out, fly up to it and use a piercing weapon to hit multiple cannons at once. When you take out all 4 cannons, the ship will explode. |
||
| + | |||
| + | == [[Solar Eclipse]] == |
||
| + | [[File:Eclipse Bunker.png|thumb|right]] |
||
| + | The monsters spawned during a Solar Eclipse are very powerful. The [[Reaper]] acts similarly to a [[Wraith]], but with higher stats. The [[Swamp Thing|Swamp Things]] are extremely fast, and they are as common as zombies. [[Vampire|Vampires]] are equally as common as zombies, and can turn into bats if the player is above them. [[Eyezor|Eyezors]] are not very common during a Solar Eclipse, but they can shoot lasers from their eyes, making them formidable enemies. They are slightly faster than regular zombies. [[Frankenstein|Frankensteins]] are common as zombies, but move much faster. |
||
| + | |||
| + | |||
| + | The Solar Eclipse strategy is simple to understand. Every enemy but the Reapers and Vampires use standard Fighter AI, (and even the same jump range as basic Zombies and Goblins,) and will walk into pits just like any other zombie. Lava pit traps will destroy the whole invasion force but the reapers. Hence, the easiest way to nullify most of the threat is to dig a simple tunnel underneath a small lava pit on some leveled terrain. That allows players to simply focus on fighting the Reapers alone, (which are rare enough that you rarely fight more than one at a time,) while collecting all the drops. |
||
| + | |||
| + | However, as of 1.3, this event is significantly more dangerous, especially after the bosses are defeated, as more powerful enemies will spawn, though the drops are also worth the trouble. [[Mothron|Mothrons]] are considered mini-bosses, so always prioritize them when they spawn. [[Nailhead|Nailheads]] and [[Dr. Man Fly|Dr. Man Flies]] should be tackled at range. Nailheads have 4000 health (8000 in expert mode), but their nails are far less damaging than touching them. While Dr. Man Flies have less health, their flasks deal heavy area damage and serve as a constant distraction. [[Deadly Spheres]], as their name implies, should be taken with care due to their small size, high damage and defense. Failing to do so often results in serious hits, if not, death. [[Butcher|Butchers]] and [[Psycho|Psychos]], while only have melee range, are not to be underestimated as they can chip off quite some health if left unhindered. |
||
| + | |||
| + | Another strategy consists of using [[Wings]] to fly above enemies and hitting them with debuff-inflicting weapons, such as [[Cursed Flames]], and then hitting them with a stronger weapon to finish them off. I prefer to use a [[Daedalus Stormbow]] with [[Cursed Arrow|Cursed Arrows]] and a [[Meteor Staff]] to destroy the enemies. This does require some mana potions but works effectively if you don't want or need an arena. |
||
| + | |||
| + | == [[Frost Legion]] == |
||
| + | There are three unique monsters in the Frost Legion, named [[Mister Stabby]], [[Snowman Gangsta]], and [[Snow Balla]]. The Frost Legion does not happen on its own. The player has to obtain a [[Snow Globe]] from a [[Present]] to summon them. The summon item can only be obtained in [[Hardmode]], but the Legion can still be summoned and defeated in a non-Hardmode world. Mister Stabby is a threat due to his high contact damage, and it is suggested to fight the entire event with ranged weapons. However, the enemies deal medium to high damage, so sets with a higher defense value are suggested. |
||
| + | |||
| + | For the Frost Legion, if you're far enough underground, then the snowmen won't spawn, even after getting the message that they've arrived, so you don't have to head back to your house immediately upon receiving message of an imminent attack. However, they will remain and will appear if you surface. |
||
| + | The Snowmen are incapable of jumping down from simple wooden platforms, meaning it is possible to construct a basic trench with a wooden platform above it, and be completely out of harms way. |
||
| + | |||
| + | If you place lava pits on either side of your house, you can defeat most of the snowmen that spawn, however, Snow Ballas may block up the traps, inhibiting the trap from killing any more snowmen. Filling the empty space of any traps with Wooden Beams will prevent Snow Ballas from blocking up the traps. The beams occupy the same layer as other furniture and do not block movement. |
||
| + | |||
| + | == [[Frost Moon]] == |
||
| + | {{dablink|See [[Guide:Frost Moon strategies]].}} |
||
| + | |||
| + | == [[Pumpkin Moon]] == |
||
| + | The enemies during a Pumpkin Moon are very dangerous, especially The [[Headless Horseman]] and [[Pumpking]]. The player has to craft a [[Pumpkin Moon Medallion]] to start a Pumpkin Moon. The event should not be attempted with lower tier armour and weapons as the enemies have high health and damage. |
||
| + | |||
| + | Some suggested loadouts for the Pumpkin Moon: |
||
| + | |||
| + | Ranger: |
||
| + | [[Shroomite Armor]] with Helmet, |
||
| + | [[Stynger]] (Primary Weapon), |
||
| + | [[Tactical Shotgun]] (Secondary Weapon), |
||
| + | [[Chlorophyte Bullets]], |
||
| + | [[Destroyer Emblem]], |
||
| + | [[Wings]], |
||
| + | [[Ranger Emblem]], |
||
| + | [[Sniper Scope]], |
||
| + | [[Celestial Stone]] |
||
| + | |||
| + | Caster: |
||
| + | [[Spectre Armor]], |
||
| + | [[Magnet Sphere]] (Switch with [[Bat Scepter]] when obtained), |
||
| + | [[Nimbus Rod]], |
||
| + | [[Heat Ray]], |
||
| + | [[Staff of the Frost Hydra]], |
||
| + | [[Destroyer Emblem]], |
||
| + | [[Avenger Emblem]], |
||
| + | [[Magic Cuffs]], |
||
| + | [[Sorcerer Emblem]], |
||
| + | [[Celestial Stone]] |
||
| + | |||
| + | Warrior: |
||
| + | [[Beetle Armor]], |
||
| + | [[Flairon]], [[Paladin's Hammer]]/[[Possessed Hatchet]], |
||
| + | [[Vampire Knives]], |
||
| + | [[Terra Blade]], |
||
| + | [[Destroyer Emblem]], |
||
| + | [[Warrior Emblem]], |
||
| + | [[Wings]], |
||
| + | [[Cross Necklace]], |
||
| + | [[Celestial Stone]] |
||
| + | |||
| + | (Note that in the {{mobile version}} that [[Spectre Armor]] does not have 40 or 32 defense, but 24 defense) |
||
| + | Some Pumpkin Moon enemies are susceptible to the Ichor debuff, making a Flask of Ichor useful in earlier waves. Towards the later waves, the player will mostly be attacking Pumpkings, which are immune to Ichor, making the debuff less useful. |
||
| + | It is a good idea to place [[Spear Trap]]s over areas where enemies will be congregating. Spear Traps work best when wired to different timers, as a row of spears firing at the same time can only hit an enemy once. A somewhat easier way of dealing damage to these congregated enemies is to use the [[Nimbus Rod]]. A strategy for Pumpking is to have wings with a mythical shadowbeam staff with spectre armor so when attacking him in a small area the beam's attack will bounce off, dealing multiplied damage at once. The magic will absorb to the player, for longer lasting. Keep star and heart statues hooked to one second timers for a quick run-by healing. End-game gear is highly recommended, with post-Golem or Fishron weapons. |
||
| + | |||
| + | End-game gear makes farming this event effortless. The Last Prism, for example, while eats through your mana like crazy, easily shreds through even the Pumpking. |
||
| + | |||
| + | == Martian Madness == |
||
| + | The smaller enemies can be easily defeated using a generic trap, one of which would be a platform above a lava pit, which may or may not have [[Dart Trap|Dart Traps]], or traps from the [[Jungle Temple|Lihzahrd]], built in. It is also advisable to have some heart and/or star statues hooked up to a timer. |
||
| + | |||
| + | The only hard part about the event is the [[Martian Saucer]]. However, almost all damage from it can be avoided by simply building a roof over the player's head. Almost all of the Saucer's attacks can not go through blocks (with the exception of the rockets' AoE damage), and it will always hover a given height over the player, so a roof can easily be constructed between. All the player needs is a weapon that can go through blocks. The [[Blizzard Staff]], or the [[Nettle Burst]] or [[Vilethorn]] will suffice, though the Blizzard Staff is the best choice.<gallery>File:Capture 2015-07-01 19 37 16.png</gallery>''An example of a lava pit, complete with heart/star statues and traps hooked up to a timer.'' |
||
| + | |||
| + | If you are a summoner, you can very easily farm this event by sealing yourself in a box that is small, but not small enough so that the Martian Saucer's missiles can harm you through the walls with splash damage. If your summons cannot pass through solid blocks, then be sure to summon them outside of the box so they can reach the enemies. |
||
| + | |||
| + | == [[Lunar Events]] == |
||
| + | {{dablink|See [[Guide:Lunar Events strategies]].}} |
||
| + | |||
| + | == General tips == |
||
| ⚫ | |||
| + | Lava is a useful tool for thinning out the numbers of enemies. By placing a single bucket of lava in a sufficiently wide 1-block-deep trench, it is possible to create a pool shallow enough to kill off most enemies while preserving their loot (such traps can be tested easily by throwing cheap items into the trench—if they burn up, widen the trench). This is a common way to burn enemies to death while allowing their item drops to collect as they approach your home. Other variations include "waterfalls" of lava or even entire moats, albeit using large bodies of lava means any item drops will be destroyed as well, though it is always fun to watch zombies pour into a pit of lava in masses. |
||
| + | |||
| + | === [[Spiky Ball Trap]] Moat === |
||
| + | Similar to the lava pool is the [[Spiky Ball Trap]] Moat. If you have recovered spiky ball traps from the [[Lihzahrd]] Dungeon, you may dig a moat completely under your house. The moat should be at least 12 blocks deep. Next, mount spiky ball traps to the underside of your house at regular intervals. Connect the spiky ball traps to a 3 second timer inside your house. Activate the timer once the invasion begins to rain down spiky balls on the invading enemies. |
||
| + | |||
| + | === [[Dart Trap]]=== |
||
| + | Although they do not deal a lot of damage, [[Dart Trap]]s or [[Lihzahrd]] [[Super Dart Trap]]s are an easy-to-use method of defending your base. All you have to do is set them up on the outside of your entrances and set up manual triggers using [[switch]]es or [[lever]]s, or automatic triggers such as [[pressure plate]]s or [[timers]]. It is a good way to keep the weaker enemies out of your base, although it is more of an offensive technique than a defensive one. If you're using one of the aforementioned automatic techniques, you should be careful not to let you or your [[NPC]] villagers get shot when going out of their houses. Try not to block the door with dart traps, though. |
||
| + | |||
| + | === [[Active Stone Block]]s and [[Actuator]]s=== |
||
| + | If you have the [[mechanic]] it's easy. Place the active stone block one side of the door and wire it to a switch. It will block [[zombies]],most [[goblins]], and if you're quick, even [[Swamp Thing|Swamp Things.]] You could even make the "door" out of active blocks and turn them off when you need to go through. The same effect can be achieved with [[actuator]]s. |
||
| + | |||
| + | By using actuators and Grey, Brown, Blue or Lihzahrd [[pressure plate]]s, you can create a player only door that doesn't even require you to use your cursor. Set up the door as you would an active stone/actuator door and because Grey, Brown, Blue or Lihzahrd [[pressure plate]]s can only be activated by the player nothing else is able to enter (Or escape). This also works with active stone blocks, which will not look at all weird if your house is made of stone! |
||
| + | |||
| + | === Tower of Death === |
||
| + | If you are in [[hardmode]] and have acquired the [[Nimbus Rod]] and [[Wings]] or anything that allows flight, there's a very efficient and safe way to farm or survive most of these events by making a tall tower, 20 blocks or higher,at least 4 blocks wide, with two entrances from the ground for enemies to come in. At the top of the tower(inside), fly to the top (don't end up killing yourself by using [[rod of discord]]), and place some [[Platform]]s right under you, enough to cover the width of the tower. Place some [[torches]], if needed. Whenever an event occurs, go to this tower, stand there, constantly summon the clouds, and watch as enemies walk in to their miseries. Note: this method is not perfect, but would cover most of the harms during an event, especially in [[hardmode]]. This is very useful during [[Solar Eclipse]]s, considering you need to worry about the [[Reaper]]s. The [[Crimson Rod]] is not recommended for hardmode [[Event]]s because of it's low damage output. This also works well with the [[Water Candle]] and [[Battle Potion]]s, if you don't mind the risks of higher spawn rates. You can also make some add-ons to the entrances, making them extend outwards to keep out flying enemies, except the [[Reaper]]s and [[wraith]]s, but due to their movement, they still pose little threat to your tower. |
||
| + | |||
| + | === Lava Moat === |
||
| + | Doing this will guarantee to group all the naturally spawned enemies into one tight space so you can focus your damage easily and won't have to wait for the enemy to come to you. Plan this on a flat sheet of land on the surface with no nearby holes or caves. Simply make a 1 block deep and ~40 block wide hole on both sides of your arena then cover them with a thin layer of [[lava]], make sure to have a 10-15 strip of land (lava-cleared) between the two lava moat. Because enemies can't spawn on lava all enemies will be forced to spawn on the thin landstrip between the lava moats . Though make sure while the event is happening, stand on a platform above the landstrip but high enough so you can't see it since you can't actually see the enemies spawning on the landstrip but you can see them coming out of that place. Remember to test your lava moat arena with naturally spawning surface [[slimes]] first before testing it on an actual event. Add [[traps]] for extra dps along with [[heart lantern]], [[campfire]], [[heart statue]] and [[star statue]] if you're a mage for general purposes. |
||
| + | |||
| + | === Invincibility Machine === |
||
| + | [[File:invincibilitymachine.jpg|thumb|right]] |
||
| + | This technique involves overriding all forms of damage with the temporary invincibility granted when damage is taken from a weak enemy such as a [[statue]]-spawned slime. This is useful when dealing with Moon [[event]]s, such as the [[Pumpkin Moon]] and [[Frost Moon]], though it also works against bosses (with the exception of the Moon Lord, for whom special measures were put in place to prevent this). The machine fails if the protective slime is killed. |
||
| + | |||
| + | The machine consists of a small 5x6 box half-filled with [[Honey]], such that the player will receive the Honey Regeneration [[buff]], but without drowning. A [[Teleporter]] provides an easy way into the machine, and various [[switch]]es are available to toggle [[traps]] and the [[Actuator|actuated]] spawn surface. The Teleporter is optional; you could just actuate yourself in from the top. |
||
| + | |||
| + | It's important to note that the machine will only work if the Slime Statue is initially activated when there are no other enemies present. The best way to achieve this is to block all available spawn surfaces with a thin layer of lava and deactivating the actuated spawn surface (monsters can spawn at distances between 62 and 84 tiles away from the player). This way, the slimes spawned from the statue will have damage priority over any other mobs that spawn thereafter. Lastly, reactivate the spawn surface before starting the event. If any NPC is killed while the machine is in use, then it will fail. |
||
| + | |||
| + | The downside of an invincibility machine is that the player's options become limited. Generally, the best approach is to use a summoner build with the highest-damage summoning armor available and five damage-increasing accessories ([[Summoner Emblem]], [[Papyrus Scarab]], [[Necromantic Scroll]], [[Hercules Beetle]], and [[Avenger Emblem]] - all with the Menacing [[Modifier]]). Most summoning weapons can attack enemies outside while preserving the protective slime. The exceptions are the [[Tempest Staff]], [[Stardust Dragon Staff]], and [[Rainbow Crystal Staff]]. The Stardust Guardian will kill the slime if placed too close to the player, but it is okay to summon it at a distance. |
||
| + | |||
| + | One of the few weapons that can be used from within the box is the [[Blizzard Staff]], as its projectiles cannot enter the invincibility machine. The [[Meteor Staff]] can be used the same way, but the box must be constructed with a thicker ceiling, because the explosions can potentially kill the slime. The [[Chlorophyte Partisan]] can also damage enemies outside without hitting the slime (when aimed upwards), and although it won't be the biggest source of DPS, it's better than nothing. In the late game, one can also set up a [[Staff of the Frost Hydra]] and [[Lunar Portal Staff]] for free damage. The [[Lunar Flare]] may be used to eliminate faraway enemies to either side, but any explosion that occurs too close to the machine will kill the slime. It also might not be a bad idea to [[Hooks|grapple]] to the side of the machine, because being knocked around by a slime is a little bit annoying (though it won't compromise the integrity of the machine). |
||
| + | |||
| + | {{guides}} |
||
Revision as of 12:21, 9 May 2016
This guide deals with the events currently implemented in Terraria as of 1.3.
Blood Moon
Blood Moons are events that has a 1/10 chance of occuring each night once the player has 120 life or more, and can be a hassle for newer players who are caught unaware. Not only does the monster spawn rate increase dramatically during a Blood Moon, but the max amount of enemies that can be on screen also rises significantly, allowing swarms of enemies to appear at one time. Additionally, monster spawns completely ignore reduced spawn rates by way of NPCs. Zombies can break open doors during this event, posing significant danger to NPCs inside houses. However, there are ways to profit from Blood Moons if one is prepared, especially thanks to rare spawns like The Groom.
Generally, Blood Moons can be seen safely through by simply staying in your base, as long as all doors are either prevented from opening inwards or simply barricaded by blocks. In the Console and Mobile versions, Blood Moons do not spawn truly dangerous enemies; they simply increase the spawn rate and maximum onscreen limit while introducing one new enemy, The Drippler.There are also rare variations such as Corrupt Bunnies and Corrupt Goldfish. This means that players who are adept at handling zombies and Demon Eyes have little to fear from this event. In hardmode, the Blood Moon becomes harder as Clowns will spawn.
Goblin Army
Goblins will appear at the spawn point and kill any NPCs they find. They will continually spawn until their army limit is reached before the event will end. This group has multiple types of units with different attack patterns, so strategies for dealing with them will differ depending on the type of goblin.
- The Goblin Sorcerer will teleport no matter where the player(s) are and will shoot a projectile at you.
- The Goblin Thief is a fast paced enemy that can jump high and open doors faster than other goblins.
- The Goblin Peon is 2 blocks tall and can destroy doors.
- The Goblin Warrior has more health and does more contact damage to players.
- The Goblin Archer will shoot wooden arrows at the player(s).
- The Goblin Summoner is a Hardmode-exclusive goblin that is much stronger than the others, but drops much greater loot.
If the player is strong enough to easily handle the goblins, a long, flat field near the base would be the best place to deal with the army, as it would be close enough to the spawn point to appear while keeping the goblins away from the NPCs. Weapons that can do damage to multiple enemies at once such as the Space Gun or Jester's Arrows are useful for taking out crowds.
Digging a pit on both sides of your base is a simple but effective way of holding back most of the goblins, save for sorcerer and archer goblins. Just simply dig a hole five deep by six wide or dig the pit next to a wall so when the goblins try to jump the pit they will hit the wall and fall into the pit. The downside to using a pit by itself, (without lava or other traps), is that after taking out the sorcerers and archers you still need to take care of the goblins in the pit. However, you can use the Spiky Balls dropped from the goblins you killed earlier and throw them into the pit to take them out from a safe distance.
You can also build a simple active stone/inactive stone door to prevent goblins and enemies in general from entering.
Pirate Invasion
The Pirate Invasion is basically the Hardmode version of the Goblin Army. A step up from goblins, these pirates will give you a hard time if you don't you how to effectively deal with them. The Pirate Invasion has multiple types of units with different attack patterns. The event currently contains six (seven in PC) enemies, the Pirate Crossbower, the Parrot, the Pirate Deckhand, the Pirate Deadeye, the Pirate Corsair, the Pirate Captain, and the PC-exclusive Flying Dutchman. The player can summon the event using the pirate map which has a 1% chance to drop from mobs in the Ocean biome. The event can also happen on its own, with a 1/30 chance if it is has not happened yet in the world. The Pirate Invasion can easily give 1-2 platinum if the player does not die.
If you want to face the pirates head-on you must be prepared. Defeating these pirates is not an easy feat for a fresh hardmode player. You will want to use weapons that pierces multiple enemies at once, such as Jester's arrows or the Magical Harp. Alternatively, you can make sure the pirates stay below you, with you on a wooden platform. Then use some kind of high-level Spear to slay the attackers. When a captain attacks, focus all of your attention on him, because he will stop attacking when attacked. If you have the Uzi or Minishark/Megashark it is a good tactic to continually fly over the pirates and shoot at them. On the PC version, the Flying Dutchman will rain down cannonballs on you while spawning more of the basic pirate enemies. To take it out, fly up to it and use a piercing weapon to hit multiple cannons at once. When you take out all 4 cannons, the ship will explode.
Solar Eclipse
The monsters spawned during a Solar Eclipse are very powerful. The Reaper acts similarly to a Wraith, but with higher stats. The Swamp Things are extremely fast, and they are as common as zombies. Vampires are equally as common as zombies, and can turn into bats if the player is above them. Eyezors are not very common during a Solar Eclipse, but they can shoot lasers from their eyes, making them formidable enemies. They are slightly faster than regular zombies. Frankensteins are common as zombies, but move much faster.
The Solar Eclipse strategy is simple to understand. Every enemy but the Reapers and Vampires use standard Fighter AI, (and even the same jump range as basic Zombies and Goblins,) and will walk into pits just like any other zombie. Lava pit traps will destroy the whole invasion force but the reapers. Hence, the easiest way to nullify most of the threat is to dig a simple tunnel underneath a small lava pit on some leveled terrain. That allows players to simply focus on fighting the Reapers alone, (which are rare enough that you rarely fight more than one at a time,) while collecting all the drops.
However, as of 1.3, this event is significantly more dangerous, especially after the bosses are defeated, as more powerful enemies will spawn, though the drops are also worth the trouble. Mothrons are considered mini-bosses, so always prioritize them when they spawn. Nailheads and Dr. Man Flies should be tackled at range. Nailheads have 4000 health (8000 in expert mode), but their nails are far less damaging than touching them. While Dr. Man Flies have less health, their flasks deal heavy area damage and serve as a constant distraction. Deadly Spheres, as their name implies, should be taken with care due to their small size, high damage and defense. Failing to do so often results in serious hits, if not, death. Butchers and Psychos, while only have melee range, are not to be underestimated as they can chip off quite some health if left unhindered.
Another strategy consists of using Wings to fly above enemies and hitting them with debuff-inflicting weapons, such as Cursed Flames, and then hitting them with a stronger weapon to finish them off. I prefer to use a Daedalus Stormbow with Cursed Arrows and a Meteor Staff to destroy the enemies. This does require some mana potions but works effectively if you don't want or need an arena.
Frost Legion
There are three unique monsters in the Frost Legion, named Mister Stabby, Snowman Gangsta, and Snow Balla. The Frost Legion does not happen on its own. The player has to obtain a Snow Globe from a Present to summon them. The summon item can only be obtained in Hardmode, but the Legion can still be summoned and defeated in a non-Hardmode world. Mister Stabby is a threat due to his high contact damage, and it is suggested to fight the entire event with ranged weapons. However, the enemies deal medium to high damage, so sets with a higher defense value are suggested.
For the Frost Legion, if you're far enough underground, then the snowmen won't spawn, even after getting the message that they've arrived, so you don't have to head back to your house immediately upon receiving message of an imminent attack. However, they will remain and will appear if you surface. The Snowmen are incapable of jumping down from simple wooden platforms, meaning it is possible to construct a basic trench with a wooden platform above it, and be completely out of harms way.
If you place lava pits on either side of your house, you can defeat most of the snowmen that spawn, however, Snow Ballas may block up the traps, inhibiting the trap from killing any more snowmen. Filling the empty space of any traps with Wooden Beams will prevent Snow Ballas from blocking up the traps. The beams occupy the same layer as other furniture and do not block movement.
Frost Moon
Pumpkin Moon
The enemies during a Pumpkin Moon are very dangerous, especially The Headless Horseman and Pumpking. The player has to craft a Pumpkin Moon Medallion to start a Pumpkin Moon. The event should not be attempted with lower tier armour and weapons as the enemies have high health and damage.
Some suggested loadouts for the Pumpkin Moon:
Ranger: Shroomite Armor with Helmet, Stynger (Primary Weapon), Tactical Shotgun (Secondary Weapon), Chlorophyte Bullets, Destroyer Emblem, Wings, Ranger Emblem, Sniper Scope, Celestial Stone
Caster: Spectre Armor, Magnet Sphere (Switch with Bat Scepter when obtained), Nimbus Rod, Heat Ray, Staff of the Frost Hydra, Destroyer Emblem, Avenger Emblem, Magic Cuffs, Sorcerer Emblem, Celestial Stone
Warrior: Beetle Armor, Flairon, Paladin's Hammer/Possessed Hatchet, Vampire Knives, Terra Blade, Destroyer Emblem, Warrior Emblem, Wings, Cross Necklace, Celestial Stone
(Note that in the ![]() Mobile version that Spectre Armor does not have 40 or 32 defense, but 24 defense)
Some Pumpkin Moon enemies are susceptible to the Ichor debuff, making a Flask of Ichor useful in earlier waves. Towards the later waves, the player will mostly be attacking Pumpkings, which are immune to Ichor, making the debuff less useful.
It is a good idea to place Spear Traps over areas where enemies will be congregating. Spear Traps work best when wired to different timers, as a row of spears firing at the same time can only hit an enemy once. A somewhat easier way of dealing damage to these congregated enemies is to use the Nimbus Rod. A strategy for Pumpking is to have wings with a mythical shadowbeam staff with spectre armor so when attacking him in a small area the beam's attack will bounce off, dealing multiplied damage at once. The magic will absorb to the player, for longer lasting. Keep star and heart statues hooked to one second timers for a quick run-by healing. End-game gear is highly recommended, with post-Golem or Fishron weapons.
Mobile version that Spectre Armor does not have 40 or 32 defense, but 24 defense)
Some Pumpkin Moon enemies are susceptible to the Ichor debuff, making a Flask of Ichor useful in earlier waves. Towards the later waves, the player will mostly be attacking Pumpkings, which are immune to Ichor, making the debuff less useful.
It is a good idea to place Spear Traps over areas where enemies will be congregating. Spear Traps work best when wired to different timers, as a row of spears firing at the same time can only hit an enemy once. A somewhat easier way of dealing damage to these congregated enemies is to use the Nimbus Rod. A strategy for Pumpking is to have wings with a mythical shadowbeam staff with spectre armor so when attacking him in a small area the beam's attack will bounce off, dealing multiplied damage at once. The magic will absorb to the player, for longer lasting. Keep star and heart statues hooked to one second timers for a quick run-by healing. End-game gear is highly recommended, with post-Golem or Fishron weapons.
End-game gear makes farming this event effortless. The Last Prism, for example, while eats through your mana like crazy, easily shreds through even the Pumpking.
Martian Madness
The smaller enemies can be easily defeated using a generic trap, one of which would be a platform above a lava pit, which may or may not have Dart Traps, or traps from the Lihzahrd, built in. It is also advisable to have some heart and/or star statues hooked up to a timer.
The only hard part about the event is the Martian Saucer. However, almost all damage from it can be avoided by simply building a roof over the player's head. Almost all of the Saucer's attacks can not go through blocks (with the exception of the rockets' AoE damage), and it will always hover a given height over the player, so a roof can easily be constructed between. All the player needs is a weapon that can go through blocks. The Blizzard Staff, or the Nettle Burst or Vilethorn will suffice, though the Blizzard Staff is the best choice.
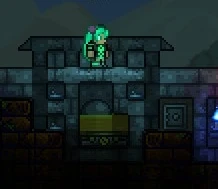
- Capture 2015-07-01 19 37 16.png
An example of a lava pit, complete with heart/star statues and traps hooked up to a timer.
If you are a summoner, you can very easily farm this event by sealing yourself in a box that is small, but not small enough so that the Martian Saucer's missiles can harm you through the walls with splash damage. If your summons cannot pass through solid blocks, then be sure to summon them outside of the box so they can reach the enemies.
Lunar Events
General tips
Lava
Lava is a useful tool for thinning out the numbers of enemies. By placing a single bucket of lava in a sufficiently wide 1-block-deep trench, it is possible to create a pool shallow enough to kill off most enemies while preserving their loot (such traps can be tested easily by throwing cheap items into the trench—if they burn up, widen the trench). This is a common way to burn enemies to death while allowing their item drops to collect as they approach your home. Other variations include "waterfalls" of lava or even entire moats, albeit using large bodies of lava means any item drops will be destroyed as well, though it is always fun to watch zombies pour into a pit of lava in masses.
Spiky Ball Trap Moat
Similar to the lava pool is the Spiky Ball Trap Moat. If you have recovered spiky ball traps from the Lihzahrd Dungeon, you may dig a moat completely under your house. The moat should be at least 12 blocks deep. Next, mount spiky ball traps to the underside of your house at regular intervals. Connect the spiky ball traps to a 3 second timer inside your house. Activate the timer once the invasion begins to rain down spiky balls on the invading enemies.
Dart Trap
Although they do not deal a lot of damage, Dart Traps or Lihzahrd Super Dart Traps are an easy-to-use method of defending your base. All you have to do is set them up on the outside of your entrances and set up manual triggers using switches or levers, or automatic triggers such as pressure plates or timers. It is a good way to keep the weaker enemies out of your base, although it is more of an offensive technique than a defensive one. If you're using one of the aforementioned automatic techniques, you should be careful not to let you or your NPC villagers get shot when going out of their houses. Try not to block the door with dart traps, though.
Active Stone Blocks and Actuators
If you have the mechanic it's easy. Place the active stone block one side of the door and wire it to a switch. It will block zombies,most goblins, and if you're quick, even Swamp Things. You could even make the "door" out of active blocks and turn them off when you need to go through. The same effect can be achieved with actuators.
By using actuators and Grey, Brown, Blue or Lihzahrd pressure plates, you can create a player only door that doesn't even require you to use your cursor. Set up the door as you would an active stone/actuator door and because Grey, Brown, Blue or Lihzahrd pressure plates can only be activated by the player nothing else is able to enter (Or escape). This also works with active stone blocks, which will not look at all weird if your house is made of stone!
Tower of Death
If you are in hardmode and have acquired the Nimbus Rod and Wings or anything that allows flight, there's a very efficient and safe way to farm or survive most of these events by making a tall tower, 20 blocks or higher,at least 4 blocks wide, with two entrances from the ground for enemies to come in. At the top of the tower(inside), fly to the top (don't end up killing yourself by using rod of discord), and place some Platforms right under you, enough to cover the width of the tower. Place some torches, if needed. Whenever an event occurs, go to this tower, stand there, constantly summon the clouds, and watch as enemies walk in to their miseries. Note: this method is not perfect, but would cover most of the harms during an event, especially in hardmode. This is very useful during Solar Eclipses, considering you need to worry about the Reapers. The Crimson Rod is not recommended for hardmode Events because of it's low damage output. This also works well with the Water Candle and Battle Potions, if you don't mind the risks of higher spawn rates. You can also make some add-ons to the entrances, making them extend outwards to keep out flying enemies, except the Reapers and wraiths, but due to their movement, they still pose little threat to your tower.
Lava Moat
Doing this will guarantee to group all the naturally spawned enemies into one tight space so you can focus your damage easily and won't have to wait for the enemy to come to you. Plan this on a flat sheet of land on the surface with no nearby holes or caves. Simply make a 1 block deep and ~40 block wide hole on both sides of your arena then cover them with a thin layer of lava, make sure to have a 10-15 strip of land (lava-cleared) between the two lava moat. Because enemies can't spawn on lava all enemies will be forced to spawn on the thin landstrip between the lava moats . Though make sure while the event is happening, stand on a platform above the landstrip but high enough so you can't see it since you can't actually see the enemies spawning on the landstrip but you can see them coming out of that place. Remember to test your lava moat arena with naturally spawning surface slimes first before testing it on an actual event. Add traps for extra dps along with heart lantern, campfire, heart statue and star statue if you're a mage for general purposes.
Invincibility Machine
This technique involves overriding all forms of damage with the temporary invincibility granted when damage is taken from a weak enemy such as a statue-spawned slime. This is useful when dealing with Moon events, such as the Pumpkin Moon and Frost Moon, though it also works against bosses (with the exception of the Moon Lord, for whom special measures were put in place to prevent this). The machine fails if the protective slime is killed.
The machine consists of a small 5x6 box half-filled with Honey, such that the player will receive the Honey Regeneration buff, but without drowning. A Teleporter provides an easy way into the machine, and various switches are available to toggle traps and the actuated spawn surface. The Teleporter is optional; you could just actuate yourself in from the top.
It's important to note that the machine will only work if the Slime Statue is initially activated when there are no other enemies present. The best way to achieve this is to block all available spawn surfaces with a thin layer of lava and deactivating the actuated spawn surface (monsters can spawn at distances between 62 and 84 tiles away from the player). This way, the slimes spawned from the statue will have damage priority over any other mobs that spawn thereafter. Lastly, reactivate the spawn surface before starting the event. If any NPC is killed while the machine is in use, then it will fail.
The downside of an invincibility machine is that the player's options become limited. Generally, the best approach is to use a summoner build with the highest-damage summoning armor available and five damage-increasing accessories (Summoner Emblem, Papyrus Scarab, Necromantic Scroll, Hercules Beetle, and Avenger Emblem - all with the Menacing Modifier). Most summoning weapons can attack enemies outside while preserving the protective slime. The exceptions are the Tempest Staff, Stardust Dragon Staff, and Rainbow Crystal Staff. The Stardust Guardian will kill the slime if placed too close to the player, but it is okay to summon it at a distance.
One of the few weapons that can be used from within the box is the Blizzard Staff, as its projectiles cannot enter the invincibility machine. The Meteor Staff can be used the same way, but the box must be constructed with a thicker ceiling, because the explosions can potentially kill the slime. The Chlorophyte Partisan can also damage enemies outside without hitting the slime (when aimed upwards), and although it won't be the biggest source of DPS, it's better than nothing. In the late game, one can also set up a Staff of the Frost Hydra and Lunar Portal Staff for free damage. The Lunar Flare may be used to eliminate faraway enemies to either side, but any explosion that occurs too close to the machine will kill the slime. It also might not be a bad idea to grapple to the side of the machine, because being knocked around by a slime is a little bit annoying (though it won't compromise the integrity of the machine).
-
 Getting started
 -
 Practical tips
 - Walkthrough
- Mining techniques
- Invasion events