m (Reverted edits by 72.197.183.161 (talk) to last revision by LuisYKW2) |
m (Reverted edits by OrangeOrPie (talk) to last revision by BotAntony) Tag: Rollback |
||
| (884 intermediate revisions by more than 100 users not shown) | |||
| Line 1: | Line 1: | ||
| + | {{distinguish|Summoning items}} |
||
| − | {{tocright}} |
||
| + | {{for|a sortable list of all available summon weapons, along with their stats for comparison|List of summon weapons}} |
||
| + | {{tocright}} |
||
| − | + | '''Summon weapons''' are a type of [[weapon]] that spawns secondary characters that will aid the player during battle by automatically attacking [[enemies]] within range. They deal [[summon damage]] and cannot be hurt or killed. |
|
| + | The characters spawned by most summon weapons fall into one of two categories: [[#Minions|minions]] and [[#Sentries|sentries]]. Minions are mobile characters that follow the player, while sentries remain stationary. Additionally, the set bonuses of the [[Stardust armor]], [[Chlorophyte armor]], and [[Forbidden armor]] will summon an entity to fight for the player in a manner similar to minions. |
||
| − | By default, a player can only have a single Minion summoned at once. Various boosts can raise the player's Minion capacity, allowing multiple simultaneous Minions. The maximum number of minions achievable using this method is 11, using [[Stardust armor]], [[Papyrus Scarab]], [[Necromantic Scroll]], [[Pygmy Necklace]], [[Summoning Potion]] and the [[Bewitching Table]]. With Minion cap boosts in effect, the same Minion can be summoned multiple times, or several different Minions can be summoned. Minion cap boosts do not affect [[Pet]]s or [[Light Pet]]s. |
||
| + | {{eil|Whips}} are related weapons that deal summon damage without summoning any minions. Hitting an enemy with a whip causes a player's minions and sentries to target it immediately. Some whips have bonus effects which can be activated by minions, but not by sentries. |
||
| − | Minions follow players in a manner similar to Pets, flying and passing through [[block]]s as necessary to keep pace with the player's movements, though most cannot move through blocks for the purposes of attacking. Exceptions are minions summoned by the [[Tempest Staff]], [[Xeno Staff]], and [[Stardust Dragon Staff]]. |
||
| + | There are currently 26 summon weapons on the {{eversions|1.4.1}}, 19 on the {{eversions|1.3.0.1|not=1.4.0.1}}, 11 on the {{eversions|1.2.4|not=1.3.0.1}}, and 5 on the {{eversions|1.2.4|invert=y}}. |
||
| − | Sentries are exceptions to the above: While they similarly deal summon damage, they are temporary, cannot move at all, and do not count toward the Minion cap. |
||
| − | == |
+ | == Minions == |
| + | '''Minions''' are mobile characters. They follow the player indefinitely until the player dies, summons a replacement minion, manually cancels their [[buff]], or exits the world. There are several different minions available, some of which can walk or fly, and attack using melee or ranged means. A minion costs [[mana]] to summon initially, but follows the player indefinitely thereafter at no further cost. |
||
| − | === Pre-Hardmode === |
||
| − | {| class="terraria" |
||
| − | |- |
||
| − | ! colspan="2" style="padding:0 15px" | Item !! colspan=2 | Minion !! Damage !! Acquired From |
||
| + | Minions provide an ongoing source of damage against enemies which requires little or no attention from the player. The common limit of all minions is that each has a limited rate of attack and damage, but the different types also have various limits to their movement and/or attacks. |
||
| + | |||
| + | Minions follow players in a manner similar to [[pets]], flying and passing through [[blocks]] as necessary to keep pace with the player's movements, though most cannot move through blocks for the purposes of attacking. Exceptions are the minions summoned by {{Eil|Abigail's Flower}}, [[Tempest Staff]], {{eil|Xeno Staff}}, {{eil|Desert Tiger Staff}}, {{eil|Stardust Dragon Staff}}, {{eil|Blade Staff}}, {{eil|Sanguine Staff}}, and {{eil|Terraprisma}}, all of which can attack through blocks. |
||
| + | |||
| + | [[File:Minion Targeting Particles 1.png|thumb|{{eicons|1.3.4|not=1.4.0.1}} Targeting graphic for moving targets]] |
||
| + | [[File:Minion Targeting Particles 2.png|thumb|{{eicons|1.3.4|not=1.4.0.1}} Targeting graphic for stationary targets]] |
||
| + | |||
| + | On the {{eversions|1.3.4}}, it is possible to press {{key|open}} with a minion-summoning item. This will direct the respective minion to target the entity nearest to the cursor. As long as the minions have their target within their line of sight, they will specifically attack it. {{eicons|1.4.0.1}} The targeted enemy will show swirling white curves on it. {{eicons|1.3.4|not=1.4.0.1}} The targeted enemy will show swirling purple particles which will trail behind a moving enemy, or circle in front of a stationary one (see images). |
||
| + | |||
| + | By default, a player can only have a single minion summoned at once. Various boosts can raise the player's minion capacity ("slots"), allowing multiple simultaneous minions. With minion cap boosts in effect, the same minion can be summoned multiple times, or several different minions can be summoned. Minion cap boosts do not affect pets or [[light pet]]s. If the minion cap later drops below the number of minions in use, minions are randomly chosen and dismissed until the number of minions is below the current cap. Minions vanish when their player leaves the world, and are not re-summoned when the player re-enters that or another world. |
||
| + | |||
| + | The [[Spider Staff]] (on {{eversions|Spider Staff|not=1.4.0.1|short=y}}), {{eil|Optic Staff}}, Stardust Dragon Staff, {{eil|Abigail's Flower}}, and {{eil|Desert Tiger Staff}} have special minion capacity logic. See their pages for details. |
||
| + | |||
| + | == Sentries == |
||
| + | '''Sentries''' are stationary characters. Unlike minions, sentries do not follow the player, and will instead remain rooted in place. In normal use, sentries will last for a fixed ten minutes before vanishing; unlike minions, they can persist even after their owner dies. During the {{eil|Old One's Army}} event, this time limit does not apply (see [[#Tavernkeep's sentries|below]] for details). |
||
| + | |||
| + | By default, a player can only have a single sentry summoned at once. {{eicons|Tavernkeep}} Tavernkeep armor and Old One's Army accessories (see below) can raise the player's sentry capacity, allowing multiple simultaneous sentries. Note that these accessories do ''not'' stack with each other, so the maximum sentry limit is 6: 1 by default, +1 from an accessory, +1 from a War Table, and +3 from armor. With sentry cap boosts in effect, the same sentry can be summoned multiple times, or several different sentries can be summoned. On the {{eversions|Tavernkeep|invert=y}}, the player is limited to only summoning one of each sentry type, with no way to raise the cap. |
||
| + | |||
| + | A waiting sentry goes into a reuse cooldown after attacking, before it can try to attack again. This cooldown is bypassed initially on summoning, which can dramatically increase sentry attack speed at the cost of greater mana expense. Since sentries do not suffer from [[Mana Sickness]], this can be a viable way to deliver high damage at long range when using a sentry that attacks instantly. |
||
| + | |||
| + | === Tavernkeep's sentries === |
||
| + | {{exclusive|Tavernkeep|section=y}} |
||
| + | Sentries summoned by items from the [[Tavernkeep]] are associated with the [[Old One's Army]] [[event]]. They are purchased with [[Defender Medal]]s (instead of [[coin]]s), which are awarded only during the event. At first, they can only be used within the event, where they will remain placed until the end of the event. Each sentry summoned will cost 10 [[Etherian Mana]]; at the beginning of the event, the player immediately gets the 10 Etherian Mana for their first sentry, and can collect more as they kill enemies. Sentries summoned with Etherian Mana are not subject to sentry limits (see above). Other sentries can be used in the event, but will have their usual mana cost, duration, and sentry limits. |
||
| + | |||
| + | Each of the Tavernkeep's sentry summon weapons come in three tiers: Rod, Cane, and Staff; with the Staff being the most expensive and the most powerful. The Tavernkeep's various armor sets each enhance one of his four sentry types; see his article for full details. |
||
| + | |||
| + | After the event is completed once, these can be used outside the event, and will then function as normal sentries, costing ordinary [[mana]] to summon (5 points per tier) and lasting the usual two minutes. Etherian Mana cannot be used outside the event, so the usual sentry limits apply: By default only one sentry can be summoned at once, but [[armor]] sold by the Tavernkeep, and accessories dropped by event bosses such as [[Ogre]]s, can raise a player's sentry limit. This limit increase ''does'' include non-Tavernkeep sentries such as the Queen Spider. Again, the accessories do not stack with each other. |
||
| + | |||
| + | == Whips == |
||
| + | {{exclusive|Whips|section=y}} |
||
| + | [[Whips]] are unlike other summon weapons, and instead act more like a traditional weapon. When used, whips will perform a normal attack which costs no mana, swiping in a wide cone towards the cursor or wherever aimed. Whips deal summon damage, and as such cannot deal [[critical hit]]s. All whips can pierce infinitely in their range, but will deal progressively less damage to each additional enemy they hit, until they start dealing 1 damage. Whips all vary in size as well. The severity of damage loss from piercing and the size of whips typically goes down and up, respectively, as whips get stronger. |
||
| + | |||
| + | Despite being summon weapons, whips are affected by some effects which only work on [[melee weapons]], only get melee [[modifiers]], and have a limited range like melee weapons. Whips are affected by any boosts to melee speed (such as [[Feral Claws]] and its upgrades), as well as [[flasks]] and the [[autoswing]] toggle feature. Whips are not affected by boosts to melee damage or the [[Titan Glove]]'s boost to melee weapon size. |
||
| + | |||
| + | A feature of whips is how they make minions and summons target the enemy hit, the same way that other summon weapons can target enemies. Whips can only target enemies by hitting them, unlike those other summon weapons. The enemy targeted will always be the last enemy hit by the whip, usually the furthest enemy away from the player that gets hit. |
||
| + | |||
| + | The main feature of whips is their summon tag damage, which increases the damage of each minion hit by a set amount. Two endgame whips also feature summon tag critical strike chance, which enables summons to deal critical hits. This summon tag critical strike chance cannot be increased by any other boosts to critical strike chance. Summon tag effects will affect both minions and sentries. |
||
| + | |||
| + | Some whips feature unique [[buffs]] and [[debuffs]], aside from the common debuffs of [[Poisoned]] and [[On Fire!]] that two whips can inflict. Two whips feature debuffs which activate an effect when the enemy with the debuff is hit by a minion. {{eicons|1.4.1}} These two debuffs are also universal; even universally immune enemies like [[The Destroyer]] can be affected by whip debuffs. The buffs that whips have are mostly boosts to melee speed, which get progressively more potent for stronger, later whips. These melee speed buffs are not exclusive to the whips that grant them, and will actually affect not only other whips, but also melee weapons in general. The [[Cool Whip]] currently features the only buff that does not affect melee speed; its buff creates a damaging projectile that lasts for 3 seconds after the last time the whip hit something. |
||
| + | |||
| + | == Pre-Hardmode == |
||
| + | === Minions === |
||
| + | {| class="sortable terraria lined" |
||
| + | ! colspan=2 | Item !! data-sort-type=number | Minion !! Damage !! Source !! Notes |
||
| + | {{/row|Abigail's Flower|minion=Abigail | Found on [[grass]] near placed [[Tombstones]].| |
||
| + | * The flower on top of Abigail's head changes shape and/or color every time she is summoned.}} |
||
| + | {{/row|Finch Staff|minion=Finch|Found in [[Living Wood Chest]]s.<br>Starting item in [[Journey Mode]].<br>Throwing a [[Living Wood Wand]] into [[Shimmer]].| |
||
| + | * Does not trigger invulnerability.}} |
||
| + | {{/row|Flinx Staff|minion=Flinx|Crafted: {{recipes/extract|result=Flinx Staff}} }} |
||
| + | {{/row|Slime Staff|minion=Baby Slime|Dropped by most [[slime]] types and [[Slimed Zombie]].}} |
||
| + | {{/row|Vampire Frog Staff|minion=Vampire Frog|Dropped by [[Zombie Merman]] and [[Wandering Eye Fish]].}} |
||
| + | {{/row|Hornet Staff|minion=Hornet|Crafted: {{recipes/extract|result=Hornet Staff}}| |
||
| + | *Inflicts the [[Poisoned]] debuff to most enemies.}} |
||
| + | {{/row|Imp Staff|minion=Imp|Crafted: {{recipes/extract|result=Imp Staff}}| |
||
| + | *Inflicts the [[On Fire!]] debuff to most enemies.}} |
||
| + | |} |
||
| + | |||
| + | === Sentries === |
||
| + | ==== Standard ==== |
||
| + | {| class="sortable terraria lined" |
||
| + | ! colspan=2 | Item !! data-sort-type=number | Sentry !! Damage !! Source !! Notes |
||
| + | {{/row|Houndius Shootius|sentry=Houndius Shootius|Dropped by [[Deerclops]].}} |
||
| + | |} |
||
| + | |||
| + | ==== Tavernkeep's sentries ==== |
||
| + | |||
| + | {{options/snap|item|snapshot}}{{options/set|item|small=y|icons=n}} |
||
| + | {| class="terraria" id="table-Sentries-Tavernkeep" |
||
|- |
|- |
||
| + | ! Item !! Sentry !! Damage !! Source !! Notes |
||
| − | | align=center | {{il2c|Slime Staff}} |
||
| − | | align=center | [[File:Baby Slime Minion.png]] || Baby Slime |
||
| − | |style="text-align:center"| 8 || [[Slimes]] / [[Slimed Zombie]] (0.01% or 1/100 chance) |
||
|- |
|- |
||
| + | | {{item|Lightning Aura Rod|icons=y}} |
||
| − | | align=center | {{il2c|Hornet Staff|size=30px}} {{pc icon}} |
||
| + | | {{item|Lightning Aura|nolink=y}} |
||
| − | | align=center | [[File:Hornet Minion.png]] || Hornet |
||
| − | | |
+ | | align=center | {{iteminfo|Lightning Aura Rod|damage}} |
| + | | Sold by [[Tavernkeep]]. |
||
| + | | |
||
|- |
|- |
||
| + | | {{item|Flameburst Rod|icons=y}} |
||
| − | | align=center | {{il2c|Imp Staff|size=30px}} {{pc icon}} |
||
| + | | {{item|Flameburst Tower|nolink=y}} |
||
| − | | align=center | [[File:Imp Minion.png|40px]] || Imp |
||
| − | | |
+ | | align=center | {{iteminfo|Flameburst Rod|damage}} |
| + | | Sold by [[Tavernkeep]]. |
||
| − | |- |
||
| + | | |
||
| + | |- |
||
| + | | {{item|Explosive Trap Rod|icons=y}} |
||
| + | | {{item|Explosive Trap|nolink=y}} |
||
| + | | align=center | {{iteminfo|Explosive Trap Rod|damage}} |
||
| + | | Sold by [[Tavernkeep]]. |
||
| + | | |
||
| + | |- |
||
| + | | {{item|Ballista Rod|icons=y}} |
||
| + | | {{item|Ballista|nolink=y}} |
||
| + | | align=center | {{iteminfo|Ballista Rod|damage}} |
||
| + | | Sold by [[Tavernkeep]]. |
||
| + | | |
||
| + | |}{{options/restore|item|snapshot}} |
||
| + | |||
| + | === Whips === |
||
| + | {| class="sortable terraria lined" |
||
| + | ! colspan=3 | Item !! data-sort-type=number | Damage !! Source !! Notes |
||
| + | {{/row|Leather Whip|Purchased from the [[Zoologist]] ({{iteminfo|Leather Whip|buy}}).| |
||
| + | *4 summon tag damage. |
||
| + | *Damage reduced by 50% each hit in a single swing.}} |
||
| + | {{/row|Snapthorn|| |
||
| + | *6 summon tag damage. |
||
| + | *Hitting enemies increases attack speed with the Jungle's Fury [[buff]]. |
||
| + | *Damage reduced by 40% each hit in a single swing.}} |
||
| + | {{/row|Spinal Tap|| |
||
| + | *7 summon tag damage. |
||
| + | *Performs better against multiple targets than most whips. |
||
| + | *Damage reduced by 10% each hit in a single swing.}} |
||
|} |
|} |
||
| − | + | == Hardmode == |
|
| + | === Minions === |
||
| − | {| class="terraria" |
||
| + | {| class="sortable terraria lined" |
||
| − | |- |
||
| − | ! colspan= |
+ | ! colspan=2 | Item !! data-sort-type=number | Minion !! Damage !! Source !! Notes |
| + | {{/row|Spider Staff|minion=Spider | Crafted: {{recipes/extract|result=Spider Staff}} | |
||
| + | *Inflicts the [[Venom]] debuff. |
||
| + | *{{eicons|1.4.0.1|invert=1}}Each spider counts for 75% of a slot, though the player still cannot summon one with less than a full slot remaining.}} |
||
| + | {{/row|Sanguine Staff|minion=Sanguine Bat|Dropped by [[Dreadnautilus]].| |
||
| + | *Stays in the same position in relation to the player.}} |
||
| + | {{/row|Pirate Staff|minion=Pirate|Dropped by [[Pirates]] and {{eil|Flying Dutchman}}.| |
||
| + | *Does not trigger invulnerability.}} |
||
| + | {{/row|Blade Staff|minion=Enchanted Dagger|Dropped by [[Queen Slime]] {{eicons|1.4.1.2}}.| |
||
| + | *Ignores 25 defense. Does not trigger invulnerability. |
||
| + | *Stays in the same position in relation to the player, flies through blocks to attack enemies.}} |
||
| + | {{/row|Optic Staff|minion=Twins||Crafted: {{recipes/extract|result=Optic Staff|full=y}}| |
||
| + | *Both Twins are spawned as 1 minion.}} |
||
| + | {{/row|Pygmy Staff|minion=Pygmy|Dropped by [[Plantera]].| |
||
| + | *Inflicts [[Poisoned]] or [[Venom]] debuff to most enemies.}} |
||
| + | {{/row|Desert Tiger Staff|minion=Desert Tiger|Found in [[Desert Chest]].| |
||
| + | *Does not trigger invulnerability. |
||
| + | *Will change form at 4 and 7 summoned minions. It will increase damage and the tigers speed for each summon for up to 9 summons. Zap through blocks to attack enemies.}} |
||
| + | {{/row|Deadly Sphere Staff|minion=Deadly Sphere|Dropped by [[Deadly Sphere]].}} |
||
| + | {{/row|Raven Staff|minion=Raven|Dropped by [[Pumpking]].| |
||
| + | *Does not trigger invulnerability.}} |
||
| + | {{/row|Xeno Staff|minion=UFO|Dropped by [[Martian Saucer]].| |
||
| + | *Attacks are instantaneous and cannot miss.}} |
||
| + | {{/row|Tempest Staff|minion=Sharknado|Dropped by [[Duke Fishron]].| |
||
| + | *Both Sharknado and Mini Sharkrons can hit an enemy.}} |
||
| + | {{/row|Stardust Dragon Staff|minion=Stardust Dragon|Crafted: {{recipes/extract|result=Stardust Dragon Staff}}| |
||
| + | *Each extra minion summoned adds a segment to the main Dragon, increasing damage. |
||
| + | *Flies through blocks to attack enemies.}} |
||
| + | {{/row|Stardust Cell Staff|minion=Stardust Cell|Crafted: {{recipes/extract|result=Stardust Cell Staff}}| |
||
| + | *Launches additional projectiles at enemies the player hits.}} |
||
| + | {{/row|Terraprisma|minion=Terraprisma|Dropped by [[Empress of Light]] if all damage is dealt during the day.| |
||
| + | *Does not trigger invulnerability. |
||
| + | *Stays in the same position in relation to the player, flies through blocks to attack enemies.}} |
||
| + | |} |
||
| + | |||
| + | === Sentries === |
||
| + | ==== Standard ==== |
||
| + | {| class="sortable terraria lined" |
||
| + | ! colspan=2 | Item !! data-sort-type=number | Sentry !! Damage !! Source !! Notes |
||
| + | {{/row|Queen Spider Staff|sentry=Queen Spider|Crafted: {{recipes/extract|result=Queen Spider Staff}}| |
||
| + | *Spiders accumulate, inflicts the [[Acid Venom]] debuff.}} |
||
| + | {{/row|Staff of the Frost Hydra|sentry=Frost Hydra|Found in [[Biome Chest|Ice Chest]].}} |
||
| + | {{/row|Lunar Portal Staff|sentry=Lunar Portal|Dropped by [[Moon Lord]].}} |
||
| + | {{/row|Rainbow Crystal Staff|sentry=Rainbow Crystal|Dropped by [[Moon Lord]].}} |
||
| + | |} |
||
| + | ==== Tavernkeep's sentries ==== |
||
| + | {{options/snap|item|snapshot}}{{options/set|item|small=y|icons=n}} |
||
| + | {| class="terraria" id="table-Sentries-Tavernkeep" |
||
|- |
|- |
||
| + | ! Item !! Sentry !! Damage !! Source !! Notes |
||
| − | | align=center | {{il2c|Spider Staff}} {{pc icon}} |
||
| − | | align=center | [[File:Spider Minion.png|60px]] || Spider |
||
| − | | style="text-align:center" | 26 || 16 {{item link2|Spider Fang}} {{pc icon}} |
||
|- |
|- |
||
| + | | {{item|Lightning Aura Cane|icons=y}} |
||
| − | | align=center | {{il2c|Optic Staff}} {{pc icon}} |
||
| + | | {{item|Lightning Aura 2|Lightning Aura|nolink=y}} |
||
| − | | align=center | [[File:Twins Minion.png|50px]] || Twins |
||
| + | | align=center | {{iteminfo|Lightning Aura Cane|damage}} |
||
| − | |style="text-align:center"| 30 || 2 {{item link2|Lens}} 1 {{item link2|Black Lens}} 12 {{item link2|Hallowed Bar}} 20 {{item link2|Soul of Sight}} |
||
| + | | Sold by [[Tavernkeep]]. |
||
| + | | |
||
|- |
|- |
||
| + | | {{item|Flameburst Cane|icons=y}} |
||
| − | | align=center | {{il2c|Pirate Staff}} {{pc icon}} |
||
| + | | {{item|Flameburst Tower 2|Flameburst Tower|nolink=y}} |
||
| − | | align=center | [[File:Pirate Minion.png|50px]] || Pirate |
||
| + | | align=center | {{iteminfo|Flameburst Cane|damage}} |
||
| − | | style="text-align:center" | 40 || [[Pirate Invasion]] |
||
| + | | Sold by [[Tavernkeep]]. |
||
| + | | |
||
|- |
|- |
||
| + | | {{item|Explosive Trap Cane|icons=y}} |
||
| − | | align=center | {{il2c|Pygmy Staff}} |
||
| + | | {{item|Explosive Trap 2|Explosive Trap|nolink=y}} |
||
| − | | align=center | {{mirror|[[File:Pygmy Types.png|50px]]}} || Pygmy |
||
| + | | align=center | {{iteminfo|Explosive Trap Cane|damage}} |
||
| − | |style="text-align:center"| 34 || [[Plantera]] (25% or 1/4 chance) |
||
| + | | Sold by [[Tavernkeep]]. |
||
| + | | |
||
|- |
|- |
||
| + | | {{item|Ballista Cane|icons=y}} |
||
| − | | align=center | {{il2c|Xeno Staff}} {{pc icon}} |
||
| + | | {{item|Ballista 2|Ballista|nolink=y}} |
||
| − | | align=center | [[File:Minion UFO.png]] || UFO |
||
| + | | align=center | {{iteminfo|Ballista Cane|damage}} |
||
| − | |style="text-align:center"| 36 || [[Martian Saucer]] (11% or 1/9 chance) |
||
| + | | Sold by [[Tavernkeep]]. |
||
| + | | |
||
| + | |- class="topline" |
||
| + | | {{item|Lightning Aura Staff|icons=y}} |
||
| + | | {{item|Lightning Aura 3|Lightning Aura|nolink=y}} |
||
| + | | align=center | {{iteminfo|Lightning Aura Staff|damage}} |
||
| + | | Sold by [[Tavernkeep]]. |
||
| + | | |
||
|- |
|- |
||
| − | + | | {{item|Flameburst Staff|icons=y}} |
|
| + | | {{item|Flameburst Tower 3|Flameburst Tower|nolink=y}} |
||
| − | | align=center | [[File:Raven Minion.png]] || Raven |
||
| + | | align=center | {{iteminfo|Flameburst Staff|damage}} |
||
| − | |style="text-align:center"| 37 || [[Pumpking]] (0.01% to 14.29% chance depending on wave) |
||
| + | | Sold by [[Tavernkeep]]. |
||
| + | | |
||
|- |
|- |
||
| + | | {{item|Explosive Trap Staff|icons=y}} |
||
| − | | align=center | {{il2c|Tempest Staff}} {{pc icon}} |
||
| + | | {{item|Explosive Trap 3|Explosive Trap|nolink=y}} |
||
| − | | align=center | [[File:Tempest Minion.png|35px]] || Sharknado |
||
| + | | align=center | {{iteminfo|Explosive Trap Staff|damage}} |
||
| − | |style="text-align:center"| 50 || [[Duke Fishron]] (20% or 1/5 chance) |
||
| + | | Sold by [[Tavernkeep]]. |
||
| + | | |
||
|- |
|- |
||
| + | | {{item|Ballista Staff|icons=y}} |
||
| − | | align=center | {{il2c|Deadly Sphere Staff}} {{pc icon}} |
||
| + | | {{item|Ballista 3|Ballista|nolink=y}} |
||
| − | | align=center | [[File:Deadly Sphere minion.gif]] || Deadly Sphere |
||
| + | | align=center | {{iteminfo|Ballista Staff|damage}} |
||
| − | | style="text-align:center" | 50 || [[Deadly Sphere]] (2.5% or 1/40 chance) |
||
| + | | Sold by [[Tavernkeep]]. |
||
| + | | |
||
| + | |}{{options/restore|item|snapshot}} |
||
| + | |||
| + | === Whips === |
||
| + | {| class="sortable terraria lined" |
||
| + | ! colspan=3 | Item !! data-sort-type=number | Damage !! Source !! Notes |
||
| + | {{/row|Firecracker|Dropped by [[Wall of Flesh]].| |
||
| + | * Instead of increasing summon damage, a struck enemy is surrounded by fiery energy which explodes the next time a minion attacks it, which deals {{eicons|1.4.1.2}} 2.75× / {{eicons|1.4.0.1}} 3× the minion's usual damage. |
||
| + | * Damage reduced by 33% each hit in a single swing.}} |
||
| + | {{/row|Cool Whip|| |
||
| + | * Hitting enemies summons a snowflake minion that attacks that enemy and any nearby enemies, doing 10 damage and ignoring 30 defense. |
||
| + | * {{eicons|1.4.1.2}} Also inflicts [[Frostburn]] debuff for 4 seconds. |
||
| + | * Damage reduced by 30% each hit in a single swing.}} |
||
| + | {{/row|Durendal|| |
||
| + | * 9 summon tag damage. |
||
| + | * Hitting enemies increases attack speed with the Durendal's Blessing [[buff]]. |
||
| + | * Damage reduced by 20% each hit in a single swing.}} |
||
| + | {{/row|Dark Harvest|Dropped by [[Pumpking]].| |
||
| + | * Hitting an enemy adds dark energy to it. When minions attack an enemy with dark energy, the dark energy flares and damages nearby enemies (not the original target) for 10 damage per hit. This damage ignores up to 50 defense. |
||
| + | * Hitting enemies increases attack speed with the Harvest Time [[buff]]. |
||
| + | * Damage reduced by 10% each hit in a single swing.}} |
||
| + | {{/row|Morning Star|Dropped by [[Blue Armored Bones]], [[Hell Armored Bones]], and [[Rusty Armored Bones]].| |
||
| + | * 5 summon tag damage. |
||
| + | * +5% summon tag critical strike chance. |
||
| + | * Damage reduced by 5% each hit in a single swing.}} |
||
| + | {{/row|Kaleidoscope|Dropped by [[Empress of Light]].| |
||
| + | * 20 summon tag damage. |
||
| + | * +10% summon tag critical strike chance. |
||
| + | * Damage reduced by 10% each hit in a single swing.}} |
||
| + | |} |
||
| + | |||
| + | == Armor Summons == |
||
| + | Certain armor sets will summon a unique minion when the full set is worn: |
||
| + | * All armor summons can be obtainable on {{desktop}}, and the [[Stardust armor|Stardust Guardian]] is also obtainable on {{console}} and {{mobile}}. The [[Chlorophyte armor|Leaf Crystal]] (see bottom of this section) is obtainable on all platforms. |
||
| + | * Each player can only have one armor minion that remains active as long as the armor is worn, and can be directed by double-pressing the {{key|down}} key. |
||
| + | * They do not count against either minion or sentry caps. |
||
| + | * See also the Leaf Crystal from [[Chlorophyte armor]]; This is not controllable like a minion, but does provide ongoing attacks against nearby enemies. |
||
| + | {{options/snap|item|snapshot}}{{options/set|item|small=y}} |
||
| + | {| class="terraria" id="table-Armor-Summons" |
||
|- |
|- |
||
| + | ! Item !! Minion !! Damage !! Source |
||
| − | | align=center | {{il2c|Stardust Dragon Staff}} {{pc icon}} |
||
| − | | align=center | [[File:Stardust Dragon minion (1 summon).png|65px]] || Stardust Dragon |
||
| − | | style="text-align:center" | 40 || 18 {{item link2|Stardust Fragment}} |
||
|- |
|- |
||
| + | | {{item|Forbidden armor}} |
||
| − | | align=center | {{il2c|Stardust Cell Staff}} {{pc icon}} |
||
| + | | {{item|Forbidden Sign|nolink=y}} |
||
| − | | align=center | [[File:Stardust Cell.gif]] || Stardust Cell |
||
| + | | align=center | 25 |
||
| − | | style="text-align:center" | 60 || 18 {{item link2|Stardust Fragment}} |
||
| + | | Crafted: 3 {{item|mode=image|Forbidden Fragment}} / 46 ( {{item|mode=image|Adamantite Bar}} ''or'' {{item|mode=image|Titanium Bar}} ) |
||
|- |
|- |
||
| + | | {{item|Stardust armor}} |
||
| + | | {{item|Stardust Guardian|image=Stardust Guardian minion.png|nolink=y}} |
||
| + | | align=center | 20 |
||
| + | | Crafted: 36 {{item|mode=image|Luminite Bar}} / 45 {{item|mode=image|Stardust Fragment}} |
||
|} |
|} |
||
| − | + | == Boost gear == |
|
| + | === Basegame Armor === |
||
| − | Sentries are unlike other minions. They are temporary and don't follow the player, rather remaining stationary until their time is exhausted. They also don't count toward the player's minion cap, so other traditional summoned minions will not be affected by summoning a sentry in addition. Multiple sentries can be summoned at once, but two of the same sentry cannot. |
||
| + | {| class="terraria lined" |
||
| − | |||
| + | ! Appearance / Name !! Total Minion Boost(s) !! ! style="font-size:90%;" data-sort-type=number | Head |
||
| − | {| class="terraria" |
||
| + | ! style="font-size:90%;" data-sort-type=number | Chest |
||
| + | ! style="font-size:90%;" data-sort-type=number | Legs |
||
| + | ! style="font-size:95%;" data-sort-type=number | Total Defense !! Source |
||
|- |
|- |
||
| + | |{{item|Flinx Fur Coat}} |
||
| − | ! colspan="2" style="padding:0 15px" | Item !! colspan=2 | Minion !! Damage !! Acquired From |
||
| + | | |
||
| − | |||
| + | * +1 minion capacity |
||
| + | * +5% summon damage |
||
| + | | |
||
| + | {{na}} |
||
| + | | |
||
| + | 1 |
||
| + | | |
||
| + | {{na}} |
||
| + | | |
||
| + | * 1 |
||
| + | | Crafted: {{recipes/extract|result=Flinx Fur Coat}} |
||
|- |
|- |
||
| + | |{{item|Obsidian armor}} |
||
| − | |{{item_link2|Queen Spider Staff}} |
||
| + | | |
||
| − | | [[Queen Spider Staff]] {{pc icon}} |
||
| + | * +1 minion capacity |
||
| − | | align=center | [[File:Queen Spider Minion.png|40px]] || Queen Spider |
||
| + | * +31% summon damage |
||
| − | | style="text-align:center" | 21 || 24 {{item link2|Spider Fang}} {{pc icon}} |
||
| + | * +15% whip speed and +30% whip range |
||
| + | | |
||
| + | 4 |
||
| + | | |
||
| + | 6 |
||
| + | | |
||
| + | 5 |
||
| + | | |
||
| + | * 15 |
||
| + | | Crafted: 60 {{item|mode=image|Obsidian}} + 30 {{item|mode=image|Silk}} + 20 ( {{item|mode=image|Shadow Scale}} ''or'' {{item|mode=image|Tissue Sample}} ) |
||
|- |
|- |
||
| + | | {{item|Bee armor}} |
||
| − | |{{item_link2|Staff of the Frost Hydra}} |
||
| + | | |
||
| − | | [[Staff of the Frost Hydra]] |
||
| + | * +2 minion capacity |
||
| − | | align=center | [[File:Staff of the Frost Hydra summoned.png|40px]] || Frost Hydra |
||
| + | * +23% summon damage |
||
| − | |style="text-align:center"| 100 || [[Frozen Chest]] |
||
| + | | |
||
| + | 4 |
||
| + | | |
||
| + | 5 |
||
| + | | |
||
| + | 4 |
||
| + | | |
||
| + | * 13 |
||
| + | | Crafted: 30 {{item|mode=image|Bee Wax}} |
||
|- |
|- |
||
| − | |{{ |
+ | | {{item|Forbidden armor}} |
| + | | |
||
| − | | [[Stardust armor]] {{pc icon}} |
||
| + | * +2 minion capacity |
||
| − | | align=center | [[File:Stardust Guardian minion.png|40px]] || Stardust Guardian |
||
| + | * +25% summon damage |
||
| − | |style="text-align:center"| 100 || 36 {{item link2|Luminite Bar}} 45 {{item link2|Stardust Fragment}} |
||
| + | * +Ancient Storm |
||
| + | | |
||
| + | 6 |
||
| + | | |
||
| + | 12 |
||
| + | | |
||
| + | 8 |
||
| + | | |
||
| + | * 26 |
||
| + | | Crafted: 3 {{item|mode=image|Forbidden Fragment}} + 46 ( {{item|mode=image|Adamantite Bar}} ''or'' {{item|mode=image|Titanium Bar}} ) |
||
|- |
|- |
||
| + | | {{item|Spider armor}} |
||
| − | |{{item_link2|Lunar Portal Staff}} |
||
| + | | |
||
| − | | [[Lunar Portal Staff]] {{pc icon}} |
||
| + | * +3 minion capacity |
||
| − | | align=center | [[File:Lunar Portal.png|23px]] || Lunar Portal |
||
| + | * +28% summon damage |
||
| − | |style="text-align:center"| 50 || [[Moon Lord]] (11.11% or 1/9 chance) |
||
| + | | |
||
| + | 5 |
||
| + | | |
||
| + | 8 |
||
| + | | |
||
| + | 7 |
||
| + | | |
||
| + | * 20 |
||
| + | | Crafted: 36 {{item|mode=image|Spider Fang}} |
||
|- |
|- |
||
| + | |{{item|Hallowed armor|image=Hallowed armor Hood.png|note2=(with Hood)}} |
||
| − | |{{item_link2|Rainbow Crystal Staff}} |
||
| + | | |
||
| − | | [[Rainbow Crystal Staff]] {{pc icon}} |
||
| + | * +3 minion capacity |
||
| − | | align=center | [[File:Rainbow Crystal.png|17px]] || Rainbow Crystal |
||
| + | * +10% summon damage |
||
| − | |style="text-align:center"| 150 || [[Moon Lord]] (11.11% or 1/9 chance) |
||
| + | * +7% (all) damage |
||
| + | | |
||
| + | 1 |
||
| + | | |
||
| + | 15 |
||
| + | | |
||
| + | 11 |
||
| + | | |
||
| + | * 27 |
||
| + | | Crafted: 54 {{item|mode=image|Hallowed Bar}} |
||
|- |
|- |
||
| + | | {{item|Tiki armor}} |
||
| + | | |
||
| + | * +4 minion capacity |
||
| + | * +30% summon damage |
||
| + | * {{Eicons|PC=1}} +30% Whip Range |
||
| + | | |
||
| + | 6 |
||
| + | | |
||
| + | 17 |
||
| + | | |
||
| + | 12 |
||
| + | | |
||
| + | * 35 |
||
| + | | Sold by [[Witch Doctor]] after [[Plantera]] has been defeated. |
||
| + | |- |
||
| + | | {{item|Spooky armor}} |
||
| + | | |
||
| + | * +4 minion capacity |
||
| + | * +58% summon damage |
||
| + | | |
||
| + | 9 |
||
| + | | |
||
| + | 11 |
||
| + | | |
||
| + | 10 |
||
| + | | |
||
| + | * 30 |
||
| + | | Crafted: 750 {{item|mode=image|Spooky Wood}} |
||
| + | |- |
||
| + | | {{item|Stardust armor}} |
||
| + | | |
||
| + | * +5 minion capacity |
||
| + | * +66% summon damage |
||
| + | * +Stardust Guardian minion |
||
| + | | |
||
| + | 10 |
||
| + | | |
||
| + | 16 |
||
| + | | |
||
| + | 12 |
||
| + | | |
||
| + | * 38 |
||
| + | | Crafted: 36 {{item|mode=image|Luminite Bar}} + 45 {{item|mode=image|Stardust Fragment}} |
||
|} |
|} |
||
| + | === Tavernkeep's Armor === |
||
| − | == Items that increase minions stats == |
||
| + | {| class="terraria lined" |
||
| − | |||
| + | ! Appearance / Name !! Minion Boost(s) !! ! style="font-size:90%;" data-sort-type=number | Head |
||
| − | === Armor === |
||
| + | ! style="font-size:90%;" data-sort-type=number | Chest |
||
| − | {| class="terraria" |
||
| + | ! style="font-size:90%;" data-sort-type=number | Legs |
||
| − | ! colspan=2 | Item !! Minion Boost(s) |
||
| + | ! style="font-size:95%;" data-sort-type=number | Total Defense !! Source |
||
| − | |- |
||
| − | | align=center | {{item_link2|Bee armor}} |
||
| − | | [[Bee armor]] {{pc icon}} |
||
| − | | |
||
| − | *+2 Minion capacity |
||
| − | *+23% Minion damage |
||
|- |
|- |
||
| − | + | | {{item|Apprentice armor}} |
|
| − | | [[Spider armor]] {{pc icon}} |
||
| |
| |
||
| + | * [[Flameburst sentry summons|Flameburst sentry]] field of view and range are dramatically increased |
||
| − | *+3 Minion capacity |
||
| + | * +2 Sentry capacity |
||
| − | *+28% Minion damage |
||
| + | * +30% summon damage |
||
| + | | |
||
| + | 7 |
||
| + | | |
||
| + | 15 |
||
| + | | |
||
| + | 10 |
||
| + | | |
||
| + | * 32 |
||
| + | | Sold by [[Tavernkeep]] |
||
|- |
|- |
||
| − | + | | {{item|Monk armor}} |
|
| + | | |
||
| − | | [[Tiki armor]] |
||
| + | * [[Lightning Aura sentry summons|Lightning Aura sentries]] can deal [[critical hit]]s and strike faster |
||
| + | * +2 Sentry capacity |
||
| + | * +30% summon damage |
||
| + | | |
||
| + | 8 |
||
| + | | |
||
| + | 22 |
||
| + | | |
||
| + | 16 |
||
| |
| |
||
| + | * 46 |
||
| − | *+4 Minion capacity |
||
| + | | Sold by [[Tavernkeep]] |
||
| − | *+30% Minion damage |
||
|- |
|- |
||
| − | + | | {{item|Huntress armor}} |
|
| − | | [[Spooky armor]] |
||
| |
| |
||
| + | * [[Explosive Trap sentry summons|Explosive Trap sentries]] "oil" enemies: Set oiled enemies [[On Fire!]] for extra damage. |
||
| − | *+3 Minion capacity |
||
| + | * +2 Sentry capacity |
||
| − | *+58% Minion damage |
||
| + | * +30% summon damage |
||
| + | | |
||
| + | 7 |
||
| + | | |
||
| + | 17 |
||
| + | | |
||
| + | 12 |
||
| + | | |
||
| + | * 36 |
||
| + | | Sold by [[Tavernkeep]] |
||
|- |
|- |
||
| − | + | | {{item|Squire armor}} |
|
| − | | [[Stardust armor]] {{pc icon}} |
||
| |
| |
||
| + | * [[Ballista sentry summons|Ballista sentry]] projectiles pierce more targets |
||
| − | *+5 Minion capacity |
||
| + | * Grants [[Ballista Panic]] [[buff]] when you take damage, doubling the fire rate of Ballista sentries for 3 seconds. |
||
| − | *+66% Minion damage |
||
| + | * +2 Sentry capacity |
||
| − | *+Stardust Guardian Minion |
||
| + | * +30% summon damage |
||
| + | | |
||
| + | 12 |
||
| + | | |
||
| + | 27 |
||
| + | | |
||
| + | 17 |
||
| + | | |
||
| + | * 56 |
||
| + | | Sold by [[Tavernkeep]] |
||
| + | |- |
||
| + | | {{item|Dark Artist armor}} |
||
| + | | |
||
| + | * +3 Sentry Capacity |
||
| + | * +60% summon damage |
||
| + | * Greatly enhances Flameburst effectiveness |
||
| + | | |
||
| + | 7 |
||
| + | | |
||
| + | 21 |
||
| + | | |
||
| + | 14 |
||
| + | | |
||
| + | * 42 |
||
| + | | Sold by [[Tavernkeep]] |
||
| + | |- |
||
| + | | {{item|Shinobi Infiltrator armor}} |
||
| + | | |
||
| + | * +3 Sentry Capacity |
||
| + | |||
| + | * +60% summon damage |
||
| + | * Greatly enhances Lightning Aura effectiveness |
||
| + | | |
||
| + | 10 |
||
| + | | |
||
| + | 26 |
||
| + | | |
||
| + | 18 |
||
| + | | |
||
| + | * 54 |
||
| + | | Sold by [[Tavernkeep]] |
||
| + | |- |
||
| + | | {{item|Red Riding armor}} |
||
| + | | |
||
| + | * +3 Sentry Capacity |
||
| + | |||
| + | * +60% summon damage |
||
| + | * Greatly enhances Explosive Traps effectiveness |
||
| + | | |
||
| + | 8 |
||
| + | | |
||
| + | 24 |
||
| + | | |
||
| + | 16 |
||
| + | | |
||
| + | * 48 |
||
| + | | Sold by [[Tavernkeep]] |
||
| + | |- |
||
| + | | {{item|Valhalla Knight armor}} |
||
| + | | |
||
| + | * +3 Sentry capacity |
||
| + | |||
| + | * +60% summon damage |
||
| + | * Greatly enhances Ballista effectiveness |
||
| + | | |
||
| + | 14 |
||
| + | | |
||
| + | 30 |
||
| + | | |
||
| + | 20 |
||
| + | | |
||
| + | * 64 |
||
| + | | Sold by [[Tavernkeep]] |
||
|} |
|} |
||
=== Accessories === |
=== Accessories === |
||
| − | {| class="terraria" |
+ | {| class="terraria lined" |
| − | ! |
+ | ! Item !! Boost(s) !! Source |
|- |
|- |
||
| + | | {{item|Pygmy Necklace}} |
||
| − | | align=center | [[File:Pygmy_Necklace.png]] |
||
| + | | |
||
| − | | [[Pygmy Necklace]] |
||
| + | * +1 Minion capacity |
||
| |
| |
||
| + | {{eicons|1.4.1}} Sold by [[Witch Doctor]] during [[night]] in [[Pre-Hardmode]]<br/> |
||
| − | *+1 Minion capacity |
||
| + | {{eicons|1.4.0.1}} Sold by Witch Doctor during night after [[Plantera]] has been defeated.<br/> |
||
| + | {{eicons|1.4.0.1|invert=y}} Sold by Witch Doctor when spoken in the [[Jungle]] after Plantera has been defeated and there is a [[Pygmy Staff]] in the player's inventory. |
||
|- |
|- |
||
| + | | {{item|Summoner Emblem}} |
||
| − | | align=center | [[File:Hercules_Beetle.png]] |
||
| − | | [[Hercules Beetle]] |
||
| |
| |
||
| − | *+15% |
+ | * +15% summon damage |
| + | | Dropped by [[Wall of Flesh]]. |
||
| − | *Increases Minion Knockback |
||
|- |
|- |
||
| + | | {{item|Putrid Scent}} |
||
| − | | align=center | [[File:Necromantic_Scroll.png]] |
||
| − | | [[Necromantic Scroll]] |
||
| |
| |
||
| + | * +5% (all) damage |
||
| − | *+1 Minion capacity |
||
| + | * In multiplayer, makes enemies less likely to target you over other players. |
||
| − | *+10% Minion damage |
||
| + | | Dropped by [[Corrupt Mimic]] |
||
|- |
|- |
||
| + | |||
| − | | align=center | [[File:Papyrus_Scarab.png]] |
||
| + | | {{item|Apprentice's Scarf}} |
||
| − | | [[Papyrus Scarab]] |
||
| |
| |
||
| − | *+1 |
+ | * +1 Sentry capacity |
| − | *+ |
+ | * +10% summon damage |
| + | | Dropped by {{eil|Ogre}}. |
||
| − | *Increases Minion Knockback |
||
|- |
|- |
||
| + | | {{item|Monk's Belt}} |
||
| − | | align=center | [[File:Summoner_Emblem.png]] |
||
| − | | [[Summoner Emblem]] {{pc icon}} |
||
| |
| |
||
| + | * +1 Sentry capacity |
||
| − | *+15% Minion damage |
||
| + | * +10% summon damage |
||
| + | | Dropped by {{eil|Ogre}}. |
||
|- |
|- |
||
| + | | {{item|Huntress's Buckler}} |
||
| − | | align=center | [[File:Avenger_Emblem.png]] |
||
| − | | [[Avenger Emblem]] |
||
| |
| |
||
| + | * +1 Sentry capacity |
||
| − | *+12% (All) Damage |
||
| + | * +10% summon damage |
||
| + | | Dropped by {{eil|Ogre}}. |
||
|- |
|- |
||
| + | | {{item|Squire's Shield}} |
||
| − | | align=center | [[File:Destroyer_Emblem.png]] |
||
| − | | [[Destroyer Emblem]] |
||
| |
| |
||
| + | * +1 Sentry capacity |
||
| − | *+10% (All) Damage |
||
| + | * +10% summon damage |
||
| + | | Dropped by {{eil|Ogre}}. |
||
|- |
|- |
||
| + | | {{item|Avenger Emblem}} |
||
| − | | align=center | [[File:Sun_Stone.png]] |
||
| − | | [[Sun Stone]] |
||
| |
| |
||
| − | *+ |
+ | * +12% (All) Damage |
| + | | Crafted: |
||
| − | *Increases Minion Knockback by 50% |
||
| + | ({{eicons|1.3.0.1}}) 1 {{item|mode=image|Warrior Emblem}} or 1 {{item|mode=image|Summoner Emblem}} or 1 {{item|mode=image|Ranger Emblem}} or 1 {{item|mode=image|Sorcerer Emblem}} + 5 {{item|mode=image|Soul of Might|ext=gif}} + 5 {{item|mode=image|Soul of Sight|ext=gif}} + 5 {{item|mode=image|Soul of Fright|ext=gif}} <br/>'''or'''<br/>({{eicons|1.3.0.1|invert=y}}) 1 {{item|mode=image|Warrior Emblem}} + 1 {{item|mode=image|Ranger Emblem}} + 1 {{item|mode=image|Sorcerer Emblem}} |
||
|- |
|- |
||
| + | | {{item|Hercules Beetle}} |
||
| − | | align=center | [[File:Moon_Stone.png]] |
||
| − | | [[Moon Stone]] |
||
| |
| |
||
| − | *+ |
+ | * +15% summon damage |
| − | *Increases Minion Knockback by |
+ | * Increases Minion Knockback by 2 |
| + | | |
||
| + | {{eicons|1.4.1}} Sold by [[Witch Doctor]] when spoken in the [[Jungle]] after [[Plantera]] has been defeated.<br/> |
||
| + | {{eicons|1.4.0.1}} Sold by Witch Doctor when spoken in the Jungle after Plantera has been defeated and there is a [[Pygmy Staff]] in the player's inventory. |
||
|- |
|- |
||
| + | | {{item|Necromantic Scroll}} |
||
| − | | align=center | [[File:Celestial_Stone.png]] |
||
| − | | [[Celestial Stone]] |
||
| |
| |
||
| + | * +1 Minion capacity |
||
| − | *+10% (All) Damage |
||
| + | * +10% summon damage |
||
| − | *Increases Minion Knockback by 50% |
||
| + | | Dropped by [[Mourning Wood]]. |
||
|- |
|- |
||
| + | | {{item|Papyrus Scarab}} |
||
| − | | align=center | [[File:Celestial_Shell.png]] |
||
| − | | [[Celestial Shell]] {{pc icon}} |
||
| |
| |
||
| + | * +1 Minion capacity |
||
| − | *+10% (All) damage |
||
| + | * +15% summon damage |
||
| − | *Increases Minion Knockback by 50% |
||
| + | * Increases Minion Knockback by 2 |
||
| + | | Crafted: 1 {{item|mode=image|Hercules Beetle}} + 1 {{item|mode=image|Necromantic Scroll}} |
||
| + | |- |
||
| + | | {{item|Moon Stone}} |
||
| + | | |
||
| + | * +10% (All) Damage |
||
| + | * +10% Whip and Melee speed |
||
| + | * Increases Minion Knockback by 0.5 |
||
| + | (Bonuses only activate during the [[Night]] or a [[Solar Eclipse]]) |
||
| + | |||
| + | {{eicons|1.4.0.1}} Does not stack with Celestial Stone or Celestial Shell |
||
| + | | Dropped by [[Vampire]]. |
||
| + | |- |
||
| + | | {{item|Sun Stone}} |
||
| + | | |
||
| + | * +10% (All) Damage |
||
| + | * +10% Whip and Melee speed |
||
| + | * Increases Minion Knockback by 0.5 |
||
| + | (Bonuses only activate during the [[Day]]) |
||
| + | |||
| + | {{eicons|1.4.0.1}} Does not stack with Celestial Stone or Celestial Shell |
||
| + | | Dropped by [[Golem]]. |
||
| + | |- |
||
| + | |||
| + | | {{item|Celestial Stone}} |
||
| + | | |
||
| + | * +10% (All) Damage |
||
| + | * +10% Whip and Melee Speed |
||
| + | * Increases Minion Knockback by 0.5 |
||
| + | |||
| + | {{eicons|1.4.0.1}} Does not stack with Celestial Shell or either Sun or Moon Stone |
||
| + | | Crafted: 1 {{item|mode=image|Sun Stone}} + 1 {{item|mode=image|Moon Stone}} |
||
| + | |- |
||
| + | | {{item|Celestial Shell}} |
||
| + | | |
||
| + | * +10% (All) Damage |
||
| + | * +10% Whip and Melee speed |
||
| + | * Increases Minion Knockback by 0.5 |
||
| + | In Werewolf form, at [[Night]] or during a [[Solar Eclipse]]: |
||
| + | * +5.1% Whip and Melee speed, total of +15.1% at Night. |
||
| + | |||
| + | {{eicons|1.4.0.1}} Does not stack with Celestial Stone or either Sun or Moon Stone |
||
| + | | Crafted: 1 {{item|mode=image|Celestial Stone}} + 1 {{item|mode=image|Moon Shell}} |
||
| + | |- |
||
| + | | {{item|Destroyer Emblem}} |
||
| + | | |
||
| + | * +10% (All) Damage |
||
| + | *+8% increased [[critical strike]] |
||
| + | | Crafted: 1 {{item|mode=image|Avenger Emblem}} + 1 {{item|mode=image|Eye of the Golem}} |
||
| + | |||
| + | |} |
||
| + | |||
| + | |||
| + | Additionally, any accessories which boost melee speed also boost whip speed, and the autoswing property of [[Feral Claws]] and its upgrades applies to whips. There are some melee accessories which have small boosts only to whips, not to the summons themselves. |
||
| + | |||
| + | |||
| + | {| class="terraria lined" |
||
| + | ! Item !! Whip and Melee Boost(s) !! Source |
||
| + | |- |
||
| + | | {{item|Feral Claws}} |
||
| + | | |
||
| + | * +12% Whip and Melee speed |
||
| + | * {{eicons|1.4.1}} All Whips and Melee Weapons now Autoswing |
||
| + | | Found in [[Ivy Chest]]s, [[Jungle Crate]]s and [[Bramble Crate]]s |
||
| + | |- |
||
| + | | {{item|Power Glove}} |
||
| + | | |
||
| + | * +12% Whip and Melee Speed |
||
| + | * All Whips and Melee Weapons now Autoswing |
||
| + | * Increased Melee weapon size/range |
||
| + | | Crafted: {{item|mode=image|Feral Claws}} + {{item|mode=image|Titan Glove}} |
||
| + | |- |
||
| + | | {{item|Mechanical Glove}} |
||
| + | | |
||
| + | * +12% Whip and Melee speed |
||
| + | * All Whips and Melee Weapons now Autoswing |
||
| + | * Increased Melee weapon size/range |
||
| + | * +12% Melee damage |
||
| + | * Increased Melee knockback (doubled) |
||
| + | | Crafted: {{item|mode=image|Power Glove}} + {{item|mode=image|Avenger Emblem}} |
||
| + | |- |
||
| + | |{{item|Fire Gauntlet}} |
||
| + | | |
||
| + | * +12% Whip and Melee speed |
||
| + | * All Whips and Melee Weapons now Autoswing |
||
| + | * Increased Melee weapon size/range |
||
| + | * +12% Melee damage |
||
| + | * Increased Melee knockback (doubled) |
||
| + | * Additional fire damage ([[Hellfire]]{{eicons|1.4.1}} / [[On Fire!]]{{eicons|1.4.1|invert=y}}) |
||
| + | | Crafted: {{item|mode=image|Mechanical Glove}} + {{item|mode=image|Magma Stone}} |
||
| + | |- |
||
| + | | {{item|Berserker's Glove}} |
||
| + | | |
||
| + | * +12% Whip and Melee speed |
||
| + | * All Whips and Melee Weapons can now Autoswing |
||
| + | * +8 Defense |
||
| + | * In Multiplayer, enemies are more likely to target you |
||
| + | Aggro effects make this better in singleplayer, where aggro doesn't matter. |
||
| + | | Crafted: {{item|mode=image|Power Glove}} + {{item|mode=image|Flesh Knuckles}} |
||
| + | |- |
||
| + | | {{item|Moon Charm}} |
||
| + | | |
||
| + | * +5.1% Whip and Melee Speed |
||
| + | (Boost only activates at [[Night]] or during a [[Solar Eclipse]]) |
||
| + | |||
| + | (Does not stack with Celestial Shell) |
||
| + | | Dropped by [[Werewolf]] on a Full Moon |
||
|} |
|} |
||
=== Buffs === |
=== Buffs === |
||
| − | {| class="terraria" |
+ | {| class="terraria lined" |
| − | ! |
+ | ! Buff !! From !! Minion Boost(s) |
|- |
|- |
||
| + | | {{item|Well Fed}} |
||
| − | | align=center | [[File:Summoning Potion.png]] |
||
| + | | [[Well Fed|Foods]] |
||
| − | | [[Summoning Potion]] {{pc icon}} |
||
| |
| |
||
| + | * +5% (All) Damage |
||
| − | *+1 Minion capacity |
||
| + | * Increases Minion Knockback by 0.5 |
||
|- |
|- |
||
| + | | {{item|Plenty Satisfied}} |
||
| − | | align=center | [[File:Pumpkin Pie.png]] |
||
| − | | [[ |
+ | | [[Plenty Satisfied|Foods]] |
| |
| |
||
| − | *+5% (All) |
+ | * +7.5% (All) damage |
| + | * +0.75 minion knockback |
||
| − | *Increases Minion Knockback by 50% |
||
|- |
|- |
||
| + | | {{item|Exquisitely Stuffed}} |
||
| − | | align=center | [[File:Bewitching Table.png]] |
||
| + | | [[Plenty Satisfied|Foods]] |
||
| − | |[[Bewitching Table]] {{pc icon}} |
||
| |
| |
||
| + | * +10% (All) damage |
||
| − | *+1 Minion capacity |
||
| + | * +1 minion knockback |
||
| + | |- |
||
| + | | {{item|Wrath}} |
||
| + | |{{item|Wrath Potion}} |
||
| + | | |
||
| + | * +10% (All) Damage |
||
| + | |- |
||
| + | | {{item|Cute Fishron Mount|image=Cute Fishron Mount (buff).png}} |
||
| + | | {{item|Shrimpy Truffle}} |
||
| + | | |
||
| + | * +15% (All) Damage - (In Water / Under 50% Health) |
||
| + | |- |
||
| + | | {{item|Feral Bite}} |
||
| + | | Some {{item|Bats|image=Cave Bat.png}} and {{item|Duke Fishron|size=60px}} |
||
| + | | |
||
| + | * +20% (All) Damage |
||
| + | |- |
||
| + | | {{item|Damage Nebula}} |
||
| + | | {{item|Damage Booster}} |
||
| + | | |
||
| + | * +15%/30%/45% (All) damage for 8 seconds |
||
| + | |- |
||
| + | | {{item|Summoning (buff)|Summoning}} |
||
| + | | {{item|Summoning Potion}} |
||
| + | | |
||
| + | * +1 Minion capacity |
||
| + | |- |
||
| + | | {{item|Bewitched}} |
||
| + | | {{item|Bewitching Table}} |
||
| + | | |
||
| + | * +1 Minion capacity |
||
| + | |- |
||
| + | | {{item|Weapon Imbue: Confetti}} |
||
| + | | {{item|Flask of Party}} |
||
| + | | |
||
| + | * Melee and whip attacks cause a burst of [[confetti]] |
||
| + | |- |
||
| + | | {{item|Weapon Imbue: Cursed Flames}} |
||
| + | | {{item|Flask of Cursed Flames}} |
||
| + | | |
||
| + | * Melee and whip attacks inflict [[Cursed Inferno]] debuff on enemies |
||
| + | |- |
||
| + | | {{item|Weapon Imbue: Fire}} |
||
| + | | {{item|Flask of Fire}} |
||
| + | | |
||
| + | * Melee and whip attacks inflict [[On Fire!]] debuff on enemies |
||
| + | |- |
||
| + | | {{item|Weapon Imbue: Gold}} |
||
| + | | {{item|Flask of Gold}} |
||
| + | | |
||
| + | * Melee and whip attacks inflict [[Midas]] debuff on enemies |
||
| + | |- |
||
| + | | {{item|Weapon Imbue: Ichor}} |
||
| + | | {{item|Flask of Ichor}} |
||
| + | | |
||
| + | * Melee and whip attacks inflict [[Ichor]] debuff on enemies |
||
| + | |- |
||
| + | | {{item|Weapon Imbue: Nanites}} |
||
| + | | {{item|Flask of Nanites}} |
||
| + | | |
||
| + | * Melee and whip attacks inflict [[Confused]] debuff on enemies |
||
| + | |- |
||
| + | | {{item|Weapon Imbue: Poison}} |
||
| + | | {{item|Flask of Poison}} |
||
| + | | |
||
| + | * Melee and whip attacks inflict [[Poisoned]] debuff on enemies |
||
| + | |- |
||
| + | | {{item|Weapon Imbue: Venom}} |
||
| + | | {{item|Flask of Venom}} |
||
| + | | |
||
| + | * Melee and whip attacks inflict [[Venom]] debuff on enemies |
||
|} |
|} |
||
| + | {{options/restore|item|snapshot}} |
||
| − | == |
+ | == Achievement == |
| + | {{achievement|name=You and What Army?}} |
||
| − | * While all Summon weapons can obtain the Mythical [[Modifier]], the most practical is Ruthless because of the extra damage. The reduced mana cost, critical strike chance, and knockback provided by Mythical are less useful because Summon weapons use little mana, minions cannot critcally hit, and it could be argued that less minion knockback may increase damage over time in specific cases. |
||
| + | |||
| − | * Once summoned, the minion's attack will not change even if the caster removes minion damage enhancing equipment. |
||
| + | == Notes == |
||
| + | |||
| + | * <section begin=modifier/>While all Summon weapons can obtain the '''Mythical''' [[modifier]], the '''Ruthless''' modifier offers the most effective minion boost by solely increasing a minion's hit damage. The reduced mana cost, increased speed, critical strike chance, and knockback provided by Mythical are less useful because Summon weapons use mana only once (on the initial summoning rather than the minion attacks themselves), minions cannot deal critical hits, and their knockback is negligible even with modifiers. Three exceptions are the Slime Staff, Finch Staff, and the {{eil|Flinx Staff|nolink=y}}, as damage rounding causes the bonus provided by Ruthless and Mythical to be equal.<section end="modifier" /> |
||
| + | ** Weapon speed is not very useful for minion or sentry-summoning weapons, as it will only decrease the time it takes to summon a minion. Minions/sentries won't attack faster with a speed-boosting modifier. |
||
| + | * Minions count as buffs and contribute to the 22 Buff/Debuff limit. As such you can potentially lose your minions in the middle of a fight if they get pushed off by potions or debuffs. This can be mitigated by managing your total number of buffs: |
||
| + | ** Turning off non-combat buffs (pets, light pets) |
||
| + | ** Limiting number of active potions to only the most important potions |
||
| + | ** Using only one or two types of minion at a given time |
||
| + | ** Not activating un-needed buffs (like ammo crate if you don't intend to use ammo based weapons) |
||
| + | ** Removing extraneous buff granting items from arenas (like sunflowers if you don't need the speed or water-candles in event arenas) |
||
| + | ** Using debuff immunity items to prevent aquiring a debuff |
||
| + | * Minions will never attack other players, making them useless in [[PvP]]. Some minion weapons can still damage players if specifically targeted (Frost Hydra, Rainbow Crystal Staff, etc.), or if they deal incidental contact damage (Ravens, Sharknados, etc.). |
||
| + | * All [[mounts]] that can attack are classified as summon damage. This includes the following: [[Dusty Rawhide Saddle|Painted Horse Mount]], [[Royal Gilded Saddle|Majestic Horse Mount]], [[Black Studded Saddle|Dark Horse Mount]], [[Goat Skull|Goat Mount]], [[The Black Spot|Pirate Ship Mount]], [[Hexxed Branch|Tree Mount]], [[Toy Tank|Santank Mount]], [[Slime Mount]], [[Winged Slime Mount]], [[Basilisk Mount]], [[Unicorn Mount]], and [[Brain Scrambler (item)|Scutlix Mount]]. |
||
| + | * Only some minions have piercing attacks: [[Slime Staff|Slime]], [[Imp Staff|Imp]], [[Optic Staff|Twins]], [[Stardust Dragon Staff|the Stardust Dragon]], [[Terraprisma]], and all three Ballistas. This may be relevant if a player is using other piercing weapons. |
||
| + | * {{eicons|1.4.0.1|invert=y}} Once summoned, the minion's attack will not change even if the player adds or removes damage enhancing equipment (or buffs). It is worthwhile to load up all available damage bonuses and buffs (for both minion damage and damage in general) before summoning minions, even with no intention of using that equipment in the field. (No longer applies as of 1.4) |
||
| + | * It is unnecessary to upgrade an [[Avenger Emblem]] to a [[Destroyer Emblem]] for the purpose of summon damage, as they cannot deal critical hits. However, the Destroyer Emblem may benefit players if they are using non-summon weapons. Players may also want to use a Destroyer Emblem if they want to stack its damage bonus with the bonus provided by an Avenger Emblem. |
||
| + | * {{eicons|1.3.0.1|not=1.4.0.1}} Note that when trying to obtain the "You And What Army" achievement, Spiders do count as full minions, but the Twins do not. |
||
| + | * {{eversions|1.4.0.1}} As of 1.4, the strategy of summoning minions with accessories that have 'Menacing' prefixes applied and then switching to 'Warding' accessories to efficiently maximize damage and defense no longer works, as minions will now update their damage according to the accessories the player is wearing. This can, however, be useful in some situations. |
||
| + | * Whips are affected by Melee Speed increases, and can be autoswung with the [[Feral Claws]] or other accessories that enable autoswing. |
||
| + | * Players may want to avoid using minions in some situations, as they may accidentally trigger events. |
||
| + | ** Minions that deal contact damage may inadvertently spawn the [[Queen Bee]] if they accidentally touch the [[Larva]] present in [[Bee Hive|Bee Hives]]. |
||
| + | ** In the Underworld, minions may inadvertently spawn the [[Wall of Flesh]] by killing a [[Voodoo Demon]], causing its [[Guide Voodoo Doll]] to fall into lava. |
||
| + | ** While minions will not explicitly target the [[Cultists]], minions that deal contact damage may inadvertently damage them, causing them to become hostile. It is also possible for minions to kill all four Cultists, causing the [[Lunatic Cultist]] to spawn. |
||
| + | |||
| + | == Tips == |
||
| + | * Minions do not differentiate between enemies summoned by [[Statues]] and normal enemy spawns. This causes them to sometimes interfere with enemy-based engines, as they will zip off to slaughter any statue-summoned enemies in range (The [[Stardust Dragon Staff|Stardust Dragon]] is especially prone to this behavior). |
||
| + | * {{eicons|1.4.0.1|invert=y}} Summon weapons are the only weapon type that is not regularly available in the first parts of the game. While the first summon weapon, the [[Slime Staff]] is technically the earliest obtainable weapon, it is extremely rare, and is likely to go unseen until far later in the game. It can, however, be farmed by the use of a [[Slime Statue]] as soon as the [[Mechanic]] shows up.<!-- Yes, it is possible to replace a natural trap with a statue and keep jumping on the plate. With a 1/10K drop, that's not something I could suggest with a straight face. -MM --> |
||
| + | * Even if not playing as a Summoner, it is always good to keep a minion around to help pick off minor or weakened enemies. Having a minion taking out some of the passing bats, slimes, zombies, and so on can sharply improve the player's quality of life while wandering around in the nighttime surface, Caverns, Jungle, and so on. Doubly so if the player is trying to build, gather bait, chop wood, or otherwise do something besides fighting -- indeed, for such projects it may be worth adding a second minion to help fend off interruptions. |
||
| + | * Note that minions will attack Slimes even during the day, when the Slimes are nominally "neutral". In areas where [[King Slime]] can spawn in place of a regular slime ([[surface]] layer, outer thirds of the map), the turnover can lead to repeat visits from the King. |
||
| + | * All the [[Tavernkeep's Sentry|Tavernkeep's Sentries]] can be constantly resummoned to automatically refresh their attack. This is, however, less efficient than using a weapon from another class. |
||
| + | * {{eicons|1.4.0.1|invert=1}} In an Expert mode world, summoners can usefully wire a [[Bat Statue]] to a switch near the base or spawn zone. Spawning a bat and tanking a few hits (to contract the [[Feral Bite]]) lets the player summon their minions with an extra 20% damage bonus, but that's best done while safe at home. However since 1.4 this is no longer a viable strategy, due to the fact that the additional damage provided by Feral Bite will be gone once the effect is over, rendering it practically useless, since you wouldn't want the Feral Bite debuff in battle. |
||
| + | * {{eversions|1.4.0.1}} The Kaleidoscope whip can prove to be more useful than the Morning Star, as the Kaleidoscope has higher drop rates from a specific boss than the Morning Star, the summon tag damage is higher and it's faster with more critical strike chance, which is better than simply a slightly longer range and more damage. The Morning Star, however, has high knockback and can be useful in events to keep enemies back. |
||
| + | * In order to delete a minion without having to die or reload the world you can set a key bind in the miscellaneous tab and set a key bind for "remove buff" since every minion counts as a buff you can delete them without having to die or reload but in order for this to work you need to set another key bind for "cycle next buff" to hover over the intended minions buff and press the designated key bind for "remove buff" this will delete the minion easily |
||
| + | |||
| + | == Maximizing minions == |
||
| + | === Minion Count === |
||
| + | {{eicons|1.3.0.1}} The maximum possible minion capacity is 11. It requires equipping [[Stardust armor]] (not counting its Stardust Guardian), the [[Papyrus Scarab]], [[Necromantic Scroll]], and [[Pygmy Necklace]] accessories while being under the effects of the [[Summoning Potion]] and the [[Bewitching Table]]. |
||
| + | |||
| + | * {{icon/old-gen console}}{{3DS}} The maximum possible minion capacity is 9. It requires equipping [[Tiki armor]], the [[Papyrus Scarab]], [[Necromantic Scroll]], and [[Pygmy Necklace]] accessories while being under the temporary effects of the [[Summoning Potion]]. |
||
| + | * {{eicons|1.4.0.1|invert=y}} Before 1.4, spiders counted for 75% of a slot, though they couldn't be summoned with less than a full slot remaining. |
||
| + | |||
| + | === Minion Damage === |
||
| + | Note that damage is calculated in a two-step process. First the weapon damage itself is adjusted for the weapon modifier (and rounded to the nearest integer). Only after that are all other modifiers added and applied to the weapon damage. |
||
| + | |||
| + | {{eicons|1.4.0.1|invert=y}} Damage bonuses only need to be active while actually summoning the minions. This allows summoning some minions at maximum damage, and then unequipping some of the damage bonus for limit increases, to summon more minions at slightly lower damage. |
||
| + | |||
| + | {{eicons|1.4.0.1}} Update 1.4.0.1 changes the damage bonus to be calculated concurrently, meaning any damage bonus that is removed while a minion is active will be removed from the minion. Thus, the following loadout is no longer useful as a "setup" procedure, though it remains a powerful summoner build. |
||
| + | |||
| + | A [[Modifier|Ruthless modifier]] on the minion-summoning staff yields +18% up front. |
||
| + | |||
| + | Other modifiers can be maximized as follows: |
||
| + | |||
| + | * A mixed armor set: |
||
| + | ** + 22% from the [[Stardust armor|Stardust Helmet]]. |
||
| + | ** + 30% from either the [[Dark Artist armor|Dark Artist's Robes]] or the [[Valhalla Knight armor|Valhalla Knight's Breastplate]]. |
||
| + | ** + 25% from [[Red Riding armor|Red Riding Leggings]]. |
||
| + | * Accessories: |
||
| + | ** + 15% from the [[Papyrus Scarab]]. |
||
| + | ** + 15% from the [[Hercules Beetle]]. |
||
| + | ** + 15% from the [[Summoner Emblem]]. |
||
| + | ** + 12% from the [[Avenger Emblem]]. |
||
| + | ** + 10% from any of the following accessories: [[Necromantic Scroll]], [[Destroyer Emblem]], [[Celestial Stone]], [[Celestial Shell]], any of the Ogre accessories ([[Apprentice's Scarf]], [[Huntress's Buckler]], [[Monk's Belt]], [[Squire's Shield]]), or either the [[Sun Stone]] (during the day), or the [[Moon Stone]] (at night). |
||
| + | *** These all offer the same damage bonus for the actual summoning of minions, but they have different features for continued use: The Necromantic scroll grants players an extra minion slot, the Ogre accessories grants players an extra sentry slot, while the other accessories extend their damage bonus to other damage types, and provide other bonuses. |
||
| + | ** + 20% from reforging all five accessories to have Menacing (+4% damage). |
||
| + | * Buffs: |
||
| + | ** + 5% from [[Well Fed]] (from eating food). |
||
| + | ** + 10% from [[Wrath Potion|Wrath]] (from drinking a [[Wrath Potion]]). |
||
| + | ** + 45% from a 3-stack of [[Damage Booster]] buffs from [[Nebula armor]] (a teammate's, or see below). |
||
| + | * Expert mode only: |
||
| + | ** {{expert|+ 14%}} from a second accessory from the "10%" list above, likewise reforged to Menacing. |
||
| + | ** {{expert|+ 15%}}from [[Cute Fishron Mount]] (riding the [[Cute Fishron]] in water and for 6 seconds afterwards). |
||
| + | ** {{expert|+ 20%}} from the [[Feral Bite]] debuff (inflicted by [[Bat]]s in [[Expert Mode]]). |
||
| + | |||
| + | Total maximum: +224% ({{expert|+273%}}). On top of the bonus for a Ruthless weapon, this will yield approximately +282% ({{expert|+340%}}).<!-- E.g., (+224% → 3.24) * (+18% → 1.18) = 3.82 → +282% --> |
||
| + | |||
| + | === Examples === |
||
| + | * An ordinary [[Stardust Cell Staff]] would summon a [[Stardust Cell Staff|Stardust Cell]] hitting for 60 summon damage. After reforging the staff to have the Ruthless modifier, the staff would summon a Stardust Cell hitting for 60 + 18% = 71 summon damage. After wearing the above gear, eating food, drinking a Wrath Potion, entering a body of water while riding the Cute Fishron, getting bitten by a bat (in Expert mode), and picking up a 3-stack of Damage Booster buffs in multiplayer, the staff would summon a Stardust Cell hitting for 265 damage. |
||
| + | * A Ruthless Stardust Dragon has a modified damage of 47. With a [[Summoning Potion]] and [[Bewitching Table]], the above will allow up to six summons (188 base damage). With the above damage bonuses, the resulting dragon will do an average of 609 ({{expert|701}}) damage per hit. |
||
| + | |||
| + | === The Procedure === |
||
| + | To achieve "maximum minion power" in single-player, follow the following procedure. ([[Autopause|auto-pause]] will help a lot; comments about extra spiders should be ignored as of 1.4.): |
||
| + | # All accessories being used to achieve maximum minion power must be reforged to Menacing, and all summoning weapons to Ruthless. |
||
| + | # Prepare a bat generator; set up one or two [[Bat Statue]]s wired to (staggered) 1-second timer(s) in an enclosed area. |
||
| + | #* Expert mode: Set up a {{expert|water pool}}<nowiki/>next to the bat generator. Make sure the statue(s) can be triggered from within the pool. Enter the water pool and use the [[Shrimpy Truffle]] mount. |
||
| + | # Arrange the desired summoning '''weapons''' on the hotbar. |
||
| + | # Wear the following '''accessories''': [[Papyrus Scarab]], [[Hercules Beetle]], [[Summoner Emblem]], [[Avenger Emblem]], [[Necromantic Scroll]]. Keep a [[Pygmy Necklace]] handy for later. |
||
| + | #* For Expert mode's {{expert|sixth accessory}}, any of the other "10%" damage accessories from the list above can be used. When the procedure below to "ice the cake" is followed, the sixth accessory will be traded for the Pygmy Necklace. |
||
| + | #'''Armor''': Start off in [[Nebula armor]], with the mixed set handy ([[Stardust Helmet]], [[Dark Artist's Robes]]/[[Valhalla Knight's Breastplate]], [[Red Riding Leggings]]). Keep the rest of the [[Stardust armor]] set handy. |
||
| + | # Use the '''potions''': [[Food and drink potions|Food]], [[Wrath Potion|Wrath]], [[Summoning Potion|Summoning]]. Additionally, use a [[Bewitching Table]] to provide an extra minion slot. |
||
| + | # Start the timer(s) to spawn some '''bats'''. |
||
| + | #* In Expert mode: {{expert|Let the bats bite}} until they inflict [[Feral Bite]] before continuing. |
||
| + | #* Kill the bats until the Nebula Set's Level 3 Damage Booster is achieved. If possible, leave some extra damage boosters for future usage. |
||
| + | # '''Rush''': All of the following steps need to be finished before the Damage Boosters start to expire. If the Damage Boosters expire, reequip the Nebula armor and kill more bats to replenish them. |
||
| + | # Switch to the '''mixed armor set''' as above. |
||
| + | #* In Expert mode: {{expert|Jump in the pool}} and use the Shrimpy Truffle mount. |
||
| + | # '''Summon''' the desired minions. In total, there should be six minions (or pairs of twins, or Dragon segments, {{eicons|1.4.0.1|invert=1}}or 7 spiders and a ¾ slot) at the maximum of +224% ({{expert|+273%}}) damage over the Ruthless damage rating. |
||
| + | #* Minion sources: Default, Stardust Helmet, Papryus Scarab, Necromantic Scroll, Summoning Potion, Bewitching Table. |
||
| + | # {{eicons|1.4.0.1|invert=1}} To '''ice the cake''' with five more minions at slightly lower damage: |
||
| + | ## Replace the Avenger Emblem (or in Expert mode, the sixth accessory) with the '''Pygmy Necklace'''. This brings damage values down to +212% ({{expert|+263%}}). (If ¾ of a minion slot is available, a spider can be summoned to fill it) Summon another minion. |
||
| + | ## Wear the '''Stardust Leggings''', and summon another two minions at +209% ({{expert|+260%}}) damage. |
||
| + | ## Wear the '''Stardust Plate''', dropping to +201% ({{expert|+252%}}) damage. (If those last three minions were spiders, summon another spider now.) Summon two more minions. |
||
| + | ## Note: If the player later loses some of the many extra-slot bonuses in use (removing accessories or armor, letting buffs expire), the minion(s) that vanish will be chosen randomly. Each individual minion will keep the damage bonus in effect when it was summoned. |
||
| + | ## Results: If the chosen summons are all Stardust Dragon segments, the "icing the cake" phase will likely reduce the damage bonus for the dragon as a whole,{{verify}} but even so this will yield diminishing returns rather than an actual drop in damage. An 11-segment Dragon will end up doing an average of 893 ({{expert|1045}}) damage per hit. If all minions used were spiders, there will be 14 in total, half doing the max of 100 ({{expert|115}}), the rest trailing down to 93 ({{expert|109}}) |
||
| + | |||
| + | == Trivia == |
||
| + | * All minion-summoning items (with the exception of {{eil|Abigail's Flower}}, {{eil|Houndius Shootius}}, and the {{eil|Terraprisma}}) and the [[Tavernkeep|Tavernkeep's]] tier three [[Summon weapons#Tavernkeep.27s sentries|sentry summoning items]] have the word "Staff" in their names. |
||
| + | ** The Tavernkeep's tier two sentry summon items also all have the word "Cane" in their names. Same goes for the tier one items, which share the word "Rod". This can be used to help tell the difference between the sentry tiers. |
||
| + | ** That said, a number of other magical weapons and tools are also called "Staff" or "Rod". (e.g Nimbus Rod, Frost Staff) |
||
| + | * The Sharknadoes summoned by the [[Tempest Staff]] turn translucent when going through blocks, similar to what [[Duke Fishron]] and [[Pigron]]s do. |
||
{{Master Template Weapons |
{{Master Template Weapons |
||
| − | | show-main = yes |
||
| show-summon = yes |
| show-summon = yes |
||
}} |
}} |
||
| + | [[Category:Summon weapons| ]] |
||
| − | [[ru:Оружие для призыва]] |
||
| + | |||
| − | {{translation projects}} |
||
| + | {{language info|en=Summon weapons}} |
||
Latest revision as of 23:03, 30 January 2024
Summon weapons are a type of weapon that spawns secondary characters that will aid the player during battle by automatically attacking enemies within range. They deal summon damage and cannot be hurt or killed.
The characters spawned by most summon weapons fall into one of two categories: minions and sentries. Minions are mobile characters that follow the player, while sentries remain stationary. Additionally, the set bonuses of the Stardust armor, Chlorophyte armor, and Forbidden armor will summon an entity to fight for the player in a manner similar to minions.
Whips are related weapons that deal summon damage without summoning any minions. Hitting an enemy with a whip causes a player's minions and sentries to target it immediately. Some whips have bonus effects which can be activated by minions, but not by sentries.
There are currently 26 summon weapons on the ![]() PC version,
PC version, ![]() Console version,
Console version, ![]() Mobile version, and
Mobile version, and ![]() tModLoader version, 19 on the
tModLoader version, 19 on the ![]() Old Chinese version and
Old Chinese version and ![]() tModLoader 1.3-Legacy version, 11 on the
tModLoader 1.3-Legacy version, 11 on the ![]() Old-gen console version and
Old-gen console version and ![]() Windows Phone version, and 5 on the Nintendo
Windows Phone version, and 5 on the Nintendo ![]() version.
version.
Minions
Minions are mobile characters. They follow the player indefinitely until the player dies, summons a replacement minion, manually cancels their buff, or exits the world. There are several different minions available, some of which can walk or fly, and attack using melee or ranged means. A minion costs mana to summon initially, but follows the player indefinitely thereafter at no further cost.
Minions provide an ongoing source of damage against enemies which requires little or no attention from the player. The common limit of all minions is that each has a limited rate of attack and damage, but the different types also have various limits to their movement and/or attacks.
Minions follow players in a manner similar to pets, flying and passing through blocks as necessary to keep pace with the player's movements, though most cannot move through blocks for the purposes of attacking. Exceptions are the minions summoned by Abigail's Flower, Tempest Staff, Xeno Staff, Desert Tiger Staff, Stardust Dragon Staff, Blade Staff, Sanguine Staff, and Terraprisma, all of which can attack through blocks.
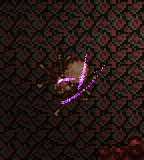
Targeting graphic for moving targets
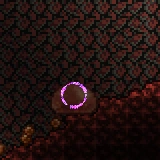
Targeting graphic for stationary targets
On the ![]() PC version,
PC version, ![]() Console version,
Console version, ![]() Mobile version,
Mobile version, ![]() tModLoader version, and
tModLoader version, and ![]() tModLoader 1.3-Legacy version, it is possible to press ⚷ Interact with a minion-summoning item. This will direct the respective minion to target the entity nearest to the cursor. As long as the minions have their target within their line of sight, they will specifically attack it.
tModLoader 1.3-Legacy version, it is possible to press ⚷ Interact with a minion-summoning item. This will direct the respective minion to target the entity nearest to the cursor. As long as the minions have their target within their line of sight, they will specifically attack it. The targeted enemy will show swirling white curves on it. The targeted enemy will show swirling purple particles which will trail behind a moving enemy, or circle in front of a stationary one (see images).
By default, a player can only have a single minion summoned at once. Various boosts can raise the player's minion capacity ("slots"), allowing multiple simultaneous minions. With minion cap boosts in effect, the same minion can be summoned multiple times, or several different minions can be summoned. Minion cap boosts do not affect pets or light pets. If the minion cap later drops below the number of minions in use, minions are randomly chosen and dismissed until the number of minions is below the current cap. Minions vanish when their player leaves the world, and are not re-summoned when the player re-enters that or another world.
The Spider Staff (on ![]() Old-gen console,
Old-gen console, ![]() Windows Phone,
Windows Phone, ![]() Old Chinese, and
Old Chinese, and ![]() tModLoader Legacy), Optic Staff
tModLoader Legacy), Optic Staff, Stardust Dragon Staff, Abigail's Flower, and Desert Tiger Staff have special minion capacity logic. See their pages for details.
Sentries
Sentries are stationary characters. Unlike minions, sentries do not follow the player, and will instead remain rooted in place. In normal use, sentries will last for a fixed ten minutes before vanishing; unlike minions, they can persist even after their owner dies. During the Old One's Army event, this time limit does not apply (see below for details).
By default, a player can only have a single sentry summoned at once. Tavernkeep armor and Old One's Army accessories (see below) can raise the player's sentry capacity, allowing multiple simultaneous sentries. Note that these accessories do not stack with each other, so the maximum sentry limit is 6: 1 by default, +1 from an accessory, +1 from a War Table, and +3 from armor. With sentry cap boosts in effect, the same sentry can be summoned multiple times, or several different sentries can be summoned. On the ![]() Old-gen console version,
Old-gen console version, ![]() Windows Phone version,
Windows Phone version, ![]() Old Chinese version, and Nintendo
Old Chinese version, and Nintendo ![]() version, the player is limited to only summoning one of each sentry type, with no way to raise the cap.
version, the player is limited to only summoning one of each sentry type, with no way to raise the cap.
A waiting sentry goes into a reuse cooldown after attacking, before it can try to attack again. This cooldown is bypassed initially on summoning, which can dramatically increase sentry attack speed at the cost of greater mana expense. Since sentries do not suffer from Mana Sickness, this can be a viable way to deliver high damage at long range when using a sentry that attacks instantly.
Tavernkeep's sentries
Sentries summoned by items from the Tavernkeep are associated with the Old One's Army event. They are purchased with Defender Medals (instead of coins), which are awarded only during the event. At first, they can only be used within the event, where they will remain placed until the end of the event. Each sentry summoned will cost 10 Etherian Mana; at the beginning of the event, the player immediately gets the 10 Etherian Mana for their first sentry, and can collect more as they kill enemies. Sentries summoned with Etherian Mana are not subject to sentry limits (see above). Other sentries can be used in the event, but will have their usual mana cost, duration, and sentry limits.
Each of the Tavernkeep's sentry summon weapons come in three tiers: Rod, Cane, and Staff; with the Staff being the most expensive and the most powerful. The Tavernkeep's various armor sets each enhance one of his four sentry types; see his article for full details.
After the event is completed once, these can be used outside the event, and will then function as normal sentries, costing ordinary mana to summon (5 points per tier) and lasting the usual two minutes. Etherian Mana cannot be used outside the event, so the usual sentry limits apply: By default only one sentry can be summoned at once, but armor sold by the Tavernkeep, and accessories dropped by event bosses such as Ogres, can raise a player's sentry limit. This limit increase does include non-Tavernkeep sentries such as the Queen Spider. Again, the accessories do not stack with each other.
Whips
Whips are unlike other summon weapons, and instead act more like a traditional weapon. When used, whips will perform a normal attack which costs no mana, swiping in a wide cone towards the cursor or wherever aimed. Whips deal summon damage, and as such cannot deal critical hits. All whips can pierce infinitely in their range, but will deal progressively less damage to each additional enemy they hit, until they start dealing 1 damage. Whips all vary in size as well. The severity of damage loss from piercing and the size of whips typically goes down and up, respectively, as whips get stronger.
Despite being summon weapons, whips are affected by some effects which only work on melee weapons, only get melee modifiers, and have a limited range like melee weapons. Whips are affected by any boosts to melee speed (such as Feral Claws and its upgrades), as well as flasks and the autoswing toggle feature. Whips are not affected by boosts to melee damage or the Titan Glove's boost to melee weapon size.
A feature of whips is how they make minions and summons target the enemy hit, the same way that other summon weapons can target enemies. Whips can only target enemies by hitting them, unlike those other summon weapons. The enemy targeted will always be the last enemy hit by the whip, usually the furthest enemy away from the player that gets hit.
The main feature of whips is their summon tag damage, which increases the damage of each minion hit by a set amount. Two endgame whips also feature summon tag critical strike chance, which enables summons to deal critical hits. This summon tag critical strike chance cannot be increased by any other boosts to critical strike chance. Summon tag effects will affect both minions and sentries.
Some whips feature unique buffs and debuffs, aside from the common debuffs of Poisoned and On Fire! that two whips can inflict. Two whips feature debuffs which activate an effect when the enemy with the debuff is hit by a minion. These two debuffs are also universal; even universally immune enemies like The Destroyer can be affected by whip debuffs. The buffs that whips have are mostly boosts to melee speed, which get progressively more potent for stronger, later whips. These melee speed buffs are not exclusive to the whips that grant them, and will actually affect not only other whips, but also melee weapons in general. The Cool Whip currently features the only buff that does not affect melee speed; its buff creates a damaging projectile that lasts for 3 seconds after the last time the whip hit something.
Pre-Hardmode
Minions
| Item | Minion | Damage | Source | Notes | |
|---|---|---|---|---|---|
| Abigail's Flower |
6 | Found on grass near placed Tombstones. |
| ||
| Finch Staff |
7 | Found in Living Wood Chests. Starting item in Journey Mode. Throwing a Living Wood Wand into Shimmer. |
| ||
| Flinx Staff |
8 | Crafted: 6 or 6 |
|||
| Slime Staff | 8 | Dropped by most slime types and Slimed Zombie. | |||
| Vampire Frog Staff |
11 | Dropped by Zombie Merman and Wandering Eye Fish. | |||
| Hornet Staff |
12 / 9 | Crafted: 14 |
| ||
| Imp Staff |
17 |
Crafted: 17 |
| ||
Sentries
Standard
| Item | Sentry | Damage | Source | Notes | |
|---|---|---|---|---|---|
| Houndius Shootius |
24 | Dropped by Deerclops. | |||
Tavernkeep's sentries
| Item | Sentry | Damage | Source | Notes |
|---|---|---|---|---|
| 4 | Sold by Tavernkeep. | |||
| 17 | Sold by Tavernkeep. | |||
| 24 | Sold by Tavernkeep. | |||
| 30 | Sold by Tavernkeep. |
Whips
| Item | Damage | Source | Notes | ||
|---|---|---|---|---|---|
| Leather Whip |
14 | Purchased from the Zoologist (10). |
| ||
| Snapthorn |
18 | Crafted: 12 or |
| ||
| Spinal Tap |
27 | Crafted: 90 |
| ||
Hardmode
Minions
| Item | Minion | Damage | Source | Notes | |
|---|---|---|---|---|---|
| Spider Staff |
26 / 25 | Crafted: 16 |
| ||
| Sanguine Staff |
35 | Dropped by Dreadnautilus. |
| ||
| Pirate Staff |
40 / 32 | Dropped by Pirates and Flying Dutchman |
| ||
| Blade Staff |
6 | Dropped by Queen Slime |
| ||
| Optic Staff |
24 | Crafted: |
Crafted: 1 | ||
| Pygmy Staff |  Pygmy Pygmy
|
40 / 34 / 27 | Dropped by Plantera. | ||
| Desert Tiger Staff |
41 | Found in Desert Chest. |
| ||
| Deadly Sphere Staff |
40 | Dropped by Deadly Sphere. | |||
| Raven Staff | 55 / 37 | Dropped by Pumpking. |
| ||
| Xeno Staff |
36 | Dropped by Martian Saucer. |
| ||
| Tempest Staff | 50 | Dropped by Duke Fishron. |
| ||
| Stardust Dragon Staff |
40 | Crafted: 18 |
| ||
| Stardust Cell Staff |
60 | Crafted: 18 |
| ||
 |
Terraprisma |
90 | Dropped by Empress of Light if all damage is dealt during the day. |
| |
Sentries
Standard
| Item | Sentry | Damage | Source | Notes | |
|---|---|---|---|---|---|
| Queen Spider Staff |
26 / 19 | Crafted: 24 |
| ||
| Staff of the Frost Hydra | 100 | Found in Ice Chest. | |||
| Lunar Portal Staff |
 Lunar Portal Lunar Portal
|
100 | Dropped by Moon Lord. | ||
| Rainbow Crystal Staff |
130 / 150 | Dropped by Moon Lord. | |||
Tavernkeep's sentries
| Item | Sentry | Damage | Source | Notes |
|---|---|---|---|---|
| 11 | Sold by Tavernkeep. | |||
| 42 | Sold by Tavernkeep. | |||
| 59 | Sold by Tavernkeep. | |||
| 74 | Sold by Tavernkeep. | |||
| 34 | Sold by Tavernkeep. | |||
| 88 | Sold by Tavernkeep. | |||
| 126 | Sold by Tavernkeep. | |||
| 156 | Sold by Tavernkeep. |
Whips
| Item | Damage | Source | Notes | ||
|---|---|---|---|---|---|
| Firecracker |
37 | Dropped by Wall of Flesh. |
| ||
| Cool Whip |
45 | Crafted: 8 |
| ||
| Durendal |
55 | Crafted: 12 |
| ||
| Dark Harvest |
100 | Dropped by Pumpking. |
| ||
| Morning Star |
165 | Dropped by Blue Armored Bones, Hell Armored Bones, and Rusty Armored Bones. |
| ||
| Kaleidoscope |
180 | Dropped by Empress of Light. |
| ||
Armor Summons
Certain armor sets will summon a unique minion when the full set is worn:
- All armor summons can be obtainable on
 PC, and the Stardust Guardian is also obtainable on Console and Mobile. The Leaf Crystal (see bottom of this section) is obtainable on all platforms.
 - Each player can only have one armor minion that remains active as long as the armor is worn, and can be directed by double-pressing the ▼ Down key.
- They do not count against either minion or sentry caps.
- See also the Leaf Crystal from Chlorophyte armor; This is not controllable like a minion, but does provide ongoing attacks against nearby enemies.
| Item | Minion | Damage | Source |
|---|---|---|---|
| 25 | Crafted: 3 | ||
 Stardust Guardian Stardust Guardian |
20 | Crafted: 36 |
Boost gear
Basegame Armor
| Appearance / Name | Total Minion Boost(s) | Head | Chest | Legs | Total Defense | Source |
|---|---|---|---|---|---|---|
|
n/a |
1 |
n/a |
|
Crafted: 10 or 10 | |
|
4 |
6 |
5 |
|
Crafted: 60 | |
|
4 |
5 |
4 |
|
Crafted: 30 | |
|
6 |
12 |
8 |
|
Crafted: 3 | |
|
5 |
8 |
7 |
|
Crafted: 36 | |
(with Hood)
|
|
1 |
15 |
11 |
|
Crafted: 54 |
|
6 |
17 |
12 |
|
Sold by Witch Doctor after Plantera has been defeated. | |
|
9 |
11 |
10 |
|
Crafted: 750 | |
|
10 |
16 |
12 |
|
Crafted: 36 |
Tavernkeep's Armor
| Appearance / Name | Minion Boost(s) | Head | Chest | Legs | Total Defense | Source |
|---|---|---|---|---|---|---|
|
7 |
15 |
10 |
|
Sold by Tavernkeep | |
|
8 |
22 |
16 |
|
Sold by Tavernkeep | |
|
7 |
17 |
12 |
|
Sold by Tavernkeep | |
|
12 |
27 |
17 |
|
Sold by Tavernkeep | |
|
7 |
21 |
14 |
|
Sold by Tavernkeep | |
|
10 |
26 |
18 |
|
Sold by Tavernkeep | |
|
8 |
24 |
16 |
|
Sold by Tavernkeep | |
|
14 |
30 |
20 |
|
Sold by Tavernkeep |
Accessories
| Item | Boost(s) | Source |
|---|---|---|
|
| |
|
Dropped by Wall of Flesh. | |
|
Dropped by Corrupt Mimic | |
|
Dropped by Ogre | |
|
Dropped by Ogre | |
|
Dropped by Ogre | |
|
Dropped by Ogre | |
|
Crafted:
( | |
|
| |
|
Dropped by Mourning Wood. | |
|
Crafted: 1 | |
(Bonuses only activate during the Night or a Solar Eclipse)
|
Dropped by Vampire. | |
(Bonuses only activate during the Day)
|
Dropped by Golem. | |
|
Crafted: 1 | |
In Werewolf form, at Night or during a Solar Eclipse:
|
Crafted: 1 | |
|
Crafted: 1 |
Additionally, any accessories which boost melee speed also boost whip speed, and the autoswing property of Feral Claws and its upgrades applies to whips. There are some melee accessories which have small boosts only to whips, not to the summons themselves.
| Item | Whip and Melee Boost(s) | Source |
|---|---|---|
|
Found in Ivy Chests, Jungle Crates and Bramble Crates | |
|
Crafted: | |
|
Crafted: | |
| Crafted: | ||
Aggro effects make this better in singleplayer, where aggro doesn't matter. |
Crafted: | |
(Boost only activates at Night or during a Solar Eclipse) (Does not stack with Celestial Shell) |
Dropped by Werewolf on a Full Moon |
Buffs
| Buff | From | Minion Boost(s) |
|---|---|---|
| Foods |
| |
| Foods |
| |
| Foods |
| |
| ||
| ||
| Some |
| |
| ||
| ||
| ||
| ||
| ||
| ||
| ||
| ||
| ||
| ||
|
Achievement

Notes
- While all Summon weapons can obtain the Mythical modifier, the Ruthless modifier offers the most effective minion boost by solely increasing a minion's hit damage. The reduced mana cost, increased speed, critical strike chance, and knockback provided by Mythical are less useful because Summon weapons use mana only once (on the initial summoning rather than the minion attacks themselves), minions cannot deal critical hits, and their knockback is negligible even with modifiers. Three exceptions are the Slime Staff, Finch Staff, and the Flinx Staff
, as damage rounding causes the bonus provided by Ruthless and Mythical to be equal.- Weapon speed is not very useful for minion or sentry-summoning weapons, as it will only decrease the time it takes to summon a minion. Minions/sentries won't attack faster with a speed-boosting modifier.
- Minions count as buffs and contribute to the 22 Buff/Debuff limit. As such you can potentially lose your minions in the middle of a fight if they get pushed off by potions or debuffs. This can be mitigated by managing your total number of buffs:
- Turning off non-combat buffs (pets, light pets)
- Limiting number of active potions to only the most important potions
- Using only one or two types of minion at a given time
- Not activating un-needed buffs (like ammo crate if you don't intend to use ammo based weapons)
- Removing extraneous buff granting items from arenas (like sunflowers if you don't need the speed or water-candles in event arenas)
- Using debuff immunity items to prevent aquiring a debuff
- Minions will never attack other players, making them useless in PvP. Some minion weapons can still damage players if specifically targeted (Frost Hydra, Rainbow Crystal Staff, etc.), or if they deal incidental contact damage (Ravens, Sharknados, etc.).
- All mounts that can attack are classified as summon damage. This includes the following: Painted Horse Mount, Majestic Horse Mount, Dark Horse Mount, Goat Mount, Pirate Ship Mount, Tree Mount, Santank Mount, Slime Mount, Winged Slime Mount, Basilisk Mount, Unicorn Mount, and Scutlix Mount.
- Only some minions have piercing attacks: Slime, Imp, Twins, the Stardust Dragon, Terraprisma, and all three Ballistas. This may be relevant if a player is using other piercing weapons.
Once summoned, the minion's attack will not change even if the player adds or removes damage enhancing equipment (or buffs). It is worthwhile to load up all available damage bonuses and buffs (for both minion damage and damage in general) before summoning minions, even with no intention of using that equipment in the field. (No longer applies as of 1.4)- It is unnecessary to upgrade an Avenger Emblem to a Destroyer Emblem for the purpose of summon damage, as they cannot deal critical hits. However, the Destroyer Emblem may benefit players if they are using non-summon weapons. Players may also want to use a Destroyer Emblem if they want to stack its damage bonus with the bonus provided by an Avenger Emblem.
Note that when trying to obtain the "You And What Army" achievement, Spiders do count as full minions, but the Twins do not.- PC version, Console version, Mobile version, and tModLoader version As of 1.4, the strategy of summoning minions with accessories that have 'Menacing' prefixes applied and then switching to 'Warding' accessories to efficiently maximize damage and defense no longer works, as minions will now update their damage according to the accessories the player is wearing. This can, however, be useful in some situations.
- Whips are affected by Melee Speed increases, and can be autoswung with the Feral Claws or other accessories that enable autoswing.
- Players may want to avoid using minions in some situations, as they may accidentally trigger events.
- Minions that deal contact damage may inadvertently spawn the Queen Bee if they accidentally touch the Larva present in Bee Hives.
- In the Underworld, minions may inadvertently spawn the Wall of Flesh by killing a Voodoo Demon, causing its Guide Voodoo Doll to fall into lava.
- While minions will not explicitly target the Cultists, minions that deal contact damage may inadvertently damage them, causing them to become hostile. It is also possible for minions to kill all four Cultists, causing the Lunatic Cultist to spawn.
Tips
- Minions do not differentiate between enemies summoned by Statues and normal enemy spawns. This causes them to sometimes interfere with enemy-based engines, as they will zip off to slaughter any statue-summoned enemies in range (The Stardust Dragon is especially prone to this behavior).
Summon weapons are the only weapon type that is not regularly available in the first parts of the game. While the first summon weapon, the Slime Staff is technically the earliest obtainable weapon, it is extremely rare, and is likely to go unseen until far later in the game. It can, however, be farmed by the use of a Slime Statue as soon as the Mechanic shows up.- Even if not playing as a Summoner, it is always good to keep a minion around to help pick off minor or weakened enemies. Having a minion taking out some of the passing bats, slimes, zombies, and so on can sharply improve the player's quality of life while wandering around in the nighttime surface, Caverns, Jungle, and so on. Doubly so if the player is trying to build, gather bait, chop wood, or otherwise do something besides fighting -- indeed, for such projects it may be worth adding a second minion to help fend off interruptions.
- Note that minions will attack Slimes even during the day, when the Slimes are nominally "neutral". In areas where King Slime can spawn in place of a regular slime (surface layer, outer thirds of the map), the turnover can lead to repeat visits from the King.
- All the Tavernkeep's Sentries can be constantly resummoned to automatically refresh their attack. This is, however, less efficient than using a weapon from another class.
In an Expert mode world, summoners can usefully wire a Bat Statue to a switch near the base or spawn zone. Spawning a bat and tanking a few hits (to contract the Feral Bite) lets the player summon their minions with an extra 20% damage bonus, but that's best done while safe at home. However since 1.4 this is no longer a viable strategy, due to the fact that the additional damage provided by Feral Bite will be gone once the effect is over, rendering it practically useless, since you wouldn't want the Feral Bite debuff in battle.- PC version, Console version, Mobile version, and tModLoader version The Kaleidoscope whip can prove to be more useful than the Morning Star, as the Kaleidoscope has higher drop rates from a specific boss than the Morning Star, the summon tag damage is higher and it's faster with more critical strike chance, which is better than simply a slightly longer range and more damage. The Morning Star, however, has high knockback and can be useful in events to keep enemies back.
- In order to delete a minion without having to die or reload the world you can set a key bind in the miscellaneous tab and set a key bind for "remove buff" since every minion counts as a buff you can delete them without having to die or reload but in order for this to work you need to set another key bind for "cycle next buff" to hover over the intended minions buff and press the designated key bind for "remove buff" this will delete the minion easily
Maximizing minions
Minion Count
The maximum possible minion capacity is 11. It requires equipping Stardust armor (not counting its Stardust Guardian), the Papyrus Scarab, Necromantic Scroll, and Pygmy Necklace accessories while being under the effects of the Summoning Potion and the Bewitching Table.
- The maximum possible minion capacity is 9. It requires equipping Tiki armor, the Papyrus Scarab, Necromantic Scroll, and Pygmy Necklace accessories while being under the temporary effects of the Summoning Potion.
Before 1.4, spiders counted for 75% of a slot, though they couldn't be summoned with less than a full slot remaining.
Minion Damage
Note that damage is calculated in a two-step process. First the weapon damage itself is adjusted for the weapon modifier (and rounded to the nearest integer). Only after that are all other modifiers added and applied to the weapon damage.
Damage bonuses only need to be active while actually summoning the minions. This allows summoning some minions at maximum damage, and then unequipping some of the damage bonus for limit increases, to summon more minions at slightly lower damage.
Update 1.4.0.1 changes the damage bonus to be calculated concurrently, meaning any damage bonus that is removed while a minion is active will be removed from the minion. Thus, the following loadout is no longer useful as a "setup" procedure, though it remains a powerful summoner build.
A Ruthless modifier on the minion-summoning staff yields +18% up front.
Other modifiers can be maximized as follows:
- A mixed armor set:
- + 22% from the Stardust Helmet.
- + 30% from either the Dark Artist's Robes or the Valhalla Knight's Breastplate.
- + 25% from Red Riding Leggings.
- Accessories:
- + 15% from the Papyrus Scarab.
- + 15% from the Hercules Beetle.
- + 15% from the Summoner Emblem.
- + 12% from the Avenger Emblem.
- + 10% from any of the following accessories: Necromantic Scroll, Destroyer Emblem, Celestial Stone, Celestial Shell, any of the Ogre accessories (Apprentice's Scarf, Huntress's Buckler, Monk's Belt, Squire's Shield), or either the Sun Stone (during the day), or the Moon Stone (at night).
- These all offer the same damage bonus for the actual summoning of minions, but they have different features for continued use: The Necromantic scroll grants players an extra minion slot, the Ogre accessories grants players an extra sentry slot, while the other accessories extend their damage bonus to other damage types, and provide other bonuses.
- + 20% from reforging all five accessories to have Menacing (+4% damage).
- Buffs:
- + 5% from Well Fed (from eating food).
- + 10% from Wrath (from drinking a Wrath Potion).
- + 45% from a 3-stack of Damage Booster buffs from Nebula armor (a teammate's, or see below).
- Expert mode only:
- + 14% from a second accessory from the "10%" list above, likewise reforged to Menacing.
- + 15%from Cute Fishron Mount (riding the Cute Fishron in water and for 6 seconds afterwards).
- + 20% from the Feral Bite debuff (inflicted by Bats in Expert Mode).
Total maximum: +224% (+273%). On top of the bonus for a Ruthless weapon, this will yield approximately +282% (+340%).
Examples
- An ordinary Stardust Cell Staff would summon a Stardust Cell hitting for 60 summon damage. After reforging the staff to have the Ruthless modifier, the staff would summon a Stardust Cell hitting for 60 + 18% = 71 summon damage. After wearing the above gear, eating food, drinking a Wrath Potion, entering a body of water while riding the Cute Fishron, getting bitten by a bat (in Expert mode), and picking up a 3-stack of Damage Booster buffs in multiplayer, the staff would summon a Stardust Cell hitting for 265 damage.
- A Ruthless Stardust Dragon has a modified damage of 47. With a Summoning Potion and Bewitching Table, the above will allow up to six summons (188 base damage). With the above damage bonuses, the resulting dragon will do an average of 609 (701) damage per hit.
The Procedure
To achieve "maximum minion power" in single-player, follow the following procedure. (auto-pause will help a lot; comments about extra spiders should be ignored as of 1.4.):
- All accessories being used to achieve maximum minion power must be reforged to Menacing, and all summoning weapons to Ruthless.
- Prepare a bat generator; set up one or two Bat Statues wired to (staggered) 1-second timer(s) in an enclosed area.
- Expert mode: Set up a water poolnext to the bat generator. Make sure the statue(s) can be triggered from within the pool. Enter the water pool and use the Shrimpy Truffle mount.
- Arrange the desired summoning weapons on the hotbar.
- Wear the following accessories: Papyrus Scarab, Hercules Beetle, Summoner Emblem, Avenger Emblem, Necromantic Scroll. Keep a Pygmy Necklace handy for later.
- For Expert mode's sixth accessory, any of the other "10%" damage accessories from the list above can be used. When the procedure below to "ice the cake" is followed, the sixth accessory will be traded for the Pygmy Necklace.
- Armor: Start off in Nebula armor, with the mixed set handy (Stardust Helmet, Dark Artist's Robes/Valhalla Knight's Breastplate, Red Riding Leggings). Keep the rest of the Stardust armor set handy.
- Use the potions: Food, Wrath, Summoning. Additionally, use a Bewitching Table to provide an extra minion slot.
- Start the timer(s) to spawn some bats.
- In Expert mode: Let the bats bite until they inflict Feral Bite before continuing.
- Kill the bats until the Nebula Set's Level 3 Damage Booster is achieved. If possible, leave some extra damage boosters for future usage.
- Rush: All of the following steps need to be finished before the Damage Boosters start to expire. If the Damage Boosters expire, reequip the Nebula armor and kill more bats to replenish them.
- Switch to the mixed armor set as above.
- In Expert mode: Jump in the pool and use the Shrimpy Truffle mount.
- Summon the desired minions. In total, there should be six minions (or pairs of twins, or Dragon segments,
or 7 spiders and a ¾ slot) at the maximum of +224% (+273%) damage over the Ruthless damage rating.- Minion sources: Default, Stardust Helmet, Papryus Scarab, Necromantic Scroll, Summoning Potion, Bewitching Table.
To ice the cake with five more minions at slightly lower damage:- Replace the Avenger Emblem (or in Expert mode, the sixth accessory) with the Pygmy Necklace. This brings damage values down to +212% (+263%). (If ¾ of a minion slot is available, a spider can be summoned to fill it) Summon another minion.
- Wear the Stardust Leggings, and summon another two minions at +209% (+260%) damage.
- Wear the Stardust Plate, dropping to +201% (+252%) damage. (If those last three minions were spiders, summon another spider now.) Summon two more minions.
- Note: If the player later loses some of the many extra-slot bonuses in use (removing accessories or armor, letting buffs expire), the minion(s) that vanish will be chosen randomly. Each individual minion will keep the damage bonus in effect when it was summoned.
- Results: If the chosen summons are all Stardust Dragon segments, the "icing the cake" phase will likely reduce the damage bonus for the dragon as a whole,Verify but even so this will yield diminishing returns rather than an actual drop in damage. An 11-segment Dragon will end up doing an average of 893 (1045) damage per hit. If all minions used were spiders, there will be 14 in total, half doing the max of 100 (115), the rest trailing down to 93 (109)
Trivia
- All minion-summoning items (with the exception of Abigail's Flower
, Houndius Shootius, and the Terraprisma) and the Tavernkeep's tier three sentry summoning items have the word "Staff" in their names.- The Tavernkeep's tier two sentry summon items also all have the word "Cane" in their names. Same goes for the tier one items, which share the word "Rod". This can be used to help tell the difference between the sentry tiers.
- That said, a number of other magical weapons and tools are also called "Staff" or "Rod". (e.g Nimbus Rod, Frost Staff)
- The Sharknadoes summoned by the Tempest Staff turn translucent when going through blocks, similar to what Duke Fishron and Pigrons do.


- Wooden Sword
- Cactus Sword
- Zombie Arm
- Gladius
- Ruler (
) - Umbrella (
) - Tentacle Spike
- Mandible Blade
- Bladed Glove
- Stylish Scissors
- Candy Cane Sword
- Bat Bat
- Bone Sword
- Katana
- Ice Blade
- Muramasa
- Exotic Scimitar
- Phaseblade
- Starfury
- Purple Clubberfish
- Enchanted Sword
- Bee Keeper
- Blade of Grass
- Falcon Blade
- Night's Edge


- Pearlwood Sword
- Classy Cane
- Ham Bat
- Slap Hand
- Breaker Blade
- Phasesaber
- Ice Sickle
- Cutlass
- Frostbrand
- Excalibur
- Seedler
- Beam Sword
- Bladetongue
- Brand of the Inferno
- Death Sickle
- Fetid Baghnakhs
- Keybrand
- Psycho Knife
- Flying Dragon
- The Horseman's Blade
- Christmas Tree Sword
- True Excalibur
- True Night's Edge
- Terra Blade
- Influx Waver
- Starlight
- Star Wrath
- Meowmere
- Tizona


- Wand of Sparking
- Gray Zapinator
- Aqua Scepter
- Thunder Zapper
- Space Gun
- Ice Rod
- Golden Shower
- Demon Scythe
- Laser Rifle
- Magic Dagger
- Orange Zapinator
- Sky Fracture
- Shadowflame Hex Doll
- Crystal Serpent
- Leaf Blower
- Frost Staff
- Poison Staff
- Razorpine
- Heat Ray
- Venom Staff
- Unholy Trident
- Bubble Gun
- Laser Machinegun
- Charged Blaster Cannon
- Last Prism
- Betsy's Wrath
- Zapinator


- Finch Staff
- Slime Staff
- Flinx Staff
- Abigail's Flower
- Vampire Frog Staff
- Hornet Staff
- Imp Staff
- Blade Staff
- Spider Staff
- Sanguine Staff
- Optic Staff
- Pirate Staff
- Pygmy Staff
- Desert Tiger Staff
- Raven Staff
- Deadly Sphere Staff
- Tempest Staff
- Terraprisma
- Xeno Staff
- Stardust Cell Staff
- Stardust Dragon Staff