(→Ranged: Added another bullet type (Cursed) to the recommendations.) Tag: Visual edit |
|||
| Line 1: | Line 1: | ||
| + | '''[[Plantera]]''' is a moderately hard boss; it can spawn after defeating all three of the mechanical hardmode [[Boss|bosses]] and destroying one of [[Plantera's Bulb]]s in the [[Underground Jungle]]. |
||
| − | In Terraria, there are many different types of [[weapons]], [[armor]] and [[accessories]]. By combining these Weapons, Armor and Accessories in different ways, many different abilities and bonuses etc. become available to the player and may enable them to take on difficult tasks such as defeating [[Bosses]] and the [[Pumpkin Moon]] and [[Frost Moon]]. This page lists some common synergies, setups and ideal [[reforge]] prefixes. Note that these prefixes are by no means required, and spending much effort reforging midgame equipment is generally a waste. |
||
| − | ''NOTE: This page is up-to-date as of Version 1.2.3.''' |
||
| − | == Early Game == |
||
| − | ===Wood Set - Startup Set=== |
||
| − | '''Armor''' |
||
| − | *[[Wooden Armor|Wooden, Ebonwood, Shadewood, Rich Mahogany, Boreal or Palm Wood Armor]], [[Cactus armor|Cactus Armor]], [[Pumpkin armor]](if Halloween) |
||
| − | '''Weapons''' |
||
| − | *[[Wooden Sword|Wooden, Ebonwood, Shadewood, Rich Mahogany, Boreal or Palm Wood Sword]], [[Cactus Sword]] |
||
| − | *[[Wooden Bow|Wooden, Ebonwood, Shadewood, Rich Mahogany, Boreal or Palm Wood Bow]] |
||
| − | **[[Wooden Arrow]]s, [[Flaming Arrow]]s, or [[Frostburn Arrow]]s |
||
| − | '''Accessories''' |
||
| − | *[[Shackle]] |
||
| − | *[[Aglet]] |
||
| − | '''Summary''' |
||
| + | First, Plantera has plenty of health to chew through, and a good amount of damage, so it would be best to set up a [[Heart Statue]] and [[Star Statue]] if you use magic. Set them to 1 second [[timers]]. Add a [[Heart Lantern]] and [[Campfire]] to boost your health regeneration further, and a [[Crystal Ball]] if you use magic, an [[Ammo Box]] for ranged, or a [[Sharpening Station]] if you use melee. A [[Bewitching Table]] can't hurt no matter what you use. If your arena is fairly large, try to set up more than one healing station like this, so that you can run in a big circle (or oval) and collect hearts on both ends of the loop. Alternately you can setup a house for the nurse for a mid-battle heal. |
||
| − | This is the equipment players should aim for before digging for an iron anvil. This is generally the best equipment you'll get without an Anvil, unless you find a lucky Chest or two. Cautious use of the bow can enable characters to take out enemies up to and including [[Skeleton]]s, though [[Giant Worm]]s pose a serious threat at this stage. |
||
| + | The actual shape of your arena depends on how you want to fight. For a player who wants to have plenty of evasive space, excavating around a screen's worth of space inside the [[Underground Jungle]] and filling it with rows of [[platform]]s can work well. For more aggressive players, a smaller space excavated right next to a bulb can work too. Others will just use a stack of [[bombs]] to excavate a large area for flying and grappling. Plantera's spike balls do some significant damage and are used frequently during [[Plantera]]'s first phase, however they can only bounce off solid surfaces, if you don't mind taking the extra time, consider digging a hole at least 2 times deeper than you would use for the fight and stick to the top half of your arena, without the added threat of Plantera's spike balls, it is much easier to defeat. |
||
| − | ===Metal Set=== |
||
| − | '''Armor''' |
||
| − | *[[Pumpkin armor]](if Halloween), [[Silver Armor]] or [[Tungsten armor]], [[Gold Armor]] or [[Platinum armor]] |
||
| − | '''Weapons''' |
||
| − | *[[Silver Broadsword]] or [[Tungsten Broadsword]], [[Gold Broadsword]] or [[Platinum Broadsword]], [[Candy Cane Sword]](if Christmas), [[Ice Blade]] |
||
| − | *[[Silver Bow]] or [[Tungsten Bow]], [[Gold Bow]] or [[Platinum Bow]] |
||
| − | **[[Flaming Arrow]]s, [[Frostburn Arrow]]s, [[Jester's Arrow]]s |
||
| − | *[[Snowball Cannon]] |
||
| − | **[[Snowball]]s |
||
| − | *[[Musket]], [[The Undertaker]] or [[Red Ryder]] |
||
| − | **[[Musket Ball]]s->[[Silver Bullets]] |
||
| − | *[[Shuriken]], [[Star Anise]](if Christmas), [[Throwing Knife]]s |
||
| − | *[[Enchanted Boomerang]], [[Ice Boomerang]], [[Fruitcake Chakram]](if Christmas) |
||
| − | *[[Spear]], [[Trident]] |
||
| − | *[[Grappling Hook]], [[Candy Cane Hook]](if Christmas), [[Amethyst Hook]], [[Topaz Hook]], [[Sapphire Hook]], [[Emerald Hook]], [[Ruby Hook]], [[Diamond Hook]] |
||
| − | *[[Magic Mirror]] |
||
| − | '''Accessories''' |
||
| − | *[[Cloud in a Bottle]] |
||
| − | *[[Hermes Boots]] |
||
| − | *[[Band of Regeneration]] |
||
| − | *[[Shackle]] |
||
| − | *[[Aglet]] |
||
| − | '''Summary''' |
||
| + | [[Honey]] can be used for its [[regeneration]], so you can make little pools for the regeneration benefit. |
||
| − | With this level of equipment, players are prepared to start fighting bosses and entering the midgame. Not every item on this list needs to be acquired, but a suit of Gold/Platinum Armor and a good ranged weapon is recommended. Using [[Lead]] or [[Iron]] for armor and weapon is not recommended since it is required for boss summoning items in hardmode. |
||
| + | Bring a hammer to remove the jungle walls so that in [[Plantera]]'s second phase, the hooks can only grapple on to the blocks so it cannot grab you with its hooks, and thus you do not take damage from them. |
||
| − | == Middlegame == |
||
| − | ===Melee - Shadow/Crimson=== |
||
| − | '''Armor''' |
||
| − | *[[Shadow armor]] or [[Crimson armor]] |
||
| − | '''Weapons''' |
||
| − | *[[Light's Bane]]/[[War Axe of the Night]] or [[Blood Butcherer]]/[[Blood Lust Cluster]] -> [[Phaseblade]], [[Starfury]] or [[Bee Keeper]] -> [[Blade of Grass]] -> [[Muramasa]] |
||
| − | *[[Ball O' Hurt]] or [[The Meatball]] -> [[Blue Moon]] |
||
| − | *[[The Rotted Fork]] |
||
| − | *[[Thorn Chakram]] |
||
| − | '''Accessories''' |
||
| − | *[[Shackle]] -> [[Cobalt Shield]] -> [[Obsidian Shield]] |
||
| − | *[[Hermes Boots]] -> [[Spectre Boots]] -> [[Lightning Boots]] -> [[Frostspark Boots]] |
||
| − | *[[Cloud in a Bottle]], [[Blizzard in a Bottle]] or [[Sandstorm in a Bottle]] -> Balloon Equivalent |
||
| − | *[[Anklet of the Wind]] or [[Aglet]] -> [[Obsidian Horseshoe]] or [[Feral Claws]] |
||
| − | *[[Band of Regeneration]] |
||
| − | '''Summary''' |
||
| + | More specific strategies are available below. Some of these have their own arena setups. |
||
| − | This is the generic Melee set for Corruption/Blood through the Dungeon. Seeing as it is the first mid-game set available, if you are going on a Ranger or Caster run, it is advisable to use Shadow or Crimson armor until you are able to acquire Meteor or Necro armor. |
||
| − | == |
+ | ==Gearing Up== |
| − | + | ===Armor=== |
|
| + | At the very, very minimum, players should use [[Hallowed Armor]] with the helmet to suit their class. Melee characters should use [[Turtle Armor]] or [[Frost Armor]]. However, equipping a Hallowed Mask instead of the Turtle Helmet offers greater defense and melee critical strike chance, only sacrificing the relatively decent Turtle Armor set bonus. Ranged characters should use [[Chlorophyte armor]] or [[Frost Armor]]. Magic users should also use [[Chlorophyte armor]]. You can use Chlorophyte armor's bonus with the [[Leaf Crystal]] for melee damage to help with attacking purposes. If players are farming plantera, using Vampire knives and Frost Armor can keep you alive and drain Plantera's health. |
||
| − | *[[Meteor armor]] |
||
| − | '''Weapons''' |
||
| − | *[[Space Gun]] |
||
| − | *[[Ruby Staff]] or [[Diamond Staff]] |
||
| − | *[[Vilethorn]] |
||
| − | *[[Crimson Rod]] |
||
| − | *[[Phaseblade]] or sword of similar tier |
||
| − | '''Accessories''' |
||
| − | *[[Magic Cuffs]] |
||
| − | *[[Hermes Boots]] |
||
| − | *[[Band of Regeneration]] |
||
| − | *Any 2 of: [[Lucky Horseshoe]], [[Cloud in a Bottle]]/[[Blizzard in a Bottle]]/[[Sandstorm in a Bottle]], [[Shiny Red Balloon]] |
||
| − | '''Summary''' |
||
| + | ===Weapons=== |
||
| − | The first Caster set available. Great due to the advantage of infinite Space Gun shots, and due to this also serves as a good ranged set due to the Space Gun being rather pseudo Magic/Ranged. |
||
| + | Generally, you should use a [[Bewitching Table]] and a [[Summoning Potion]] to increase your minion count to three, and conjure three [[Spider Staff|spiders]] or three pairs of [[Optic Staff|mini twins]]. Despite their higher damage, [[Pirate Staff|pirates]] are not the best choice due to their lack of flying. Those minions will give you a decent base DPS, allowing you to focus less on your damage output and more on dodging. |
||
| + | ====Melee==== |
||
| − | ===Caster - Jungle + Diamond Robe=== |
||
| + | * [[Spears]] work well as they can attack through blocks and can strike multiple times in one swing. The [[Chlorophyte Partisan]] is especially convenient as it shoots a small projectile that hits multiple times, making it a very useful spear for this fight. The Mushroom Spear is also a great option due to the spinning mushrooms it spawns. Keep using it and you can defeat Plantera in about 2-3 minutes. |
||
| − | '''Armor''' |
||
| + | * Swords like the [[Terra Blade]], [[True Night's Edge]] or [[:bg:Frostbrand|Frostbrand]] are fine choices for high ranged damage. |
||
| − | *[[Jungle armor]], [[Diamond Robe]] in place of Jungle Chestplate |
||
| + | * The [[Death Sickle]] has proven to be a great weapon. |
||
| − | '''Weapons''' |
||
| + | * The [[Cutlass]] or the [[Terra Blade]] combined with the Hallowed Armor can be very effective if the weapon has a good prefix. |
||
| − | *[[Ruby Staff]] or [[Diamond Staff]] |
||
| + | * Using the [[Light Disc]] proves effective if you have more than one of them and are in a smaller arena. |
||
| − | *[[Bee Gun]] |
||
| + | * The [[Yelets]] is very useful, as it can rip through its first phase very quickly. |
||
| − | *[[Water Bolt]] |
||
| + | * "Legendary" [[modifier]] {{pc icon}}[[Fetid Baghnakhs]] are incredible if you're going melee. This will end [[Plantera]] within' seconds. To avoid dying, use [[Turtle armor]], [[Star Veil]], and other "Warding" [[modifier]] (+4 Defense) [[accessories]]. Stacking further attack speed to 51% from accessories and armor by using full [[Hallowed armor]], [[Mechanical Glove]] and a [[Fire Gauntlet]] (any modifiers) will speed up the fight even further, attacking so fast each swing is cut short, making short enemies like turtles difficult to hit with them. Using an [[Flask of Ichor]] also helps significantly. This method doesn't require any mobility accessories once [[Plantera]] is in melee range provided you have knockback immunity from a [[Shield]] and a [[Star Veil]] to help keep you alive for the duration of the fight as you can simply stand still and attack. This works well even on [[Expert mode]]. |
||
| − | *[[Book of Skulls]] |
||
| + | * The [[Shadowflame Knife]] is a good choice as well, since it allows you to keep your distance and afflicts the [[Shadowflame]] [[debuff]]. Also it bounces, which allows it to have three chances of hitting Plantera instead of being stopped by the biters. |
||
| − | *[[Magic Missile]] -> [[Flamelash]] |
||
| − | *[[Aqua Scepter]] |
||
| − | *[[Flower of Fire]] |
||
| − | *[[Demon Scythe]] |
||
| − | *[[Slime Staff]] (Do not grind for this! It isn't worth the grind) -> [[Imp Staff]] |
||
| − | *[[Muramasa]], or sword of similar tier |
||
| − | '''Accessories''' |
||
| − | *[[Band of Regeneration]] -> [[Cobalt Shield]] -> [[Obsidian Shield]] |
||
| − | *[[Hermes Boots]] -> [[Spectre Boots]] -> [[Lightning Boots]] -> [[Frostspark Boots]] |
||
| − | *[[Magic Cuffs]] -> [[Celestial Cuffs]] |
||
| − | *Any 2 of: [[Mana Flower]](you really don't need this if you have Magic Cuffs), [[Obsidian Horseshoe]] or [[Cloud in a Balloon]]/[[Blizzard in a Balloon]]/[[Sandstorm in a Balloon]] |
||
| − | '''Summary''' |
||
| + | ====Ranged==== |
||
| − | Final Caster armor for Normal mode. Not really much to it, just a basic Caster set. |
||
| + | * The [[Uzi]] is a popular choice, dealing high damage. |
||
| + | * The [[Megashark]] with [[Chlorophyte Bullet]] can be used for high damage, although [[Crystal Bullet]]s, [[Ichor Bullet]]s, [[Cursed Bullet|Cursed Bullets]] or [[Explosive Bullet]]s will get the job done. |
||
| + | * A [[Chlorophyte Shotbow]] with [[Cursed Arrow]]s or [[Ichor Arrow]]s can be used to great effect. |
||
| + | * The [[Flamethrower]] performs admirably against Plantera itself, but becomes devastating against its tentacle-like minions. It should be used as a second weapon, to quickly get rid of leashes. |
||
| − | === |
+ | ====Magic==== |
| + | * The [[Nimbus Rod]] is often useful (even for non-magic users). It can deal continuous damage which can greatly help the fight, especially in vertical arenas. |
||
| − | '''Armor''' |
||
| + | * [[Crystal Storm]], [[Cursed Flames]], [[Magical Harp]], or [[Magic Dagger]] can be used for rapid attacking. |
||
| − | *[[Necro armor]] |
||
| + | * The [[Venom Staff]] performs very, VERY well against plantera, dealing fast, high damage. |
||
| − | '''Weapons''' |
||
| + | * The [[Rainbow Rod]] can do well against [[Plantera]]. |
||
| − | *[[Minishark]] |
||
| + | * Using the golden shower every so often can prove to be very helpful as it inflicts the ichor debuff, increasing your damage input even more. |
||
| − | *[[Handgun]] -> [[Phoenix Blaster]] |
||
| + | * The [[Crystal Serpent]] can be a good weapon against Plantera. |
||
| − | *[[Boomstick]] |
||
| + | * If your arena is dug out high enough, the [[Meteor Staff]]'s rapid targeted damage is very effective. |
||
| − | **[[Silver Bullet]]s or [[Meteor Shot]]s |
||
| − | *[[Demon Bow]]/[[Tendon Bow]] -> [[Molten Fury]] |
||
| − | **[[Unholy Arrow]]s or [[Hellfire Arrow]]s |
||
| − | *[[Star Cannon]] |
||
| − | **[[Fallen Star]]s |
||
| − | *[[Harpoon]] |
||
| − | *[[Muramasa]], or sword of similar tier |
||
| − | '''Accessories''' |
||
| − | *[[Cobalt Shield]] -> [[Obsidian Shield]] |
||
| − | *[[Spectre Boots]] -> [[Lightning Boots]] -> [[Frostspark Boots]] |
||
| − | *[[Cloud in a Balloon]]/[[Blizzard in a Balloon]]/[[Sandstorm in a Balloon]] -> [[Bundle of Balloons]] |
||
| − | *[[Obsidian Horseshoe]] |
||
| − | *[[Band of Regeneration]] |
||
| − | '''Summary''' |
||
| + | ===Potions=== |
||
| − | The final normal mode Ranged set, and only. Relies on great mobility given by the Bundle of Balloons. |
||
| + | * [[Greater Healing Potion]]s or {{mobile icon}}[[Horn of Plenty]] are important for staying alive. |
||
| + | * [[Ironskin Potion]]s and [[Regeneration Potion]]s and [[Mana Regeneration Potion]]s will help you survive much longer. |
||
| + | * Anything that gives the [[Well Fed]] buff is welcomed help. |
||
| + | * Increasing damage with buffs from potions such as the [[Archery Potion]], [[Magic Power Potion]], and any [[Flasks]] that Plantera is not immune to (Ichor is recommended, or Cursed Flames, if the world has a [[Corruption]]) will make an enormous difference. |
||
| + | * [[Clairvoyance]] from a [[Crystal Ball]] is recommended for magic users. |
||
| + | * [[Endurance Potions]] and [[Wrath Potion]] are always a great choice as well. |
||
| + | * Using [[Gravitation Potion|Gravitation Potions]] and fighting in reversed gravity will mostly negate the threat of Plantera's spiked balls. |
||
| − | === |
+ | ===Accessories=== |
| + | [[Wings]], and [[Lightning Boots]]/[[Frostspark Boots]] will allow you to dodge Plantera's attacks. |
||
| − | '''Armor''' |
||
| − | *[[Molten armor]] |
||
| − | '''Weapons''' |
||
| − | *[[Night's Edge]] |
||
| − | *[[Flamarang]] |
||
| − | *[[Sunfury]] |
||
| − | *[[Dark Lance]] |
||
| − | '''Accessories''' |
||
| − | *[[Obsidian Shield]] |
||
| − | *[[Frostspark Boots]] |
||
| − | *[[Band of Regeneration]] |
||
| − | *[[Magma Stone]] |
||
| − | *[[Obsidian Horseshoe]] or [[Feral Claws]] |
||
| − | '''Summary''' |
||
| + | Damage can be greatly boosted through [[Accessories#Combat|combat-accessories]] such as the [[Warrior Emblem|Warrior]]/[[Ranger Emblem|Ranger]]/[[Sorcerer Emblem|Sorcerer]]/[[Avenger Emblem|Avenger]] Emblems. A [[Moon Stone]] is also useful. |
||
| − | Final Melee set for Normal mode, great for early Hardmode as well. |
||
| + | [[Charm of Myths]] can be used for increased regen and reducing the [[Potion Sickness]] debuff time from one minute to 45 seconds. |
||
| − | ===Summoner - Bee=== |
||
| + | A [[Fire Gauntlet]] is helpful because of melee damage increase and causing the [[On Fire!]] debuff. A Magma Stone can be used as well for this debuff. |
||
| − | '''Armor''' |
||
| + | As with most bosses, the [[Cross Necklace]]/[[Star Veil]] can be used to extend the invulnerability period after being attacked, allowing you to take less damage. |
||
| − | *[[Bee armor]] |
||
| − | '''Weapons''' |
||
| − | *[[Imp Staff]] |
||
| − | *[[Night's Edge]] |
||
| − | *[[Harpoon]] |
||
| − | *[[Flamelash]] |
||
| − | *[[Bee Gun]] |
||
| − | *[[Book of Skulls]] |
||
| − | '''Accessories''' |
||
| − | *[[Frostspark Boots]] |
||
| − | *[[Bundle of Balloons]] |
||
| − | *[[Obsidian Shield]] |
||
| − | *[[Tiger Climbing Gear]] |
||
| − | *[[Celestial Cuffs]] or [[Mana Flower]] |
||
| − | '''Summary''' |
||
| + | For [[Prefix]]es, damage increasing or critical hit chance increasing [[Modifiers]], such as menacing and lucky, will make a less-than-obvious difference. Melee characters may want to [[Reforge]] for modifiers that increase defense, such as warding. |
||
| − | First and only summoning class for pre-hardmode, relies on the great mobility [[Tiger Climbing Gear]] and [[Bundle of Balloons]]. |
||
| + | For defensive characters, [[Flesh Knuckles]] would be one of the useful items to use. [[Star Veil]] would help during the fight during taking damage. [[Warrior Emblem]] if you're using melee. Reforging all of the [[accessories]] to "Warding" [[modifier]] will help too. |
||
| − | ===Melee/Ranged - Slash+Blast=== |
||
| − | '''Armor''' |
||
| − | *[[Demonite armor]] |
||
| − | '''Weapons''' |
||
| − | *[[Muramasa]] |
||
| − | *[[Phoenix Blaster]] |
||
| − | '''Accessories''' |
||
| − | *[[Frostspark Boots]] |
||
| − | *[[Feral Claws]] |
||
| − | *[[Obsidian Shield]] |
||
| − | *[[Sweetheart Necklace]] |
||
| − | *[[Cloud in a balloon]] |
||
| − | '''Summary''' |
||
| + | ==The Battle== |
||
| − | A fast, hard to stop force. Run through enemies with the sword then take out the rest with the gun. |
||
| + | Plantera will attempt to chase after the player, always trying to make its main bulb overlap the player's space. It moves fairly slowly when compared to a player with speed-boosting equipment. This means a player in a large enough arena can easily keep a distance, assuming they just keep moving. As such, a good arena can make the fight much easier. The second stage begins when Plantera reaches 50% remaining health. The pink petals fall off to reveal a ferocious green maw and Plantera's speed is greatly increased. |
||
| + | Currently, Plantera will enrage and gain more defense, attack more frequently and deals massive amounts of contact and ranged damage if the player leaves the Underground Jungle (including to go to the surface), so surface-level arena strategies are generally obsolete. One exception is taking advantage of Plantera's need to "grapple" to move by building a large enough space that Plantera cannot grapple up after you, and then firing down upon it. However, Plantera can grapple onto backgrounds, and since they go until reaching the underworld, you would have to clear them out first. |
||
| − | == Hardmode == |
||
| − | ===Melee - Palladium=== |
||
| − | '''Armor''' |
||
| − | *[[Palladium armor]], if not available then [[Orichalcum armor]] or [[Mythril armor]] |
||
| − | '''Weapons''' |
||
| − | *[[Phasesaber]] or [[Cutlass]] |
||
| − | *[[Titanium Trident]] |
||
| − | *[[Dao of Pow]] |
||
| − | *[[Flamarang]] |
||
| − | '''Accessories''' |
||
| − | *[[Obsidian Shield]] |
||
| − | *[[Harpy Wings]] or [[Wings]] of similar tier |
||
| − | *[[Frostspark Boots]] |
||
| − | *[[Fire Gauntlet]] |
||
| − | *[[Charm of Myths]] or [[Star Veil]] |
||
| − | '''Summary''' |
||
| + | The player will want to focus on dodging attacks while shooting constantly at Plantera. Once plantera reaches its second form, the player should be very wary and try to avoid Plantera's lunges. |
||
| − | This is the Melee set for early Hardmode, before fighting any metallic bosses. Palladium armor is arguably the best of the hardmode ore armors, and specially for tanks, as they greatly increase life regeneration when hit. Adamantite and Titanium both take great amounts of time to grind on, so it's often better to go for Cobalt or Mythril tier armor unless absolutely required, in the case of Casters. |
||
| + | Ranged characters would also try to kill tentacles as soon as they appear. Due to generally low defense of ranger's sets, getting caught by them often will kill player really fast. |
||
| − | ===Caster - Titanium=== |
||
| + | ===Attack types=== |
||
| − | '''Armor''' |
||
| + | {| class="wikitable" |
||
| − | *[[Titanium armor]] or [[Adamantite armor]] |
||
| + | |- |
||
| − | '''Weapons''' |
||
| + | | align="center" | [[File:Poison Seed.png]] || '''Seeds''' || Phase 1 || Frequently spits projectiles similar to the stingers of the [[Hornet]]s. Easily avoided in Normal mode if the player hides behind blocks. |
||
| − | *[[Poison Staff]] |
||
| + | |- |
||
| − | *[[Diamond Staff]] |
||
| + | | align="center" | [[File:Thorn Ball.png]] || '''Thorn Balls''' || || Spiky balls similar to the [[Spike Ball]] weapon. They linger on the ground for a significant amount of time and deal around 50 damage. These balls fall through [[platform]]s, so use of platforms in an arena is recommended. They are however also incredibly bouncy and can easily reach players some height in the air. |
||
| − | *[[Crystal Storm]] |
||
| + | |- |
||
| − | *[[Golden Shower]] |
||
| + | | align="center" | [[File:Plantera's Hook.png]] || '''Hooks''' || || Plantera uses three vines for its locomotion, apparently larger versions of the [[Ivy Whip]]. The ends of these vines deal damage if the player touches them. |
||
| − | *[[Demon Scythe]] |
||
| + | |- |
||
| − | '''Accessories''' |
||
| + | | align="center" | [[File:Plantera's Tentacle.png]] || '''Biters''' || Phase 2 || Once Plantera begins the second stage it will sprout a large number of small gnawing minions on "leashes". They simply wave themselves around at the end of their leash and get in the way of the player's attacks, making piercing weapons more valuable. They are fairly strong and easily killed. |
||
| − | *[[Obsidian Shield]] |
||
| + | |- |
||
| − | *[[Harpy Wings]] or [[Wings]] of a similar tier |
||
| + | | align="center" | [[File:Spore.png]] || '''Spores ''' || Phase 2 || Frequently spits projectiles similar to the [[Fungi Spore]]s fired by the [[Giant Fungi Bulb]]. Easily destroyed and avoidable, but deals high damage if hit. |
||
| − | *[[Frostspark Boots]] |
||
| + | |} |
||
| − | *[[Magic Cuffs]] |
||
| − | *[[Mana Flower]] or [[Sorcerer Emblem]] |
||
| − | '''Summary''' |
||
| + | ===Specific Strategies=== |
||
| − | This is the early Hardmode Caster set, before fighting any metallic bosses. It requires Titanium/Adamantite rather than Palladium due to the fact that unlike Melee and Ranged it cannot take advantage of Frost Armor and doesn't get an upgrade until Chlorophyte. Due to the difficulty of the hardmode jungle, it is almost required to have either Titanium/Adamantite or Frost+ armor to survive in it. The Poison staff, a very, VERY good Magic weapon is available as soon you enter hardmode, and is an outstanding weapon throughout all of hardmode. Similarly, the Diamond staff was an outstanding weapon throughout all of normal mode, and is also very good during early hardmode. Again, the Mana Flower isn't really necessary, depending on personal preference. |
||
| + | ====The Teleportation Trick ==== |
||
| + | [[File:Walkthrough Plantera.png|thumb|Teleportation trick]] |
||
| + | Make a long hallway (preferably longer than 150 tiles, but still shorter than 250 due to the bug shown below, because of [[Plantera]]'s movement speed in the second phase) out of any material you desire, and place a [[Teleporter]] on each end, and wire them together. Test it first. Then, summon [[Plantera]].This strategy works out with [[Frost armor]] or [[Hallowed armor]],a [[Megashark]] with [[Crystal Bullet]]s, with the ironskin, regeneration,well fed and thorns buff.Using a [[Flamethrower]] is not recommended since it has a short range compared to other guns, and it won't be against the biters since the crystal bullets will take care of them. |
||
| − | ===Ranger - Palladium=== |
||
| − | '''Armor''' |
||
| − | *[[Palladium armor]], if not available then [[Orichalcum armor]] or [[Mythril armor]] |
||
| − | '''Weapons''' |
||
| − | *[[Clockwork Assault Rifle]] |
||
| − | *[[Shotgun]] |
||
| − | *[[Minishark]] |
||
| − | **[[Party Bullet]]s or [[Crystal Bullet]]s |
||
| − | *[[Titanium Repeater]] or [[Adamantite Repeater]] |
||
| − | **[[Cursed Arrow]]s or [[Ichor Arrow]]s |
||
| − | *[[Star Cannon]] |
||
| − | **[[Fallen Star]]s |
||
| − | '''Accessories''' |
||
| − | *[[Obsidian Shield]] |
||
| − | *[[Harpy Wings]] or [[Wings]] of a similar tier |
||
| − | *[[Frostspark Boots]] |
||
| − | *[[Bundle of Balloons]] |
||
| − | *[[Ranger Emblem]] or [[Charm of Myths]] |
||
| − | '''Summary''' |
||
| + | When it's climbing down toward you on one side, flip the [[Mechanism|trigger]] used to activate [[Teleporter]]. You will teleport to the other side, and [[Plantera]] will have to climb back at you. It is even possible to combine the Teleporters with a [[Timer]] to remove the need to activate a trigger or with a [[Pressure Plate]],which will only require the player to jump for teleporting. |
||
| − | The early Hardmode Ranger armor. Similar to the Melee set, it uses Palladium armor, seeing as not really much more is needed until you are able to get Frost Armor. |
||
| + | Boomerang type weapons can fly indefinitely when using a teleportation trick. Before the boomerang returns, the player can teleport to the other end of the hall, and the boomerang will change directions and pierce enemies along the way. |
||
| − | ===Summoner - Spider=== |
||
| − | '''Armor''' |
||
| − | *[[Spider armor]] |
||
| − | '''Weapons''' |
||
| − | *[[Spider Staff]] |
||
| − | *[[Queen Spider Staff]] |
||
| − | *[[Titanium Sword]]/[[Titanium Trident]] or Adamantite equivalent |
||
| − | *[[Poison Staff]], if desired |
||
| − | '''Accessories''' |
||
| − | *[[Harpy Wings]] or wings of a similar tier |
||
| − | *[[Frostspark Boots]] |
||
| − | *[[Charm of Myths]] |
||
| − | *[[Obsidian Shield]] |
||
| − | *[[Bundle of Balloons]] |
||
| − | '''Summary''' |
||
| + | Note that if the hallway is too long, Plantera will despawn. This was observed in a hallway as small as 200 tiles. |
||
| − | Early hardmode summoner class. *[[Summoning Potion]] is highly recommended |
||
| − | === |
+ | ====Ring Around the Rosey method==== |
| + | It is little known that [[Plantera]]'s AI can be manipulated to be trapped inside of a block for the first stage as the player flies around it. First, a standard arena must be built (15-20 tiles high and about 50 tiles long) then, around the middle, a floating 7x7 block must be built, leaving room for the player to fly around it while just being able to shoot [[Plantera]] (preferably with a [[Terra Blade]] or [[Flamethrower]]) this will take it into second stage often without taking any hits. Second stage gets a little more intense. This means that the block idea could be discarded for the remainder of the fight, unless the player feels confident enough to keep [[Plantera]] inside. |
||
| − | '''Armor''' |
||
| − | *[[Frost armor]] |
||
| + | ====Waterbolt method==== |
||
| − | '''Weapons''' |
||
| + | This method is simple, but needs strong armor, and a friend. Create two small boxes (preferably 6x6), and add teleporters to each and wire them up. Add a trigger, and you are done. Summon [[Plantera]], get into one of the boxes, and use your water bolt inside the box. The projectiles will damage Plantera, and if you feel overwhelmed, teleport to the other box, and keep going. This strategy does not require much preparations, but this requires at least chlorophyte armor. So, this is a good way to kill Plantera if you have good armor, good skills, and a good friend to help you. |
||
| − | *[[True Night's Edge]] -> [[Terra Blade]] |
||
| − | *[[Gungnir]] |
||
| − | *[[Light Disc]]s |
||
| − | *[[Dao of Pow]] |
||
| − | '''Accessories''' |
||
| − | *[[Obsidian Shield]] |
||
| − | *[[Frozen Wings]], [[Leaf Wings]] or [[Fire Wings]] |
||
| − | *[[Frostspark Boots]] |
||
| − | *[[Fire Gauntlet]] |
||
| − | *[[Charm of Myths]] or [[Star Veil]] |
||
| − | '''Summary''' |
||
| − | The mid-hardmode Melee set. Just a basic Frost Melee set. |
||
| − | === |
+ | ====Hellevator method==== |
| + | Simple to execute and blocks most of Plantera abilities but not for melee users. Dig vertical two block wide shaft through the jungle. After breaking the bulb, run to the shaft and start ascending letting Plantera chase you. Just keep your distance and shoot away. If low on health, run out of Plantera's reach and wait for potion cooldown. When approaching the surface, drop down past Plantera and start descending in the same way. |
||
| − | '''Armor''' |
||
| − | *[[Frost armor]] |
||
| − | '''Weapons''' |
||
| − | *[[Megashark]] |
||
| − | *[[Shotgun]] |
||
| − | **[[Party Bullet]]s or [[Crystal Bullet]]s |
||
| − | *[[Hallowed Repeater]] |
||
| − | **[[Cursed Arrow]]s or [[Ichor Arrow]]s |
||
| − | '''Accessories''' |
||
| − | *[[Obsidian Shield]] |
||
| − | *[[Frozen Wings]], [[Leaf Wings]] or [[Fire Wings]] |
||
| − | *[[Frostspark Boots]] |
||
| − | *[[Bundle of Balloons]] |
||
| − | *[[Ranger Emblem]] or [[Charm of Myths]] |
||
| − | '''Summary''' |
||
| − | |||
| − | This set is basically just a much more powerful version of the Ranger Palladium set, using better Armor, a better Gun, a better Repeater and better wings. The Shotgun and Repeater are mostly for Crowd Control, while the Megashark is good for everything else.... literally. The whole point of the Frost set is to tank hits and deal extremely high DPS with the Megashark + Frostburn, making it great for bosses. |
||
| − | |||
| − | ===Caster - Hallowed=== |
||
| − | '''Armor''' |
||
| − | *[[Hallowed armor]] |
||
| − | '''weapons''' |
||
| − | *[[Poison Staff]] |
||
| − | *[[Rainbow Rod]] |
||
| − | *[[Magic Dagger]] |
||
| − | *[[Magical Harp]] |
||
| − | *[[Nimbus Rod]] |
||
| − | *[[Unholy Trident]] |
||
| − | '''accessories''' |
||
| − | *[[Obsidian Shield]] |
||
| − | *[[Frozen Wings]], [[Leaf Wings]] or [[Fire Wings]] |
||
| − | *[[Frostspark Boots]] |
||
| − | *[[Magic Cuffs]] |
||
| − | *[[Sorcerer Emblem]] |
||
| − | '''Summary''' |
||
| − | |||
| − | More of an optional class, casters may want to opt for a Hallowed set because they do not benefit from the effects of Frost Armor, this set benefits mostly from items dropped by the mechanical bosses. |
||
| − | |||
| − | ===Caster - Chlorophyte=== |
||
| − | '''Armor''' |
||
| − | *[[Chlorophyte armor]] |
||
| − | '''Weapons''' |
||
| − | *[[Venom Staff]] |
||
| − | *[[Magic Dagger]] |
||
| − | *[[Nimbus Rod]] |
||
| − | *[[Golden Shower]] |
||
| − | *[[Unholy Trident]] |
||
| − | '''Accessories''' |
||
| − | *[[Obsidian Shield]] |
||
| − | *[[Frozen Wings]], [[Leaf Wings]] or [[Fire Wings]] |
||
| − | *[[Frostspark Boots]] |
||
| − | *[[Magic Cuffs]] |
||
| − | *[[Sorcerer Emblem]] |
||
| − | '''Summary''' |
||
| − | |||
| − | Again, the Caster is the only class that does not benefit from Frost Armor, and as such must get Chlorophyte armor until they can get Spectre Armor, which is unfortunately often acquired last of the Endgame Armor Sets. As before, the Poison Staff is still a great weapon, with the Frost staff replacing the Diamond Staff, as it is essentially an upgrade to the Diamond Staff. The Golden Shower, while still not very good as an average weapon, is still great for bosses as it lowers their defense so that the Caster may use the Venom or Frost Staff to utterly destroy any Boss even faster than normal. |
||
| − | |||
| − | ===Summoner - Spider=== |
||
| − | |||
| − | '''Armor''' |
||
| − | *[[Spider armor]] |
||
| − | '''Weapons''' |
||
| − | *[[Pirate Staff]] |
||
| − | *[[Optic Staff]] |
||
| − | *[[Queen Spider Staff]] |
||
| − | *[[Titanium Sword]]/[[Titanium Trident]] or Adamantite equivalent, if desired |
||
| − | *[[Poison Staff]], if desired |
||
| − | '''Accessories''' |
||
| − | *[[Obsidian Shield]] |
||
| − | *[[Frozen Wings]], [[Leaf Wings]], or [[Fire Wings]] |
||
| − | *[[Frostspark Boots]] |
||
| − | *[[Charm of Myths]] |
||
| − | *[[Bundle of Balloons]] |
||
| − | '''Summary''' |
||
| − | |||
| − | A summoner class. Not very elaborate. |
||
| − | |||
| − | ===Melee - Beetle=== |
||
| − | '''Armor''' |
||
| − | *[[Beetle armor]] with beetle scale mail |
||
| − | '''Weapons''' |
||
| − | *[[Terra Blade]] |
||
| − | *[[Death Sickle]] |
||
| − | *[[Flower Pow]] |
||
| − | *[[Chlorophyte Partisan]]/[[Chlorophyte Saber]] |
||
| − | *[[Bananarang]]s |
||
| − | '''Accessories''' |
||
| − | *[[Obsidian Shield]] |
||
| − | *[[Frozen Wings]], [[Leaf Wings]] or[[Fire Wings]] |
||
| − | *[[Frostspark Boots]] |
||
| − | *Any 2 of: [[Fire Gauntlet]], [[Frozen Turtle Shell]], [[Charm of Myths]], [[Star Veil]] |
||
| − | |||
| − | Finally the Warrior has his endgame armor... but his weapons could still user a bit of work. |
||
| − | |||
| − | ===Ranger - Shroomite=== |
||
| − | '''Armor''' |
||
| − | *[[Shroomite armor]], all three hats, used interchangeably |
||
| − | '''Weapons''' |
||
| − | *[[Venus Magnum]] |
||
| − | *[[Uzi]] |
||
| − | *[[Megashark]] |
||
| − | **[[Chlorophyte Bullet]]s |
||
| − | *[[Pulse Bow]] |
||
| − | **[[Venom Arrow]]s or [[Ichor Arrow]]s |
||
| − | *[[Grenade Launcher]] |
||
| − | **[[Rocket III]]s |
||
| − | '''Accessories''' |
||
| − | *[[Obsidian Shield]] |
||
| − | *[[Hoverboard]] |
||
| − | *[[Frostspark Boots]] |
||
| − | *[[Bundle of Balloons]] |
||
| − | *[[Ranger Emblem]] or [[Charm of Myths]] |
||
| − | |||
| − | A powerful Pre-Dungeon Ranger set, complete with the all-powerful Chlorophyte Bullets, every enemies worst fear. You click with the Venus Magnum, and things die. Can't get better than that. |
||
| − | |||
| − | ===Summoner - Tiki=== |
||
| − | '''Armor''' |
||
| − | *[[Tiki Armor]] |
||
| − | '''Weapons''' |
||
| − | *[[Melee Weapon]] of choice |
||
| − | *[[Pygmy Staff]] |
||
| − | *[[Optic Staff]] |
||
| − | *[[Queen Spider Staff]] |
||
| − | *[[Venom Staff]], if desired |
||
| − | |||
| − | '''Accessories''' |
||
| − | *[[Pygmy Necklace]] |
||
| − | *[[Hercules Beetle]] |
||
| − | *[[Hoverboard]] |
||
| − | *[[Obsidian Shield]] |
||
| − | *[[Charm of Myths]] or [[Bundle of Balloons]] |
||
| − | '''Summary''' |
||
| − | |||
| − | The summoner just got a HUGE boost. The venom staff is great for bosses if one desires it. It's recommended to get a melee weapon as well, depending on your tastes. |
||
| − | |||
| − | ===Caster - Post-Dungeon Spectre=== |
||
| − | '''Armor''' |
||
| − | *[[Spectre armor]] |
||
| − | '''Weapons''' |
||
| − | *[[Rainbow Gun]] |
||
| − | *[[Magic Dagger]] |
||
| − | *[[Shadowbeam Staff]] |
||
| − | *[[Heat Ray]] |
||
| − | *[[Inferno Fork]] |
||
| − | *[[Unholy Trident]] |
||
| − | *[[Leaf Blower]] |
||
| − | *[[Magnet Sphere]] |
||
| − | *[[Staff of the Frost Hydra]] |
||
| − | *[[Nimbus Rod]] |
||
| − | *[[Golden Shower]] |
||
| − | '''Accessories''' |
||
| − | *[[Ankh Shield]] or [[ Mechanical Glove]] |
||
| − | *[[Hoverboard]], [[Celestial Stone]], or [[Avenger Emblem]] |
||
| − | *[[Frostspark Boots]] or [[Destroyer Emblem]] |
||
| − | *[[Magic Cuffs]]->[[Celestial Cuffs]] |
||
| − | *[[Sorcerer Emblem]] |
||
| − | '''Summary''' |
||
| − | |||
| − | The Hardmode Dungeon's worst nightmare. All of the weapons are useful for different reasons. Heat Ray is likely going to be your main weapon due to its versatility. |
||
| − | |||
| − | ===Melee - Post-Dungeon Beetle=== |
||
| − | '''Armor''' |
||
| − | *[[Beetle armor]] with beetle scale mail |
||
| − | '''Weapons''' |
||
| − | *[[Terra Blade]] |
||
| − | *[[Vampire Knives]] |
||
| − | *[[Paladin's Hammer]] |
||
| − | *[[Scourge of the Corruptor]] |
||
| − | *[[Possessed Hatchet]] |
||
| − | *[[Flower Pow]] or [[Flairon]] |
||
| − | *[[Chlorophyte Partisan]]/[[Chlorophyte Saber]] |
||
| − | '''Accessories''' |
||
| − | *[[Ankh Shield]] |
||
| − | *[[Hoverboard]] |
||
| − | *[[Frostspark Boots]] |
||
| − | *Any 2 of: [[Fire Gauntlet]], [[Frozen Turtle Shell]], [[Paladin's Shield]], [[Charm of Myths]], [[Star Veil]] |
||
| − | '''Summary''' |
||
| − | |||
| − | Great for adventuring. The set just got much better with the Vampire Knives. The whole idea is to use the Vampire Knives on EVERYTHING. |
||
| − | |||
| − | ===Ranger - Post-Dungeon Shroomite=== |
||
| − | '''Armor''' |
||
| − | *[[Shroomite armor]], all three hats, used interchangeably |
||
| − | '''Weapons''' |
||
| − | *[[Venus Magnum]] |
||
| − | *[[Megashark]] (If possible [[Space Dolphin Machine Gun]] |
||
| − | *[[Sniper Rifle]] |
||
| − | *[[Tactical Shotgun]] |
||
| − | **[[Chlorophyte Bullet]]s |
||
| − | *[[Piranha Gun]] |
||
| − | *[[Chlorophyte Shotbow]] or [[hallowed repeater]] |
||
| − | **[[Chlorophyte Arrow]]s |
||
| − | *[[Rocket Launcher]] |
||
| − | *[[Proximity Mine Launcher]] |
||
| − | **[[Rocket III]]s ([[Rocket IV]] does more damage but destroys tiles) |
||
| − | *[[Pulse Bow]] |
||
| − | *[[Tsunami]] |
||
| − | '''Accessories''' |
||
| − | *[[Ankh Shield]] |
||
| − | *[[Hoverboard]] and/or [[Frostspark Boots]] |
||
| − | *Any 2/3 of: [[Sniper Scope]], [[Magic Quiver]], [[Bundle of Balloons]], [[Master Ninja Gear]] |
||
| − | '''Summary''' |
||
| − | |||
| − | Anything that looks at this set funny dies a quick-and-very-much-painful death. Sniper Rifle + Chlorophyte Bullets = Death. It's common science. |
||
| − | |||
| − | ===Melee/Range-Slash+Blast2.0=== |
||
| − | '''Armor''' |
||
| − | *[[Cobalt Armor]]->[[Adamantite armor]]->[[Hallowed armor]] |
||
| − | '''Weapons''' |
||
| − | *[[Cobalt Sword]]->[[Phasesaber]]->[[Excalibur]]->[[Chlorophyte Saber]] |
||
| − | *[[Phoenix Blaster]]->[[Venus Magnum]] |
||
| − | '''Accessories''' |
||
| − | *[[Ankh Shield]] |
||
| − | *[[Hoverboard]] |
||
| − | *[[Frostspark boots]] |
||
| − | *[[Fire Gauntlet]] |
||
| − | *[[Avenger Emblem]] |
||
| − | '''Summary''' |
||
| − | |||
| − | A stronger version of Slash+blast. Works the same as the original. |
||
| − | |||
| − | ===Summoner - Post-Dungeon Tiki=== |
||
| − | '''Armor''' |
||
| − | *[[Tiki Armor]] |
||
| − | '''Weapons''' |
||
| − | *[[Vampire Knives]] |
||
| − | *[[Pygmy Staff]] |
||
| − | *[[Optic Staff]] |
||
| − | *[[Staff of the Frost Hydra]] |
||
| − | '''Accessories''' |
||
| − | *[[Pygmy Necklace]] |
||
| − | *[[Hercules Beetle]] |
||
| − | *[[Hoverboard]] |
||
| − | *[[Ankh Shield]] |
||
| − | *[[Celestial Stone]] |
||
| − | |||
| − | Don't deny the frost hydra's power. A decent set for bosses. |
||
| − | |||
| − | == Endgame == |
||
| − | ===Pre-Pumpkin Moon=== |
||
| − | ====Melee - Pre-Pumpkin Moon==== |
||
| − | '''Armor''' |
||
| − | *[[Beetle armor]] with beetle scalemail |
||
| − | '''Weapons''' |
||
| − | *Legendary [[Terra Blade]] |
||
| − | *Godly [[Vampire Knives]] |
||
| − | *Godly [[Paladin's Hammer]] |
||
| − | *Godly [[Scourge of the Corruptor]] |
||
| − | *Godly [[Possessed Hatchet]] |
||
| − | *Godly [[Flairon]] |
||
| − | *Godly [[Chlorophyte Partisan]]/[[Chlorophyte Saber]] |
||
| − | '''Accessories''' |
||
| − | *Menacing [[Celestial Stone]] |
||
| − | *Menacing [[Warrior Emblem]] |
||
| − | *Menacing [[Destroyer Emblem]] |
||
| − | *Menacing [[Avenger Emblem]] |
||
| − | *Menacing [[Fire Gauntlet]] |
||
| − | '''Summary''' |
||
| − | |||
| − | All players going into the Pumpkin and Frost moons are highly advised to go for a max-damage setup. The armor has slightly less defense than turtle armor, but the beetle scale mail buff is deadly. The whole idea with this set is to use Vampire Knives on everything, so as to preserve life as long as possible. Buffs are also highly advised when going into the Pumpkin Moon. |
||
| − | |||
| − | ====Ranger - Pre-Pumpkin Moon==== |
||
| − | '''Armor''' |
||
| − | *[[Shroomite armor]], all three hats, used interchangeably |
||
| − | '''Weapons''' |
||
| − | *Unreal [[Venus Magnum]] |
||
| − | *Unreal [[Megashark]] |
||
| − | *Unreal [[Sniper Rifle]] |
||
| − | *Unreal [[Tactical Shotgun]] |
||
| − | **[[Chlorophyte Bullet]]s |
||
| − | **[[Crystal Bullet]]s |
||
| − | *Unreal [[Piranha Gun]] |
||
| − | *Unreal [[Chlorophyte Shotbow]] |
||
| − | *Unreal [[Tsunami]] |
||
| − | **[[Chlorophyte Arrow]]s |
||
| − | *Godly [[Rocket Launcher]] |
||
| − | *Unreal [[Proximity Mine Launcher]] |
||
| − | **[[Rocket IV]]s |
||
| − | '''Accessories''' |
||
| − | *Menacing [[Celestial Stone]] |
||
| − | *Menacing [[Ranger Emblem]] |
||
| − | *Menacing [[Destroyer Emblem]] |
||
| − | *Menacing [[Avenger Emblem]] |
||
| − | *Menacing [[Sniper Scope]] |
||
| − | '''Summary''' |
||
| − | |||
| − | Like the Melee set, this is also a Max Damage set. It does share most of its Acessories with the Melee set, with the exception of the Sniper Scope and Ranger Emblem. As before, the goal with this set is to stay out of harms way and snipe things with the Sniper Rifle + Chlorophyte Bullets. Sniper Rifle + Chlorophyte Bullets = Death. |
||
| − | |||
| − | ====Caster - Pre-Pumpkin Moon==== |
||
| − | '''Armor''' |
||
| − | *[[Spectre armor]] |
||
| − | '''Weapons''' |
||
| − | *Mythical [[Rainbow Gun]] |
||
| − | *Mythical [[Shadowbeam Staff]] |
||
| − | *Mythical [[Heat Ray]] |
||
| − | *Mythical [[Inferno Fork]] |
||
| − | *Mythical [[Leaf Blower]] |
||
| − | *Mythical [[Magnet Sphere]] |
||
| − | *Mythical [[Staff of the Frost Hydra]] |
||
| − | *Demonic/Mystic [[Nimbus Rod]] |
||
| − | *Mythical [[Golden Shower]] |
||
| − | *Mythical [[Magic Dagger]] |
||
| − | '''Accessories''' |
||
| − | *Menacing [[Celestial Stone]] |
||
| − | *Menacing [[Sorcerer Emblem]] |
||
| − | *Menacing [[Destroyer Emblem]] |
||
| − | *Menacing [[Avenger Emblem]] |
||
| − | *Menacing [[Celestial Cuffs]] |
||
| − | '''Summary''' |
||
| − | |||
| − | As like the Ranger set, Casters stick with full Spectre Armor for Max-damage, and only the accessories change. Just shoot ''Rainbows'' and ''Debuffs'' at evil Halloween Monsters and you've got it. You may need an arena, or to be a boss |
||
| − | |||
| − | ====Summoner - Pre-Pumpkin Moon==== |
||
| − | '''Armor''' |
||
| − | *[[Tiki Armor]] |
||
| − | '''Weapons''' |
||
| − | *Godly [[Vampire Knives]] |
||
| − | *Ruthless [[Tempest Staff]] |
||
| − | *Mythical [[Optic Staff]] |
||
| − | *Ruthless [[Pygmy Staff]] |
||
| − | *Ruthless [[Queen Spider Staff]] |
||
| − | *Ruthless [[Staff of the Frost Hydra]] |
||
| − | '''Accessories''' |
||
| − | *Menacing [[Pygmy Necklace]] |
||
| − | *Menacing [[Hercules Beetle]] |
||
| − | *Menacing [[Destroyer Emblem]] |
||
| − | *Menacing [[Avenger Emblem]] |
||
| − | *Menacing [[Celestial Stone]] |
||
| − | '''Summary''' |
||
| − | |||
| − | Not much to be said. Summon some twins, sharknadoes, and dragons, and go for it. |
||
| − | |||
| − | |||
| − | ===Pre-Frost Moon=== |
||
| − | ====Melee - Pre-Frost Moon==== |
||
| − | '''Armor''' |
||
| − | *[[Beetle Armor]] with Beetle Scale Mail |
||
| − | '''Weapons''' |
||
| − | *Legendary [[Terra Blade]]/[[The Horseman's Blade]] |
||
| − | *Godly [[Vampire Knives]] |
||
| − | *Godly [[Paladin's Hammer]] |
||
| − | *Godly [[Scourge of the Corruptor]] |
||
| − | *Godly [[Possessed Hatchet]] |
||
| − | *Godly [[Flairon]] |
||
| − | *Godly [[Chlorophyte Partisan]]/[[Chlorophyte Saber]] |
||
| − | '''Accessories''' |
||
| − | *Menacing [[Celestial Stone]] |
||
| − | *Menacing [[Warrior Emblem]] |
||
| − | *Menacing [[Destroyer Emblem]] |
||
| − | *Menacing [[Avenger Emblem]] |
||
| − | *Menacing [[Fire Gauntlet]] |
||
| − | '''Summary''' |
||
| − | |||
| − | All players going into the Frost Moon are highly advised to go for a max-damage setup, like this one. The whole idea with this set is to use Vampire Knives on everything, so as to preserve life as long as possible. Buffs are also highly advised when going into the Frost Moon. |
||
| − | |||
| − | ====Ranger - Pre-Frost Moon==== |
||
| − | '''Armor''' |
||
| − | *[[Shroomite armor]], all three hats, used interchangeably |
||
| − | '''Weapons''' |
||
| − | *Unreal [[Venus Magnum]] |
||
| − | *Unreal [[Megashark]] |
||
| − | *Unreal [[Sniper Rifle]] |
||
| − | *Unreal [[Tactical Shotgun]] |
||
| − | **[[Chlorophyte Bullet]]s |
||
| − | **[[Crystal Bullet]]s |
||
| − | *Unreal [[Stake Launcher]] |
||
| − | **[[Stake]]s |
||
| − | *Unreal [[Piranha Gun]] |
||
| − | *Unreal [[Chlorophyte Shotbow]] |
||
| − | **[[Chlorophyte Arrow]]s |
||
| − | *Godly [[Rocket Launcher]] |
||
| − | *Unreal [[Proximity Mine Launcher]] |
||
| − | **[[Rocket IV]]s |
||
| − | '''Accessories''' |
||
| − | *Menacing/Lucky [[Celestial Stone]] |
||
| − | *Menacing/Lucky [[Ranger Emblem]] |
||
| − | *Menacing/Lucky [[Destroyer Emblem]] |
||
| − | *Menacing/Lucky [[Avenger Emblem]] or [[Lightning Boots]] |
||
| − | *Menacing/Lucky [[Sniper Scope]] |
||
| − | '''Summary''' |
||
| − | |||
| − | Like the Melee set, this is also a Max Damage set, though some may prefer to sacrifice a little damage for more movement. This shares most of its accessories with the Melee set, with the exception of the Sniper Scope, and the use of a Destroyer Emblem, as ranged characters no longer get a boost from the mechanical glove. As before, the goal with this set is to stay out of harms way and snipe things with the Sniper Rifle + Chlorophyte Bullets. Sniper Rifle + Chlorophyte Bullets = Death. |
||
| − | |||
| − | ====Caster - Pre-Frost Moon==== |
||
| − | '''Armor''' |
||
| − | *[[Spectre armor]] |
||
| − | '''Weapons''' |
||
| − | *Mythical [[Rainbow Gun]] |
||
| − | *Mythical [[Venom Staff]] |
||
| − | *Mythical [[Shadowbeam Staff]] |
||
| − | *Mythical [[Magic Dagger]] |
||
| − | *Mythical [[Heat Ray]] |
||
| − | *Mythical [[Inferno Fork]] |
||
| − | *Godly [[Bat Scepter]] |
||
| − | *Mythical [[Staff of the Frost Hydra]] |
||
| − | *Mythical [[Raven Staff]] |
||
| − | *Demonic/Mystic [[Nimbus Rod]] |
||
| − | *Mythical [[Golden Shower]] |
||
| − | *Mythical [[Magnet Sphere]] |
||
| − | |||
| − | '''Accessories''' |
||
| − | *Menacing/Lucky [[Celestial Stone]] |
||
| − | *Menacing/Lucky [[Sorcerer Emblem]] |
||
| − | *Menacing/Lucky [[Celestial Emblem]] |
||
| − | *Menacing/Lucky [[Avenger Emblem]] |
||
| − | *Any 2 of: Menacing/Lucky [[Destroyer Emblem]], Menacing/Lucky [[Hoverboard]], Menacing/Lucky [[Magic Cuffs]], Menacing/Lucky [[Frostspark Boots]] |
||
| − | '''Summary''' |
||
| − | |||
| − | As like the Ranger set, Casters stick with full Spectre Armor for Max-damage, and only the accessories change. Just shoot ''Rainbows'' and ''Poisonous projectiles'' at evil Halloween Monsters and you've got it. |
||
| − | |||
| − | ====Summoner - Pre-Frost Moon==== |
||
| − | '''Armor''' |
||
| − | *[[Spooky Helmet]]/[[Tiki Mask]] Interchange the armor sets for max minion damage and max minions |
||
| − | *[[Spooky Breastplate]]/[[Tiki Shirt]] |
||
| − | *[[Spooky Leggings]]/[[Tiki Pants]] |
||
| − | '''Weapons''' |
||
| − | *Godly [[Vampire Knives]] |
||
| − | *Ruthless [[Optic Staff]] |
||
| − | *Ruthless [[Tempest Staff]] |
||
| − | *Ruthless [[Raven Staff]] |
||
| − | *Ruthless [[Pygmy Staff]] |
||
| − | *Ruthless [[Queen Spider Staff]] |
||
| − | *Ruthless [[Staff of the Frost Hydra]] |
||
| − | '''Accessories''' |
||
| − | *Menacing [[Papyrus Scarab]] |
||
| − | *Menacing [[Necromantic Scroll]] |
||
| − | *Menacing [[Pygmy Necklace]] |
||
| − | *Menacing [[Destroyer Emblem]] |
||
| − | *Menacing [[Avenger Emblem]] |
||
| − | '''Summary''' |
||
| − | |||
| − | Not much to be said, either. Just murder everything with twins, dragons, and sharknadoes. |
||
| − | |||
| − | ===Post-Frost Moon=== |
||
| − | ====Melee - Post-Frost Moon==== |
||
| − | '''Armor''' |
||
| − | *[[Beetle Helmet]] |
||
| − | *[[Beetle Scale Mail]] or [[Beetle Shell]] |
||
| − | *[[Beetle Leggings]] |
||
| − | '''Weapons''' |
||
| − | *Legendary [[Terra Blade]]/[[The Horseman's Blade]] |
||
| − | *Godly [[Vampire Knives]] |
||
| − | *Godly [[North Pole]] |
||
| − | *Godly [[Paladin's Hammer]] |
||
| − | *Godly [[Scourge of the Corruptor]] |
||
| − | *Godly [[Possessed Hatchet]] |
||
| − | *Godly [[Flairon]] |
||
| − | '''Accessories''' |
||
| − | *Menacing/Warding/Lucky [[Ankh Shield]] |
||
| − | *Menacing/Warding/Lucky [[Hoverboard]], [[Spooky Wings]], [[Tattered Fairy Wings]] or [[Fishron Wings]] |
||
| − | *Menacing/Warding/Lucky [[Frostspark Boots]] |
||
| − | *Menacing/Warding/Lucky [[Fire Gauntlet]] or [[Master Ninja Gear]] |
||
| − | *Menacing/Warding/Lucky [[Celestial Stone]] |
||
| − | '''Summary''' |
||
| − | |||
| − | A great End-game Melee set for whatever you want to do. Great for exploration, boss battles and Pumpkin and Frost Moons. Vampire Knives + North Pole = Death |
||
| − | |||
| − | ====Ranger - Post-Frost Moon==== |
||
| − | '''Armor''' |
||
| − | *[[Shroomite armor]], all three hats, used interchangeably |
||
| − | '''Weapons''' |
||
| − | *Rapid [[Chain Gun]] |
||
| − | *Unreal [[Sniper Rifle]] |
||
| − | *Unreal [[Tactical Shotgun]] |
||
| − | **[[Chlorophyte Bullet]]s |
||
| − | *Unreal [[Stake Launcher]] |
||
| − | **[[Stake]]s |
||
| − | *Unreal [[Piranha Gun]] |
||
| − | *Unreal [[Pulse Bow]] |
||
| − | *Unreal [[Chlorophyte Shotbow]] |
||
| − | **[[Chlorophyte Arrow]]s |
||
| − | *Unreal [[Snowman Cannon]] |
||
| − | **[[Rocket IV]]s |
||
| − | *[[Elf Melter]] |
||
| − | **[[Gel]] |
||
| − | '''Accessories''' |
||
| − | *Menacing/Warding [[Ankh Shield]] |
||
| − | *Menacing/Warding [[Hoverboard]], [[Spooky Wings]], [[Tattered Fairy Wings]] or [[Fishron Wings]] |
||
| − | *Menacing/Warding [[Frostspark Boots]] |
||
| − | *Any 2 of: Menacing/Warding [[Sniper Scope]], [[Magic Quiver]], [[Bundle of Balloons]], [[Master Ninja Gear]] or [[Celestial Stone]] |
||
| − | '''Summary''' |
||
| − | |||
| − | A great End-game Ranger set for whatever you want to do. Great for exploration, boss battles and Pumpkin and Frost Moons. Chain Gun + Chlorophyte Bullets = Death. |
||
| − | |||
| − | ====Caster - Post-Frost Moon==== |
||
| − | '''Armor''' |
||
| − | *[[Spectre armor]] |
||
| − | '''Weapons''' |
||
| − | *Mythical [[Blizzard Staff]] |
||
| − | *Mythical [[Rainbow Gun]] |
||
| − | *Mythical [[Razorpine]] |
||
| − | *Mythical [[Venom Staff]] |
||
| − | *Mythical [[Shadowbeam Staff]] |
||
| − | *Mythical [[Heat Ray]] |
||
| − | *Mythical [[Inferno Fork]] |
||
| − | *Mythical [[Staff of the Frost Hydra]] |
||
| − | *Mythical [[Raven Staff]] |
||
| − | *Mythical [[Razorblade Typhoon]] |
||
| − | *Demonic/Mystic [[Nimbus Rod]] |
||
| − | *Mythical [[Golden Shower]] |
||
| − | *Godly [[Bat Scepter]] |
||
| − | '''Accessories''' |
||
| − | *Menacing/Warding [[Ankh Shield]] |
||
| − | *Menacing/Warding [[Hoverboard]], [[Spooky Wings]], [[Tattered Fairy Wings]] or [[Fishron Wings]] |
||
| − | *Menacing/Warding [[Frostspark Boots]] |
||
| − | *Menacing/Warding [[Magic Cuffs]] or [[Celestial Cuffs]] |
||
| − | *Menacing/Warding [[Celestial Stone]] |
||
| − | '''Summary''' |
||
| − | |||
| − | A great End-game Caster set for whatever you want to do. Great for exploration, boss battles, wrecking noobs, and Pumpkin and Frost Moons. Blizzard Staff = Death |
||
| − | |||
| − | ====Summoner - Post-Frost Moon==== |
||
| − | '''Armor''' |
||
| − | *[[Spooky Helmet]]/[[Tiki Mask]] Interchange the armor sets for max minion damage and max minions |
||
| − | *[[Spooky Breastplate]]/[[Tiki Shirt]] |
||
| − | *[[Spooky Leggings]]/[[Tiki Pants]] |
||
| − | '''Weapons''' |
||
| − | *Godly [[Vampire Knives]] |
||
| − | *Ruthless [[Optic Staff]] |
||
| − | *Ruthless [[Tempest Staff]] |
||
| − | *Ruthless [[Raven Staff]] |
||
| − | *Ruthless [[Pygmy Staff]] |
||
| − | *Ruthless [[Queen Spider Staff]] |
||
| − | *Ruthless [[Staff of the Frost Hydra]] |
||
| − | '''Accessories''' |
||
| − | *Menacing [[Papyrus Scarab]] |
||
| − | *Menacing [[Necromantic Scroll]] |
||
| − | *Menacing [[Pygmy Necklace]], [[Destroyer Emblem]] |
||
| − | *Menacing [[Hercules Beetle]] |
||
| − | *Menacing [[Spooky Wings]], [[Avenger Emblem]] |
||
| − | '''Summary''' |
||
| − | |||
| − | A Great End-Game Summoner for doing anything without having to worry about mobs. '''Note''' There is a certain sequence to maximize damage for your minions. Equip the Destroyer and Avenger Emblems, along with the Spooky armor. Summon 6 Minions, then equip the Pygmy Necklace and summon the 7th minion. Finally equip the full Tiki Set and summon the final minion. You can now replace the Avenger Emblem with Wings, and the Hercules Beetle with whatever is preferable. It is also wise to replace the Menacing summoning items with Warding after summoning the minions to add defense, so they retain their damage. |
||
| − | |||
| − | ==Other== |
||
| − | ===Builder Sets=== |
||
| − | ====Builder - Early Game==== |
||
| − | '''Armor''' |
||
| − | *Any armor available, builders can be fine even without armor. |
||
| − | '''Weapons''' |
||
| − | *Any weapon should do, at least a [[Wooden Sword]] or [[Wooden Bow]]. |
||
| − | '''Items''' |
||
| − | *Building Blocks (preferably with some useless material such as [[Dirt Block]]s for pillaring/making the base of building/etc) |
||
| − | *[[Wood]] and [[Stone]] for furniture |
||
| − | *[[Rope]]s |
||
| − | *Any kind of [[Torches]] for lighting |
||
| − | '''Accessories''' |
||
| − | *Any accessories with movement speed or defense modifier. |
||
| − | *[[Aglet]] |
||
| − | *[[Shackle]] |
||
| − | '''Summary''' |
||
| − | A setup for a player that focuses on building in the early game. They should be building [[Home]]s to bring in [[NPC]]s. The enemies they will encounter are [[Slimes]], [[Demon Eye]]s,and [[Zombies]], and therefore they do not need really good gear. |
||
| − | |||
| − | ====Builder - Mid Game==== |
||
| − | '''Armor''' |
||
| − | *Any armor available, at least [[Crimson armor]] or [[Shadow armor]]. |
||
| − | '''Weapons''' |
||
| − | *At least [[Light's Bane]]/[[Blood Butcherer]] and [[Gold Bow]]/[[Platinum Bow]]. |
||
| − | *[[Vilethorn]] to hit enemies through blocks. |
||
| − | *[[Spike Ball]]s may be effective for invasion/clustering monsters. |
||
| − | *[[Grenades]] are another good choice for clustering monsters. |
||
| − | *[[Hornet Staff]] to help deal with weaker monsters. |
||
| − | '''Items''' |
||
| − | *Any kind of [[Grappling Hook]] |
||
| − | *Building Blocks (preferably with some useless material, such as [[Dirt Block]]s, for pillaring/making the base of building/etc) |
||
| − | *[[Wood]] and [[Stone]] for furniture and useful items |
||
| − | *[[Rope]]s or [[Chain]]s |
||
| − | *Any kind of [[Torches]] for lighting |
||
| − | *[[Umbrella]] |
||
| − | *[[Paintbrush]] |
||
| − | *[[Paint Roller]] |
||
| − | *[[Paint Scraper]] |
||
| − | *Any [[Paint]]s |
||
| − | '''Accessories''' |
||
| − | *Any accessories with movement speed or defense modifier. Preferably ones that increase mobility. |
||
| − | Suggested Accessories: |
||
| − | *[[Cobalt Shield]] -> [[Obsidian Shield]] |
||
| − | *[[Shoe Spikes]]/[[Climbing Claws]] -> [[Tiger Climbing Gear]] |
||
| − | *Any Bottles/Balloons such as [[Cloud in a Bottle]]/[[Shiny Red Balloon]] -> [[Cloud in a Balloon]], and the like. |
||
| − | *[[Lucky Horseshoe]] -> [[Obsidian Horseshoe]] |
||
| − | *[[Hermes Boots]]/[[Rocket Boots]] -> [[Spectre Boots]] -> [[Lightning Boots]] -> [[Frostspark Boots]] |
||
| − | '''Summary''' |
||
| − | In mid-game, the builder should expand the house even more and be ready to assist in defending the base/house from [[Goblin Invasion]]s, and possibly [[Corruption]]/[[Crimson]].The builder may also start painting the house to make it look better. The builder might build an arena for boss fights, monster traps or farms. |
||
| + | ===Spawn Point Method=== |
||
| + | This method only works on the {{console version}}. Simply build a house in the underground Jungle, set your spawn point and destroy the bulb. Run into the house and wait next to the bed, being careful not to let Plantera despawn. Equip an auto-swinging sword. Recommendations are [[Excalibur]], [[Cutlass]] or a well reforged [[Chlorophyte Saber]]. If you are killed you will respawn in the house where Plantera is. Let Plantera sit on top of you while you slash it with the sword. This will make Plantera farming relatively easy. |
||
{{Guides}} |
{{Guides}} |
||
Revision as of 04:35, 28 April 2016
Plantera is a moderately hard boss; it can spawn after defeating all three of the mechanical hardmode bosses and destroying one of Plantera's Bulbs in the Underground Jungle.
First, Plantera has plenty of health to chew through, and a good amount of damage, so it would be best to set up a Heart Statue and Star Statue if you use magic. Set them to 1 second timers. Add a Heart Lantern and Campfire to boost your health regeneration further, and a Crystal Ball if you use magic, an Ammo Box for ranged, or a Sharpening Station if you use melee. A Bewitching Table can't hurt no matter what you use. If your arena is fairly large, try to set up more than one healing station like this, so that you can run in a big circle (or oval) and collect hearts on both ends of the loop. Alternately you can setup a house for the nurse for a mid-battle heal.
The actual shape of your arena depends on how you want to fight. For a player who wants to have plenty of evasive space, excavating around a screen's worth of space inside the Underground Jungle and filling it with rows of platforms can work well. For more aggressive players, a smaller space excavated right next to a bulb can work too. Others will just use a stack of bombs to excavate a large area for flying and grappling. Plantera's spike balls do some significant damage and are used frequently during Plantera's first phase, however they can only bounce off solid surfaces, if you don't mind taking the extra time, consider digging a hole at least 2 times deeper than you would use for the fight and stick to the top half of your arena, without the added threat of Plantera's spike balls, it is much easier to defeat.
Honey can be used for its regeneration, so you can make little pools for the regeneration benefit.
Bring a hammer to remove the jungle walls so that in Plantera's second phase, the hooks can only grapple on to the blocks so it cannot grab you with its hooks, and thus you do not take damage from them.
More specific strategies are available below. Some of these have their own arena setups.
Gearing Up
Armor
At the very, very minimum, players should use Hallowed Armor with the helmet to suit their class. Melee characters should use Turtle Armor or Frost Armor. However, equipping a Hallowed Mask instead of the Turtle Helmet offers greater defense and melee critical strike chance, only sacrificing the relatively decent Turtle Armor set bonus. Ranged characters should use Chlorophyte armor or Frost Armor. Magic users should also use Chlorophyte armor. You can use Chlorophyte armor's bonus with the Leaf Crystal for melee damage to help with attacking purposes. If players are farming plantera, using Vampire knives and Frost Armor can keep you alive and drain Plantera's health.
Weapons
Generally, you should use a Bewitching Table and a Summoning Potion to increase your minion count to three, and conjure three spiders or three pairs of mini twins. Despite their higher damage, pirates are not the best choice due to their lack of flying. Those minions will give you a decent base DPS, allowing you to focus less on your damage output and more on dodging.
Melee
- Spears work well as they can attack through blocks and can strike multiple times in one swing. The Chlorophyte Partisan is especially convenient as it shoots a small projectile that hits multiple times, making it a very useful spear for this fight. The Mushroom Spear is also a great option due to the spinning mushrooms it spawns. Keep using it and you can defeat Plantera in about 2-3 minutes.
- Swords like the Terra Blade, True Night's Edge or Frostbrand are fine choices for high ranged damage.
- The Death Sickle has proven to be a great weapon.
- The Cutlass or the Terra Blade combined with the Hallowed Armor can be very effective if the weapon has a good prefix.
- Using the Light Disc proves effective if you have more than one of them and are in a smaller arena.
- The Yelets is very useful, as it can rip through its first phase very quickly.
- "Legendary" modifier Template:Pc iconFetid Baghnakhs are incredible if you're going melee. This will end Plantera within' seconds. To avoid dying, use Turtle armor, Star Veil, and other "Warding" modifier (+4 Defense) accessories. Stacking further attack speed to 51% from accessories and armor by using full Hallowed armor, Mechanical Glove and a Fire Gauntlet (any modifiers) will speed up the fight even further, attacking so fast each swing is cut short, making short enemies like turtles difficult to hit with them. Using an Flask of Ichor also helps significantly. This method doesn't require any mobility accessories once Plantera is in melee range provided you have knockback immunity from a Shield and a Star Veil to help keep you alive for the duration of the fight as you can simply stand still and attack. This works well even on Expert mode.
- The Shadowflame Knife is a good choice as well, since it allows you to keep your distance and afflicts the Shadowflame debuff. Also it bounces, which allows it to have three chances of hitting Plantera instead of being stopped by the biters.
Ranged
- The Uzi is a popular choice, dealing high damage.
- The Megashark with Chlorophyte Bullet can be used for high damage, although Crystal Bullets, Ichor Bullets, Cursed Bullets or Explosive Bullets will get the job done.
- A Chlorophyte Shotbow with Cursed Arrows or Ichor Arrows can be used to great effect.
- The Flamethrower performs admirably against Plantera itself, but becomes devastating against its tentacle-like minions. It should be used as a second weapon, to quickly get rid of leashes.
Magic
- The Nimbus Rod is often useful (even for non-magic users). It can deal continuous damage which can greatly help the fight, especially in vertical arenas.
- Crystal Storm, Cursed Flames, Magical Harp, or Magic Dagger can be used for rapid attacking.
- The Venom Staff performs very, VERY well against plantera, dealing fast, high damage.
- The Rainbow Rod can do well against Plantera.
- Using the golden shower every so often can prove to be very helpful as it inflicts the ichor debuff, increasing your damage input even more.
- The Crystal Serpent can be a good weapon against Plantera.
- If your arena is dug out high enough, the Meteor Staff's rapid targeted damage is very effective.
Potions
- Greater Healing Potions or Template:Mobile iconHorn of Plenty are important for staying alive.
- Ironskin Potions and Regeneration Potions and Mana Regeneration Potions will help you survive much longer.
- Anything that gives the Well Fed buff is welcomed help.
- Increasing damage with buffs from potions such as the Archery Potion, Magic Power Potion, and any Flasks that Plantera is not immune to (Ichor is recommended, or Cursed Flames, if the world has a Corruption) will make an enormous difference.
- Clairvoyance from a Crystal Ball is recommended for magic users.
- Endurance Potions and Wrath Potion are always a great choice as well.
- Using Gravitation Potions and fighting in reversed gravity will mostly negate the threat of Plantera's spiked balls.
Accessories
Wings, and Lightning Boots/Frostspark Boots will allow you to dodge Plantera's attacks.
Damage can be greatly boosted through combat-accessories such as the Warrior/Ranger/Sorcerer/Avenger Emblems. A Moon Stone is also useful.
Charm of Myths can be used for increased regen and reducing the Potion Sickness debuff time from one minute to 45 seconds. A Fire Gauntlet is helpful because of melee damage increase and causing the On Fire! debuff. A Magma Stone can be used as well for this debuff. As with most bosses, the Cross Necklace/Star Veil can be used to extend the invulnerability period after being attacked, allowing you to take less damage.
For Prefixes, damage increasing or critical hit chance increasing Modifiers, such as menacing and lucky, will make a less-than-obvious difference. Melee characters may want to Reforge for modifiers that increase defense, such as warding.
For defensive characters, Flesh Knuckles would be one of the useful items to use. Star Veil would help during the fight during taking damage. Warrior Emblem if you're using melee. Reforging all of the accessories to "Warding" modifier will help too.
The Battle
Plantera will attempt to chase after the player, always trying to make its main bulb overlap the player's space. It moves fairly slowly when compared to a player with speed-boosting equipment. This means a player in a large enough arena can easily keep a distance, assuming they just keep moving. As such, a good arena can make the fight much easier. The second stage begins when Plantera reaches 50% remaining health. The pink petals fall off to reveal a ferocious green maw and Plantera's speed is greatly increased.
Currently, Plantera will enrage and gain more defense, attack more frequently and deals massive amounts of contact and ranged damage if the player leaves the Underground Jungle (including to go to the surface), so surface-level arena strategies are generally obsolete. One exception is taking advantage of Plantera's need to "grapple" to move by building a large enough space that Plantera cannot grapple up after you, and then firing down upon it. However, Plantera can grapple onto backgrounds, and since they go until reaching the underworld, you would have to clear them out first.
The player will want to focus on dodging attacks while shooting constantly at Plantera. Once plantera reaches its second form, the player should be very wary and try to avoid Plantera's lunges.
Ranged characters would also try to kill tentacles as soon as they appear. Due to generally low defense of ranger's sets, getting caught by them often will kill player really fast.
Attack types
| Seeds | Phase 1 | Frequently spits projectiles similar to the stingers of the Hornets. Easily avoided in Normal mode if the player hides behind blocks. | |
| Thorn Balls | Spiky balls similar to the Spike Ball weapon. They linger on the ground for a significant amount of time and deal around 50 damage. These balls fall through platforms, so use of platforms in an arena is recommended. They are however also incredibly bouncy and can easily reach players some height in the air. | ||
| Hooks | Plantera uses three vines for its locomotion, apparently larger versions of the Ivy Whip. The ends of these vines deal damage if the player touches them. | ||
| Biters | Phase 2 | Once Plantera begins the second stage it will sprout a large number of small gnawing minions on "leashes". They simply wave themselves around at the end of their leash and get in the way of the player's attacks, making piercing weapons more valuable. They are fairly strong and easily killed. | |
| Spores | Phase 2 | Frequently spits projectiles similar to the Fungi Spores fired by the Giant Fungi Bulb. Easily destroyed and avoidable, but deals high damage if hit. |
Specific Strategies
The Teleportation Trick
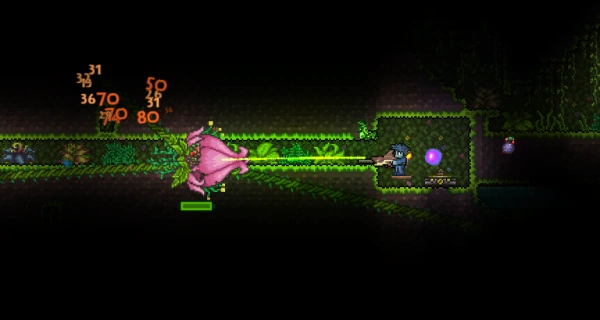
Teleportation trick
Make a long hallway (preferably longer than 150 tiles, but still shorter than 250 due to the bug shown below, because of Plantera's movement speed in the second phase) out of any material you desire, and place a Teleporter on each end, and wire them together. Test it first. Then, summon Plantera.This strategy works out with Frost armor or Hallowed armor,a Megashark with Crystal Bullets, with the ironskin, regeneration,well fed and thorns buff.Using a Flamethrower is not recommended since it has a short range compared to other guns, and it won't be against the biters since the crystal bullets will take care of them.
When it's climbing down toward you on one side, flip the trigger used to activate Teleporter. You will teleport to the other side, and Plantera will have to climb back at you. It is even possible to combine the Teleporters with a Timer to remove the need to activate a trigger or with a Pressure Plate,which will only require the player to jump for teleporting.
Boomerang type weapons can fly indefinitely when using a teleportation trick. Before the boomerang returns, the player can teleport to the other end of the hall, and the boomerang will change directions and pierce enemies along the way.
Note that if the hallway is too long, Plantera will despawn. This was observed in a hallway as small as 200 tiles.
Ring Around the Rosey method
It is little known that Plantera's AI can be manipulated to be trapped inside of a block for the first stage as the player flies around it. First, a standard arena must be built (15-20 tiles high and about 50 tiles long) then, around the middle, a floating 7x7 block must be built, leaving room for the player to fly around it while just being able to shoot Plantera (preferably with a Terra Blade or Flamethrower) this will take it into second stage often without taking any hits. Second stage gets a little more intense. This means that the block idea could be discarded for the remainder of the fight, unless the player feels confident enough to keep Plantera inside.
Waterbolt method
This method is simple, but needs strong armor, and a friend. Create two small boxes (preferably 6x6), and add teleporters to each and wire them up. Add a trigger, and you are done. Summon Plantera, get into one of the boxes, and use your water bolt inside the box. The projectiles will damage Plantera, and if you feel overwhelmed, teleport to the other box, and keep going. This strategy does not require much preparations, but this requires at least chlorophyte armor. So, this is a good way to kill Plantera if you have good armor, good skills, and a good friend to help you.
Hellevator method
Simple to execute and blocks most of Plantera abilities but not for melee users. Dig vertical two block wide shaft through the jungle. After breaking the bulb, run to the shaft and start ascending letting Plantera chase you. Just keep your distance and shoot away. If low on health, run out of Plantera's reach and wait for potion cooldown. When approaching the surface, drop down past Plantera and start descending in the same way.
Spawn Point Method
This method only works on the ![]() Console version. Simply build a house in the underground Jungle, set your spawn point and destroy the bulb. Run into the house and wait next to the bed, being careful not to let Plantera despawn. Equip an auto-swinging sword. Recommendations are Excalibur, Cutlass or a well reforged Chlorophyte Saber. If you are killed you will respawn in the house where Plantera is. Let Plantera sit on top of you while you slash it with the sword. This will make Plantera farming relatively easy.
Console version. Simply build a house in the underground Jungle, set your spawn point and destroy the bulb. Run into the house and wait next to the bed, being careful not to let Plantera despawn. Equip an auto-swinging sword. Recommendations are Excalibur, Cutlass or a well reforged Chlorophyte Saber. If you are killed you will respawn in the house where Plantera is. Let Plantera sit on top of you while you slash it with the sword. This will make Plantera farming relatively easy.