No edit summary |
(→Aftermath: Added info regarding aftermath) Tag: Visual edit |
||
| Line 1: | Line 1: | ||
| − | {{ |
+ | {{npc infobox |
| − | | |
+ | | width = 25em |
| + | | type = Boss |
||
| − | <!--| type2 = Mechanism--> |
||
| + | | environment = The Underworld |
||
| ⚫ | |||
| + | | ai = Wall of Flesh Body AI<!-- main segment --> |
||
| − | | placeable = Yes |
||
| − | | |
+ | | id = 113 |
| + | | damage = 50 / {{expert|150}} (melee) |
||
| − | | height = 3 |
||
| + | | life = 8000 / {{expert|11200}} |
||
| − | | stack = 99 |
||
| − | | |
+ | | defense = 12 |
| − | | |
+ | | knockback = 100 |
| + | | debuff = Horrified | debufflink = yes |
||
| ⚫ | |||
| + | | debufftip = You have seen something nasty, there is no escape. |
||
| ⚫ | |||
| + | | duration = While the player is within 1800 Meters (900 Blocks) from the boss. |
||
| + | | debuff2 = The Tongue | debufflink2 = yes |
||
| + | | debufftip2 = You are being sucked into the mouth. |
||
| + | | duration2 = When the player is within 1800 Meters (900 Blocks) from and behind the boss. |
||
| ⚫ | |||
| + | | Healing Potion|5-15 | 100% |
||
| + | | Pwnhammer|1| 100% |
||
| + | | Breaker Blade|1| 16.67% |
||
| + | | Clockwork Assault Rifle|1| 16.67% |
||
| + | | Laser Rifle|1| 16.67% |
||
| + | | Warrior Emblem|1| 12.5% |
||
| + | | Sorcerer Emblem|1| 12.5% |
||
| + | | Ranger Emblem|1| 12.5% |
||
| + | | Summoner Emblem|{{pc icon}}| 12.5% |
||
| + | | Wall of Flesh Mask|1| 14.29% |
||
| + | | Wall of Flesh Trophy|1|10% |
||
| + | | Treasure Bag (Wall of Flesh)|in [[Expert Mode]] only {{pc icon}}|{{expert|100%}} |
||
}} |
}} |
||
| − | {{pc only}} |
||
| + | [[File:Wall of Flesh Trophy.png|25px]] <big>''"...The master and core of the world..."''</big> [[File:Wall of Flesh Trophy.png|25px]] |
||
| − | The '''Shark Statue''' is one of 83 [[Statues]]. It can be found randomly in underground caverns, and may be harvested with a [[Pickaxes|pickaxe]]. The Shark Statue is a [[Statue]] that spawns a [[Shark]] when activated via [[Wire]]. Only three Sharks (per player) can be spawned at a time, but once one Shark is killed, it will spawn more upon activation. If there is a total of 10 Sharks on the screen then all Shark Statues will stop spawning Sharks until one is killed. Sharks spawned from this statue drop their usual items at the usual rate, except for [[coin]]s, of which none are dropped. |
||
| + | {{dablink|For the items, see [[Flesh Block]] or [[Flesh Block Wall]].}} |
||
| + | The '''Wall of Flesh''' is a [[boss]] that is spawnable in [[The Underworld]]. It is the final and hardest boss in pre-[[Hardmode]]. |
||
| + | |||
| + | To defeat the Wall of Flesh, the [[player]] must attack either its eyes or its mouth. They all share the same life counter, so shooting at any of the three will deplete the boss' total health. Shooting at the eyes causes the most damage, as they have the lowest defense. Its other body parts are transparent to weapons, so attacking those will not deplete its health, such as the Wall itself. |
||
| + | |||
| + | == Summoning == |
||
| + | [[File:2013-10-15_00003.jpg|thumb|300px|The Wall of Flesh summoned.]]The Wall of Flesh is summoned when a [[Guide Voodoo Doll]] is dropped into [[lava]] in The Underworld while the [[Guide]] is alive (this must be done in The Underworld; lava in any other [[layer]] will not work). This kills the Guide and summons the boss. It can be done either by killing the [[Voodoo Demon]] that carries the Doll while it flies above a lava pool, or by picking up the dropped Doll and throwing it into the lava yourself. On the {{Mobile version}}, you can simply tap it in your [[hotbar]], or you can drag and drop it from your hotbar to the lava. |
||
| + | |||
| + | If the Guide is not alive when the Doll is destroyed, the Wall of Flesh will not spawn, and the Doll will be wasted. If you have already summoned the Wall of Flesh recently, make sure the Guide has respawned before attempting to summon the Wall again. On the {{Desktop version}} and {{Console version}}, one can use the [[housing menu]] to see which [[NPC]]s are still alive. On the {{Mobile version}}, you can check the [[minimap]] to see if the guide is there or not. |
||
| + | |||
| + | The Wall of Flesh's sweep direction is determined by its spawn location. Spawning it anywhere left of the center of the world will cause it to sweep from left to right, while spawning it right of center will cause it to sweep right to left. Maximum fight space can be achieved by spawning it at the extreme right or left of the world, though these areas have fewer natural structures and may require additional lava survival gear or construction. |
||
| + | |||
| + | Summoning The Wall of Flesh too close to world border will not spawn him even if the Guide is alive. (Sometimes the guide does not show up on the the map) |
||
| + | |||
| + | == Attacks == |
||
| + | The Wall of Flesh is very large, occupying the entire screen vertically. Once spawned, it steadily sweeps across the map in a single direction, forcing the [[player]] to constantly move away for the duration of the fight while contending with the [[Underworld]]'s usual hazards. The Wall of Flesh moves faster as it gets more wounded, and, on [[Expert Mode]], it can reach up to 40 mph (as compared to the [[Hermes Boots]] at only 30 mph) during its last few hundred health. It must be killed before it reaches the end of the map, otherwise it will despawn and all living players in The Underworld will die (with the unique death message "<PlayerName> was Licked."). |
||
| + | |||
| + | Keep this behavior in mind when preparing an [[Arena]], as the fight will take you many screens away (unless you are already using Hardmode gear). Any [[platform]] you build will need to be very long. |
||
| + | |||
| + | Additionally: |
||
| + | * The Wall has small mouths called [[#Components|The Hungry]], each attached by a long vein, which move towards and damage players. As the Wall of Flesh's main body takes damage, they deal more damage and become more resistant to attacks. When they've suffered enough damage, they detach and chase players. In [[Expert mode|Expert Mode]], the Hungry respawn as long as the Wall is alive. |
||
| + | * The Wall's eyes fire lasers. As its health decreases, the lasers increase in damage, speed, and frequency. |
||
| + | * The Wall burps [[Leech]]es from its mouth that chase players. These will always drop [[Heart]]s when killed. |
||
| + | |||
| + | Immediately upon the Wall of Flesh's spawning, the player is afflicted with the [[Horrified]] [[debuff]], which prevents fleeing from the battle. Players that attempt to leave the Underworld or get behind the Wall of Flesh are grabbed by [[The Tongue]] and pulled directly into the Wall of Flesh's mouth, inflicting serious damage. If the player teleports beyond the reach of the tongue by using a [[Magic Mirror]], [[Recall Potion]] or other means of quick transport, the debuff instead kills them immediately, returning the message "<PlayerName> tried to escape." This can also happen after dying, if you try to return to the boss. |
||
| + | |||
| + | == Aftermath == |
||
| + | When the Wall of Flesh is killed, it leaves its [[drops]] in a floating, fully enclosed box of [[Demonite Brick]]s if your world was generated with [[The Corruption]], or [[Crimtane Brick]]s if your world was generated with the [[The Crimson|Crimson]] to prevent its drops from falling into [[lava]]. One of the drops is always the [[Pwnhammer]], which becomes an essential tool that helps players transfer into [[Hardmode]]. |
||
| + | |||
| + | After defeating the Wall of Flesh for the first time, a mini box on the bottom left corner will show up saying '''"The Ancient Spirits of Light and Dark Have Been Released"''' and your world will enter Hardmode, and will be filled with [[Hardmode#Enemies|tougher enemies]]. This will also generate two diagonal stripes of [[The Hallow]], and [[Corruption]] or [[Crimson]], in a "V" pattern from the center of the Underworld all the way to the [[Surface]] (and higher, as [[Floating Islands]] in these paths will also be converted). |
||
| + | |||
| + | Hardmode ''enemies'' will begin spawning as soon as the Wall of Flesh is defeated. The stripes of Corruption/Crimson and Hallow, however, will not spawn until the message "The ancient spirits of light and dark have been released." appears. |
||
| + | |||
| + | '''''Note:''' See [[Hardmode]] for more extensive information.'' |
||
| + | |||
| + | == Components == |
||
| + | {| |
||
| + | |- style="vertical-align:top" |
||
| + | |{{npc infobox |
||
| + | | name = Wall of Flesh Eye |
||
| ⚫ | |||
| + | | ai = Wall of Flesh Eye AI |
||
| + | | knockback = 100 |
||
| + | | damage = 22-30 / {{expert|44-60}} (eye laser (depending on health))<br>50 / {{expert|150}} (melee) |
||
| + | | defense = 0 |
||
| + | }} |
||
| + | |{{npc infobox |
||
| + | | name = Wall of Flesh Mouth |
||
| + | | image = Wall of Flesh (technical).png |
||
| + | | id = 113 |
||
| ⚫ | |||
| + | | knockback = 100 |
||
| + | | damage = 50 / {{expert|150}} (melee) |
||
| + | | defense = 15 |
||
| + | }} |
||
| + | |- style="vertical-align:top" |
||
| + | |{{npc infobox |
||
| + | | name = The Hungry |
||
| + | | id = 115 |
||
| + | | ai = Hungry AI |
||
| + | | damage = 30 / {{expert|60}} (WoF health 75%+)<br>45 / {{expert|90}} (WoF health 50%+)<br>60 / {{expert|120}} (WoF health 25%+)<br>75 / {{expert|150}} (WoF health <25%) |
||
| + | | life = 240 |
||
| + | | defense = 10 (WoF health 75%+)<br>20 (WoF health 50%+)<br>30 (WoF health 25%+)<br>40 (WoF health <25%) |
||
| + | | knockback = -10% / {{expert|1}} |
||
| + | }} |
||
| + | |{{npc infobox |
||
| + | | name = The Hungry II |
||
| + | | id = 116 |
||
| + | | ai = Demon Eye |
||
| + | | damage = 30 / {{expert|60}} |
||
| + | | life = 80 / {{expert|112}} |
||
| + | | defense = 6 |
||
| + | | knockback = 20% / {{expert|28}} |
||
| + | | Heart|1|75% |
||
| + | }} |
||
| + | |} |
||
| + | |||
| + | == Achievements == |
||
| + | [[File:Achievement Still Hungry.png]] '''Still Hungry''' is the [[achievement]] you earn for defeating the Wall of Flesh for the first time ({{pc icon}} only). |
||
| + | |||
| + | [[File:Achievement Its Hard.png]] '''It's Hard!''' is an additional achievement you earn for converting a world to [[Hardmode]] for the first time ({{pc icon}} only). |
||
== Notes == |
== Notes == |
||
| + | * Take care to avoid accidentally letting a [[Voodoo Demon]] drop its [[Guide Voodoo Doll|doll]] into [[lava]], as this will also summon the Wall of Flesh. |
||
| − | * Because of the size of the shark, they will only spawn from the statue if the chamber in which it is enclosed is at least 6 blocks wide and 4 blocks high. |
||
| + | * If you have problems getting the [[Guide]] to spawn, make sure there isn't an [[Event]] in progress. Traveling back to your world's original [[spawn]] point can reveal an ongoing event, like a [[Goblin Invasion]], and allow you to complete it. It also must be [[day]]time for the Guide to respawn. |
||
| − | * This is one of the two only statues that spawn enemies with more than 100 HP (the other being the [[Chest Statue]]), which makes it suitable for farming [[Ectoplasm]]. A simple machine with a timer hooked up to the shark statue that has been placed in a very small pit of lava, is an effortless way to farm Ectoplasm. |
||
| − | * Shark Statues can also be used to farm [[Pirate Maps]] in an ocean biome. |
||
| − | == |
+ | == Tips == |
| + | {{strategies|Guide:Wall of Flesh strategies}} |
||
| ⚫ | |||
| + | * Try not to use [[melee]] weapons if you are fighting the Wall of Flesh for the first time, because you take a sizable amount of damage from touching the Wall of Flesh or its many Hungries. If you find one however, a [[Dark Lance]] works very well with a long walkway. |
||
| + | * Mobility-enhancing items, such as [[Gravitation Potion]], [[Rocket Boots]] and various [[Hooks]] can make traversing the [[Underworld]] much easier. Similarly, items like [[Obsidian Skin Potion]]s, [[Lava Waders]], or an [[Obsidian Rose]] can mitigate the underworld's ambient hazards. |
||
| + | * You may want to make a backup of your world in case you discover that you weren't ready for [[Hardmode]] yet. |
||
| + | * The Wall of Flesh attempts to cover the entire Underworld cavern space by moving its eyes up and down; it orients by existence/absence of solid blocks and liquids 4-5 tiles above and beneath the eyes. That means making a bridge will make the eyes stay at constant height 4-7 blocks from the bridge. |
||
| + | * [[Water Walking Potion]], [[Lava Waders]], [[Rocket Boots]]/[[Spectre Boots]], or [[Obsidian Skin Potion]] are of great help in mitigating the Underworld's many [[lava]] pools. |
||
| + | * [[Beenade]]s are a highly effective weapon against the Wall of Flesh, especially in [[expert mode]]. |
||
| + | * You can make a long wooden [[platform]] going along the underworld quite high up so the stuctures, lava and mounds of ash do not get in the way. |
||
| + | * [[The Bee's Knees|Bees Knees]] is a useful weapon for extra damage or use the [[Molten Fury]] with Jester Arrows or use the [[Phoenix Blaster]]. |
||
| + | == Trivia == |
||
| − | As of June 4th, 2015 shark statues are now in console. |
||
| + | * The Wall of Flesh is the only boss that does not despawn based on player distance. Once summoned, it only despawns once it reaches the edge of the world. |
||
| + | * When the Wall of Flesh is alive it is possible for the [[Guide]] to respawn during the battle with the Wall. Dropping another [[Guide Voodoo Doll]] will kill the Guide but won't summon a second Wall of Flesh. |
||
| + | |||
| + | == History == |
||
| + | {{History|1.3.0.1|Has new AI for Expert Mode and will drop its own Treasure Bag. |
||
| + | **Can now drop the Summoner Emblem. |
||
| + | **Drops will now be encased in [[Crimtane Brick]]s if the world was generated with Crimson.}} |
||
| + | {{History|1.2.3|Now has a chance to drop the [[Wall of Flesh Mask]].}} |
||
| + | {{History|1.2|Now has a chance to drop the [[Wall of Flesh Trophy]].}} |
||
| ⚫ | |||
| − | {{Master Template |
+ | {{Master Template Characters |
| − | | show- |
+ | | show-boss = yes |
}} |
}} |
||
| − | {{translation project}} |
||
Revision as of 01:50, 9 April 2016

| Type | |
|---|---|
| Environment | |
| AI Type | Wall of Flesh Body AI |
| Damage | 50 / 150 (melee) |
| Max Life | 8000 / 11200 |
| Defense | 12 |
| KB Resist | 10000% |
| Debuff | |
|---|---|
| Debuff tooltip | You have seen something nasty, there is no escape. |
| Debuff | |
|---|---|
| Debuff tooltip | You are being sucked into the mouth. |
| Coins | 8 |
|---|
- Item (Quantity)Rate
 Healing Potion (5-15)100%
- 100%
- 16.67%
- 16.67%
- 16.67%
- 12.5%
- 12.5%
- 12.5%
- Summoner Emblem
(Template:Pc icon)12.5% - 14.29%
- 10%
- Treasure Bag
(Wall of Flesh) (in Expert Mode only Template:Pc icon)

- Internal NPC ID: 113
![]() "...The master and core of the world..."
"...The master and core of the world..." ![]()
The Wall of Flesh is a boss that is spawnable in The Underworld. It is the final and hardest boss in pre-Hardmode.
To defeat the Wall of Flesh, the player must attack either its eyes or its mouth. They all share the same life counter, so shooting at any of the three will deplete the boss' total health. Shooting at the eyes causes the most damage, as they have the lowest defense. Its other body parts are transparent to weapons, so attacking those will not deplete its health, such as the Wall itself.
Summoning
The Wall of Flesh summoned.
The Wall of Flesh is summoned when a Guide Voodoo Doll is dropped into lava in The Underworld while the Guide is alive (this must be done in The Underworld; lava in any other layer will not work). This kills the Guide and summons the boss. It can be done either by killing the Voodoo Demon that carries the Doll while it flies above a lava pool, or by picking up the dropped Doll and throwing it into the lava yourself. On the ![]() Mobile version, you can simply tap it in your hotbar, or you can drag and drop it from your hotbar to the lava.
Mobile version, you can simply tap it in your hotbar, or you can drag and drop it from your hotbar to the lava.
If the Guide is not alive when the Doll is destroyed, the Wall of Flesh will not spawn, and the Doll will be wasted. If you have already summoned the Wall of Flesh recently, make sure the Guide has respawned before attempting to summon the Wall again. On the ![]() PC version and
PC version and ![]() Console version, one can use the housing menu to see which NPCs are still alive. On the
Console version, one can use the housing menu to see which NPCs are still alive. On the ![]() Mobile version, you can check the minimap to see if the guide is there or not.
Mobile version, you can check the minimap to see if the guide is there or not.
The Wall of Flesh's sweep direction is determined by its spawn location. Spawning it anywhere left of the center of the world will cause it to sweep from left to right, while spawning it right of center will cause it to sweep right to left. Maximum fight space can be achieved by spawning it at the extreme right or left of the world, though these areas have fewer natural structures and may require additional lava survival gear or construction.
Summoning The Wall of Flesh too close to world border will not spawn him even if the Guide is alive. (Sometimes the guide does not show up on the the map)
Attacks
The Wall of Flesh is very large, occupying the entire screen vertically. Once spawned, it steadily sweeps across the map in a single direction, forcing the player to constantly move away for the duration of the fight while contending with the Underworld's usual hazards. The Wall of Flesh moves faster as it gets more wounded, and, on Expert Mode, it can reach up to 40 mph (as compared to the Hermes Boots at only 30 mph) during its last few hundred health. It must be killed before it reaches the end of the map, otherwise it will despawn and all living players in The Underworld will die (with the unique death message "<PlayerName> was Licked.").
Keep this behavior in mind when preparing an Arena, as the fight will take you many screens away (unless you are already using Hardmode gear). Any platform you build will need to be very long.
Additionally:
- The Wall has small mouths called The Hungry, each attached by a long vein, which move towards and damage players. As the Wall of Flesh's main body takes damage, they deal more damage and become more resistant to attacks. When they've suffered enough damage, they detach and chase players. In Expert Mode, the Hungry respawn as long as the Wall is alive.
- The Wall's eyes fire lasers. As its health decreases, the lasers increase in damage, speed, and frequency.
- The Wall burps Leeches from its mouth that chase players. These will always drop Hearts when killed.
Immediately upon the Wall of Flesh's spawning, the player is afflicted with the Horrified debuff, which prevents fleeing from the battle. Players that attempt to leave the Underworld or get behind the Wall of Flesh are grabbed by The Tongue and pulled directly into the Wall of Flesh's mouth, inflicting serious damage. If the player teleports beyond the reach of the tongue by using a Magic Mirror, Recall Potion or other means of quick transport, the debuff instead kills them immediately, returning the message "<PlayerName> tried to escape." This can also happen after dying, if you try to return to the boss.
Aftermath
When the Wall of Flesh is killed, it leaves its drops in a floating, fully enclosed box of Demonite Bricks if your world was generated with The Corruption, or Crimtane Bricks if your world was generated with the Crimson to prevent its drops from falling into lava. One of the drops is always the Pwnhammer, which becomes an essential tool that helps players transfer into Hardmode.
After defeating the Wall of Flesh for the first time, a mini box on the bottom left corner will show up saying "The Ancient Spirits of Light and Dark Have Been Released" and your world will enter Hardmode, and will be filled with tougher enemies. This will also generate two diagonal stripes of The Hallow, and Corruption or Crimson, in a "V" pattern from the center of the Underworld all the way to the Surface (and higher, as Floating Islands in these paths will also be converted).
Hardmode enemies will begin spawning as soon as the Wall of Flesh is defeated. The stripes of Corruption/Crimson and Hallow, however, will not spawn until the message "The ancient spirits of light and dark have been released." appears.
Note: See Hardmode for more extensive information.
Components
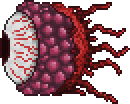
The Hungry Statistics
|

.png)
Achievements
 Still Hungry is the achievement you earn for defeating the Wall of Flesh for the first time (Template:Pc icon only).
File:Achievement Its Hard.png It's Hard! is an additional achievement you earn for converting a world to Hardmode for the first time (Template:Pc icon only).
Notes
- Take care to avoid accidentally letting a Voodoo Demon drop its doll into lava, as this will also summon the Wall of Flesh.
- If you have problems getting the Guide to spawn, make sure there isn't an Event in progress. Traveling back to your world's original spawn point can reveal an ongoing event, like a Goblin Invasion, and allow you to complete it. It also must be daytime for the Guide to respawn.
Tips
- Try not to use melee weapons if you are fighting the Wall of Flesh for the first time, because you take a sizable amount of damage from touching the Wall of Flesh or its many Hungries. If you find one however, a Dark Lance works very well with a long walkway.
- Mobility-enhancing items, such as Gravitation Potion, Rocket Boots and various Hooks can make traversing the Underworld much easier. Similarly, items like Obsidian Skin Potions, Lava Waders, or an Obsidian Rose can mitigate the underworld's ambient hazards.
- You may want to make a backup of your world in case you discover that you weren't ready for Hardmode yet.
- The Wall of Flesh attempts to cover the entire Underworld cavern space by moving its eyes up and down; it orients by existence/absence of solid blocks and liquids 4-5 tiles above and beneath the eyes. That means making a bridge will make the eyes stay at constant height 4-7 blocks from the bridge.
- Water Walking Potion, Lava Waders, Rocket Boots/Spectre Boots, or Obsidian Skin Potion are of great help in mitigating the Underworld's many lava pools.
- Beenades are a highly effective weapon against the Wall of Flesh, especially in expert mode.
- You can make a long wooden platform going along the underworld quite high up so the stuctures, lava and mounds of ash do not get in the way.
- Bees Knees is a useful weapon for extra damage or use the Molten Fury with Jester Arrows or use the Phoenix Blaster.
Trivia
- The Wall of Flesh is the only boss that does not despawn based on player distance. Once summoned, it only despawns once it reaches the edge of the world.
- When the Wall of Flesh is alive it is possible for the Guide to respawn during the battle with the Wall. Dropping another Guide Voodoo Doll will kill the Guide but won't summon a second Wall of Flesh.
History
- 1.3.0.1: Has new AI for Expert Mode and will drop its own Treasure Bag.
- Can now drop the Summoner Emblem.
- Drops will now be encased in Crimtane Bricks if the world was generated with Crimson.
- 1.2.3: Now has a chance to drop the Wall of Flesh Mask.
- 1.2: Now has a chance to drop the Wall of Flesh Trophy.
- 1.1: Introduced.
- Anomura Fungus
- Antlion
- Bat
- Bee
- Blood Crawler
- Crab
- Crimera
- Demon Eye
- Devourer
- Eater of Souls
- Face Monster
- Fungi Bulb
- Giant Worm
- Granite Elemental
- Granite Golem
- Harpy
- Hoplite
- Hornet
- Jellyfish
- Man Eater
- Meteor Head
- Mushi Ladybug
- Piranha
- Skeleton ()
- Shark (
- Orca
-
- Slime
- Snatcher
- Snow Flinx
- Tomb Crawler
- Undead Viking
- Vulture
- Wall Creeper
- Zombie
- Angler Fish
- Angry Trapper
- Arapaima
- Armored Skeleton
- Armored Viking
- Bat
- Black Recluse
- Blood Feeder
- Chaos Elemental ()
- Clinger
- Corruptor
- Derpling
- Digger
- Floaty Gross
- Gastropod ()
- Giant Fungi Bulb
- Giant Tortoise (
- Ice
-
- Herpling
- Ice Elemental
- Ichor Sticker
- Icy Merman
- Jellyfish
- Jungle Creeper
- Moss Hornet
- Pigron
- Pixie
- Possessed Armor
- Skeleton Archer
- Slime
- Unicorn
- Wandering Eye
- Werewolf
- Wraith
- Wolf
- King Slime ()
- Eye of Cthulhu
- Eater of Worlds
- Brain of Cthulhu ()
- Queen Bee (
- Bees
-
- Skeletron
- Deerclops
- Wall of Flesh ()
- Alien Skater
- Baby Dinosaur
- Baby Eater
- Baby Face Monster
- Baby Grinch
- Baby Hornet
- Baby Imp
- Baby Ogre
- Baby Penguin
- Baby Red Panda
- Baby Skeletron Head
- Baby Snowman
- Baby Truffle
- Baby Werewolf
- Black Cat
- Bunny
- Cursed Sapling
- Destroyer-Lite
- Dynamite Kitten
- Eater of Worms
- Estee
- Everscream Sapling
- Eyeball Spring
- Fennec Fox
- Flying Piggy Bank
- Glittery Butterfly
- Hoardragon
- Honey Bee
- Ice Queen
- Itsy Betsy
- Lil' Harpy
- Lizard
- Mini Minotaur
- Mini Prime
- Moonling
- Parrot
- Phantasmal Dragon
- Plantera Seedling
- Plantero
- Puppy
- Propeller Gato
- Rez and Spaz
- Sapling
- Shadow Mimic
- Shark Pup
- Skeletron Jr.
- Slime Prince
- Slime Princess
- Spider
- Spider Brain
- Squashling
- Sugar Glider
- Suspicious Eye
- Tiki Spirit
- Turtle
- Tiny Fishron
- Void Bag
- Volt Bunny
- Zephyr Fish
- Bat
- Guinea Pig
- Slime
- Lua error: too many expensive function calls.
- Lua error: too many expensive function calls.
- Lua error: too many expensive function calls.
- Lua error: too many expensive function calls.
- Lua error: too many expensive function calls.
- Lua error: too many expensive function calls.
- Lua error: too many expensive function calls.
- Lua error: too many expensive function calls.
- Lua error: too many expensive function calls.
- Lua error: too many expensive function calls.
- Lua error: too many expensive function calls.
- Lua error: too many expensive function calls.
- Lua error: too many expensive function calls.
- Lua error: too many expensive function calls.
- Lua error: too many expensive function calls.
- Lua error: too many expensive function calls.
- Lua error: too many expensive function calls.
- Lua error: too many expensive function calls.
- Lua error: too many expensive function calls.
- Lua error: too many expensive function calls.
- Lua error: too many expensive function calls.
- Lua error: too many expensive function calls.
- Lua error: too many expensive function calls.
- Lua error: too many expensive function calls.
- Lua error: too many expensive function calls.
- Lua error: too many expensive function calls.
- Raven
- Lua error: too many expensive function calls.
- Lua error: too many expensive function calls.
- Lua error: too many expensive function calls.
- Lua error: too many expensive function calls.
- Lua error: too many expensive function calls.
- Lua error: too many expensive function calls.
- Lua error: too many expensive function calls.
- Lua error: too many expensive function calls.
- Lua error: too many expensive function calls.
- Lua error: too many expensive function calls.
- Lua error: too many expensive function calls.
- Lua error: too many expensive function calls.
- Lua error: too many expensive function calls.
- Lua error: too many expensive function calls.
- Lua error: too many expensive function calls.
- Lua error: too many expensive function calls.
- Lua error: too many expensive function calls.
- Lua error: too many expensive function calls.
- Lua error: too many expensive function calls.
- Lua error: too many expensive function calls.
- Lua error: too many expensive function calls.
- Lua error: too many expensive function calls.
- Lua error: too many expensive function calls.
- Lua error: too many expensive function calls.
- Lua error: too many expensive function calls.
- Lua error: too many expensive function calls.
- Lua error: too many expensive function calls.
- Lua error: too many expensive function calls.
- Lua error: too many expensive function calls.
- Lua error: too many expensive function calls.
- Lua error: too many expensive function calls.
- Lua error: too many expensive function calls.
- Lua error: too many expensive function calls.
- Lua error: too many expensive function calls.
- Lua error: too many expensive function calls.
- Lua error: too many expensive function calls.
- Lua error: too many expensive function calls.
- Lua error: too many expensive function calls.
- Lua error: too many expensive function calls.
- Lua error: too many expensive function calls.
- Lua error: too many expensive function calls.
- Lua error: too many expensive function calls.
- Lua error: too many expensive function calls.
- Lua error: too many expensive function calls.
- Lua error: too many expensive function calls.